Three Beers from Brunswick

In trying to track down my “Holy Grail” of a pre-1600 Einbecker Bier, I stumbled across a mention of another of my favorite period beers: the Braunschweiger (Brunswick) Mumme. This reference was in “Hochtnutzbar und Bewährte Edle Bierbrau-Kunst”, by David Kellner, printed in Leipzig in 1690. While this is a bit post-period for my purposes, I’m confident enough to say that it’s “close enough” for horse-trading. Unlike Einbeck, Brunswick maintained a continuous brewing tradition, which inclines me to think that it was less likely to change significantly. (The brewing of Einbecker Bier moved to Munich after the 30 Years’ War, and there it evolved into today’s Bock.)

Kellner praises Mumme for its “exquisite strength, lovely taste, and thick, brown, beautiful color.” He also describes how it is carried far and wide over land and sea, for which the Braunschweiger brewers have created “Schiff-Mumme,” or Ship-Mumme. For their own usage within the town, they have a version called “Stadt-Mumme,” or City-Mumme; lastly, they make “Erndtbier,” or Harvest Beer, to sell to the peasants at harvest-time.

The description of what goes in to the various Brunswick Mummes is as follows:

Take two Braunschweiger wispels of quite well-washed and dried barley-malt, together with sufficient water for , and cook it for five quarters of an hour, scoop it into a vat and let it stand a little, then again it goes into the pan (but only the broth, without the malt), and once again for three hours with 15 himpen of good Country-Hops therein cook well. After this they cool in a vat, and allow them to be fermented adequately before they place it in barrels and bring it into the cellar, which afterwards, when it has sufficiently fermented and separated from the yeast, it will be tapped in the cellar and sent away. From this they receive commonly four half-barrels of Mumme.

The common City-Mumme, to be drunk quickly, take the same amount barley-malt, only 4 himpen of hops, and proceed as with the previous one. But if it is supposed to lie long, take 10 maß of hops to it, and put the brew in seven barrels.

For their Harvest-Beer they take two wispels of barley malt, 12 maß of hops, cook them with enough water for nine barrels of beer, in the same way as before, and clear it up, then they seal up the barrels, and sell it to the peasants at harvest-time.

First, let’s do an analysis of the brewing technique. It’s obviously different than the Berliner Beer process I’ve documented, particularly in that it assumes pre-malted grain. Judging from the above, I would guess that the “five quarters of an hour” portion is the mash, and it takes that long to bring everything up to temp, running it up from room temperature. It would obviously go through each stage of the various rests–liquiefaction, acid, protein, et cetera. I would have to run experiments (or dig up information on specific mass and heat absorption) to see if they’d get up to a good mashing temp in that amount of time.

Once they’ve got their “cooked mash,” they let it sit for a while, probably finishing whatever conversion is going to happen, before returning the liquid to the kettle. They then perform a three hour boil. I shudder to imagine how much fuel that must have taken. After the boil, they cool the wort, then perform what appears to be an open fermentation, before casking the beer.

One point of interest to me is that they’re using the same grain bill for these beers, “adjusting” them by varying the hopping rate and the output volume. It’s not especially significant, other than to note that modern homebrewers go the opposite route: we aim for a consistent output volume (typically 5 gallons), and adjust the grain bill and hops to meet that.

Another point to make here is that this helps dispel the notion of “brewing being mostly done in the home, for personal use.” They would need two vessels large enough to hold over a ton of sodden grain, plus the additional mash liquid. I’ve heard of ways cities got around this (which I will put in a different post), but this is obviously not “homebrewing” in any real sense of the word.

That being said, the next thing to do is to get the measurements into something usable to us. For definitions of the different measures, and for lack of something better at the moment, I’m using the Vollstaendiges Handbuch der Muenzen, Maße und Gewichte aller Länder der Erde, by Johann F. Krüger, which dates from 1803 (Google Books edition). Here’s what we’ve got:

  • 1 Braunschweiger Wispel is 329.1 gallons
  • 1 Himpen is 1/40 of a Wispel, or 8.23 gallons
  • 1 Fass, or barrel, of Mumme is 95.95 gallons (for the curious, 1 Fass of Bier is 103.62 gallons; I’m not sure why the difference)

Those are, where available, the Brunswick measurements (as for the Wispel). Failing that, I’m using the Saxony versions, unless I can reason my way into something different. The Duchy of Brunswick/Braunschweig was part of the Kingdom of Saxony, when it wasn’t independent–but that’s more history than I want to go into here. (Maybe I’ll go over it a bit in its own post, some day.)

From my own empirical observations, I get about 3.3 pounds of barley malt per gallon. The hops are problematic, as we don’t know for sure how they were packed. Are they using hop bales? “Trod” hop pockets/sacks (as used in Victorian England)? Loose hops? I’m going to assume some form of tightly packed (bales or pockets), and use that as an upper bound. Two sources (Stewart and Priest’s Handbook of Brewing, and Hornsey’s Brewing) give me bale and pocket volumes and weights of .83 to 1.25 pounds per gallon and 1.02 pounds per gallon, respectively. So, roughly 1 pound per gallon should work as a rough maximum.

Then there’s the water. “Enough” water can be difficult to estimate, but with a brewing calculator, we’ve got the information to figure it all out. I don’t have an analysis of medieval Brunswick water available to me, but it was likely well-water, and probably of moderate hardness. This would tend to promote somewhat darker beers than otherwise.

Anyway, if we plug in the numbers, the raw recipes look something like this:

Schiff-Mumme
2172.06 pounds of barley malt
123.45 pounds of hops
Final volume 191.9 gallons

Stadt-Mumme
2172.06 pounds of malt
32.92 pounds of hops, plus 2.64 pounds for dry-hopping
Final volume 671.65 gallons

Erndte-Bier
2172.06 pounds of malt
3 pounds of hops
Final volume 863.55 gallons

Those are some big beers!  My calculations tell me that the Schiff-Mumme would need something north of 285 gallons pre-boil, and significantly more than that for the mash (considering the grain will absorb some). It also gives me an OG of 1.288, assuming 70% efficiency–which is likely optimistic. IBUs would depend largely on the hops being used; assuming something with about 3% AA, you’re looking at about 79-80 IBUs.  If they were using stronger hops, it would quickly bump up towards the (theoretical) 100 IBU maximum, but given that OG, you’d need some hefty bittering to balance it! The color, even if you assume something on the order of a modern Pale Ale malt, comes out roughly 20 SRM, which looks like a nice brown, darker than a Newcastle, say, but not as dark as a Dunkel.

The Stadt-Mumme needs about a thousand gallons of wort pre-boil. I’m seeing an OG of 1.078, with 40-ish IBUs. The color is significantly lighter, coming in at about 5 SRM, using Pale Ale malt.  And the Erndte-Bier needs 1285 gallons of wort pre-boil, clocks in at about 1.050, 8-9 IBUs, and about 4 SRM, or the same color as the Pale Ale malt.

But, as I mentioned, no homebrewer these days has the equipment to mash a ton of grain at a time. (If you do–please contact me; I’d like to talk.)  So, to make it work, we have to scale things down. Here’s what I come up with, to make 5 gallon batches of each:

Schiff-Mumme
56.47 pounds of grain
3.2 pounds of hops
Mash with 36 quarts of water

Stadt-Mumme
16.07 pounds of grain
3.9 ounces of hops, plus .3 ounces for dry-hop
Mash with 37 quarts of water

Erndte-Bier
12.6 pounds of grain
.25 ounces of hops
Mash with 38 quarts of water

I’m not sure the average homebrewer would be able to brew up a Brunswick Schiff-Mumme on typical equipment. Not all-grain, certainly; although the adventurous could probably come up with a usable extract recipe. The Stadt-Mumme looks like a hoppy Oktoberfest, in just about everything except color. Playing with the grain bill, to move it away from just the base malt, would make for a really tasty beer. And the Erndte-Bier, well–it looks okay, if a bit strong, for quenching the thirst and providing some extra calories on a long workday outside.

In all of this, I’ve avoided mentioning what yeast is used. I haven’t seen any useful analyses that would point in one direction or another, and certainly no actual cultures from the time. I’d go with something German, or at least Continental, if possible; if it had a good alcohol tolerance, so much the better. The Schiff-Mumme, after all, is strong enough that even a Champagne yeast would have a hard time drying it out. An Alt yeast might work for the other two, but really, you should experiment and decide what you like best. I can imagine a California Ale/Chico/1056 batch of Stadt-Mumme being tasty, with the right hops.

I hope this has inspired you to brew a batch of Brunswick Beer! If you try any of these recipes, please let me know, either via email or in the comments!
Working Up To Bockbier

I will, one day, brew the full version of my proposed Einbecker Bier (the “original” Bockbier). That day, however, was not today.

Today’s Brew Day, on Saturday as opposed to the normal Sunday due to outside scheduling conflicts, was playing around a bit with the bones of the basic recipe (which can be found in another post–as soon as I get it written and published). I kept the 2/3 barley, 1/3 wheat grist, but scaled it back from a 1.078 SG to a planned mid-1.050’s–and then hit 1.068 anyway. This should bring the ABV down from about 7.5% to a more quaffable not quite 6%. I also stepped away from the Munich malt in favor of Vienna, which should give a breadier maltiness. (In my opinion, Munich can almost get overwhelming when used in large percentages–almost a chewy meatiness, if you will. It’s not bad, but generally needs to be either less than 100% of the malt bill, or hit with a large dose of hops). It also dialed the color back from garnet-amber to somewhere in the gold range, where the original Bockbier was (described in period as “golden”–and more detail will be in the afore-mentioned post).

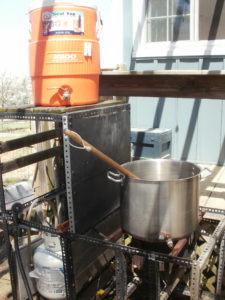
Low-tech Brew Rig, starting out on Almost Bockbier Brew Day
My trusty, somewhat rusty, Brew Rig, ready to start heating strike water.

I’ve also fooled around with the hop schedule: where the original was all bittering hops all the time, I’m doing FWH and some late hops. This should add a bit of hop complexity, even though it’s still a single-hop beer. It’s all Tettnang whole-leaf hops, because I’ve got a bunch of them waiting to be used. (As of this writing, they’re harder to get hold of as whole-leaf; here’s a link to some Tett pellets.)

Lastly, I went with White Labs San Francisco Lager yeast. This choice was made to cover a number of issues. First and second, the temps in my cellar have been fluctuating around the low 50’s; too warm for most lagers, but too cold for most ales-and I want this to be more lager-like, which pretty much means Kolsch yeast or San Fran. Third, given the weather has finally turned, everyone is brewing this weekend, and the yeast selection at my LHBS was pretty well decimated. None of my first, second, or third yeast choices were available, so here we are.

As things are wont to do, technical snags abounded. My first propane tank ran out while I was heating the sparge water; when I unscrewed the regulator, its O-ring broke. After quickly scrambling and scrounging out all of the other suitable propane hoses I’ve got, I determined that none of them had functional O-rings. A trip to the hardware store later, and my channel-lock pliers had wandered off–making connecting my second propane tank complex.

But, all things considered, it was a good day. The weather was nice, beer was brewed, and no one was killed in the making of today.

The recipe, for the curious. This is #164, in my Little Black Book.

Almost Bockbier
9 pounds Vienna Malt
3 pounds Wheat Malt
2 ounces Tettnang leaf hops (3.7% AA, FWH)
1 tablet Whirlfloc (15 min. in boil)
1 ounce Tettnang leaf hops (3.7% AA, 10 minutes in boil)
1 packet WLP-810 San Francisco Lager Yeast

Mash at 156 degrees F.  Sparge to 8 gallons pre-boil.  Boil for one hour. OG: 1.068, 5.5 gallons into the fermenter. Ferment at “cellar temps” (currently upper 50’s F).
(Brewed 14 April 2018)

Fourteen Steps for Brewing Medieval Beer

While sorting through stacks of dusty, old German books, looking for beer recipes that might date to pre-1600, or hints as to where they may be, I stumbled across an interesting series of books: the Oeconomia, oder Hausbuch. They were put into publication beginning in 1563 by Johannes Coler, a German Protestant priest who lived from 1566-1639. He lived in various parts of what is now Germany, including Frankfurt and Parchim, but spent a significant part of his early life in Berlin. Coler’s father, the Provost of Berlin, was the Lutheran theologian Jakob Coler; Jakob authored the books, but was in poor health by 1600, and his son had them printed on Jakob’s behalf.

The topic of the books was a popular one at the time: Household Maintenance. This ran the gauntlet from keeping and maintaining the gardens, hunting, cooking, finances, etc. But the most important chapter, for my purposes, was Chapter 20 of the Second Book. This chapter was entitled: On Brewing. Here’s what it looks like:

One page of the German beer brewing text

To be sure, it’s only one brewing method (“how we do things here in Berlin”), but it’s better than most of the other stuff I’ve seen, which includes more than a little bit of guesswork.  And what’s better, it’s all recognizable! This is all stuff that has equivalents in modern brewing (mostly).  Let’s break it down, with my translation (slightly tweaked for readability, and modern language):

  1. Pour the barley into a butt, and leave it to soak there for three days and nights (in winter, four is as well).
  2. Pour the barley onto a platform, raised into a heap, until it begins to germinate or shoot.
  3. Stir it frequently, separating the grains from each other, until there is a small sprout at its tip.
  4. When enough of it has sprouted, separate the grains from each other, and dry it in the stove-room, in the sun, or in a drying-oven.
  5. Grind the malt coarsely, so that the meal is well-hulled.
  6. In a pot, bring water to “seething;” put the milled malt into the butt, and pour the hot water over it, and stir it together.
  7. Scoop the mash from the butt into the kettle, and stir it well so that it does not burn. If the malt is burned, the beer will taste burnt, as well.
  8. Put wood laths alongside each other in the butt, and pack around them tightly with straw to strain the malt out from the liquid. (The butt needs to have a tap in front.)
  9. Pour the cooked malt into the butt, on the straw, and open the tap, collecting the liquid in another butt. If there is a lot of malt, heat another kettle of water, and pour it onto the grain. (If you want good beer, you pour less water; if you want a lot of beer, but lower quality, you pour a lot of water.)
    The second page of the German beer brewing text
  10. Once you have collected the runoff, pour a little into the kettle, so that it is about one-third full. Add hops–if the beer is going to store for a long time, you need a little more hops; if it is going to be drunk quickly, you need less. Stir the hops in, and bring the liquid to a boil. (The boil duration is as long as you think necessary, which is learned by experience and taste).
  11. When the boil has gone long enough, you add the rest of the liquid to fill the kettle, and bring the whole volume to a boil (without stirring).
  12. After the boil, place a large basket over a butt, and scoop the beer into the butt, straining the hops out in the basket. (If you are making a small beer, re-use these hops in it, straining them out after the boil again.)
  13. Let the beer cool to lukewarm, then add an adequate amount of yeast: more yeast if there is more beer, but less yeast for a smaller volume.
  14. Let the beer ferment for one to three days (or eight days for a Lager Beer), then remove the yeast from the top, and pour the beer into a cask. If it will be drunk soon, let it sit for eight days to clear and carbonate. If it is a Lager Beer, let it sit for longer. Afterwards, tap the cask and drink.

The third page of the German beer brewing text.

That seems like a lot to process, I know, but it’s really not so bad once you unpack what Johann says. At its heart, there are three parts to this.

First, steps one through five take you from raw grain to ground malt. There are a pair of surprises here. The most obvious one is that classically, we’ve thought that brewers purchased “finished” malt from maltsters. According to this, that wasn’t the case, at least in some areas–and if there was a part of the world I’d have bet there were professional maltsters in period, it would have been Germany.

But the really interesting thing to me is the drying of the malt. The most common “thought-experiment” description of medieval beer says it would have tasted smoky, from being dried over wood. Here we have a choice of three methods to dry the malt: “in the stove-room, in the sun, or in a drying-oven.” The drying-oven sounds to me like what we’d call a kiln. While I have issues with the notion that all kilns inherently smoked the malt, I’ll grant that it’s possible.

Drying malt “in the sun,” however, sounds like you’re creating what I’ve seen referred to as “wind-malt.” (I’ll call it “sun-malt,” from here out.) Basically, air-dried. And “in the stove-room” sounds to me like the equivalent of “dry it in a warm, dry place.” While I can come up with a way for the “stove-room” to smoke the malt, however slightly, I can’t really picture sun-malt having any smoke at all. And either of these two would give you an extremely pale malt–easily as pale as the palest of modern ale malts. I’d say at most, you’re probably looking at between 2.5 and 3.5 degrees Lovibond.

Second, from six to about thirteen, you’re taking your malt and brewing beer. Again, there are a few interesting points. First, the “seething” water used in the mash. The German word used is “sieden,” which nowadays can translate as “to boil.” I submit to you, however, that the Berliners knew what they were doing, and knew that if the mash steeped too hot, you wouldn’t get good wort. (Modern science tells us that the malt conversion enzymes denature above about 160 degrees Fahrenheit.) Running the numbers through my brewing calculators, in order to cool a volume of boiling water to mash temperature, you’ve got to have so much grain that your mash wouldn’t work.

If, however, you bring your strike-water to a bit below boiling–seething, or (as the English have so poetically put it) “smiling”–your mash temperature will tend to even out in the 152 to 156 degree range, given a number of other variables. This is perfect mashing temperatures. (William Harrison, in his 1577 Description of England, calls several times for seething water.)

Scooping the mash back into the kettle and presumably heating it (all the while stirring it, to prevent it from scorching) looks to me like either decocting, or heating the mash up to “mash-out” temperatures (stopping the enzymatic activity)–probably the former. If the malt is of uneven quality, this would probably help to bump up the mash efficiency a little bit. I’ll have to do a bit of experimentation here, and update this with my results.

Straining the wort out from the malt is fairly straightforward. Pouring more water onto the grain to increase the volume of beer is sensible, as well. I find it interesting that they’re actually adjusting the quality of beer by adding more or less water–the end volume doesn’t seem as important, here, so much as the quality of the end result.

Then they fill the kettle a third of the way with wort, and boil it with the hops. The odd bit here is that they’re doing a partial-boil initially, then later adding the rest of the hops. I’m not certain the purpose of this–again, some experimentation will be forthcoming. (Another interesting point is re-using the same hops to make a small beer…)

Third, step fourteen, is fermenting, racking, clarifying, and (eventually) drinking the beer. The beer goes through what, for lack of a better term, I’ll call primary fermentation: up to three days, or “eight days for a Lager Beer.” Bear in mind, “lagers” in the modern sense were unheard of, at this time. This is attested to by the notion of “removing the yeast from the top”–skimming off the krauesen, or foam. If this were an English ale, we would call this “top-cropping” the yeast.

Having removed the yeast, the beer is now poured into its serving-cask, where it will sit for eight days, or–again, the interesting bit–longer, if it is a Lager Beer.  Either way, by most modern standards, this is really quite quickly done. Most modern ales are around a month old or more, when you’re able to buy them; lagers (in the modern sense) take at least twice as long.

But they’re calling for the beer to be “clear and carbonated.” So, apparently it works… Yet again, further experimentation will need to take place.

There you have it! How to brew beer, in the style of Berlin, circa 1596. Great! But what’s the recipe? Well, for that, you’ll have to wait for my next post. What do you think? Please comment below…

How, When, and Why I Started Brewing

The things I’m asked most often about when I started brewing are how, when, and why, exactly, I started.  To answer these questions and more, we need to set the way-back machine to 1994, when I was a young Sailor stationed in Hawaii.

At the time, I was in my early 20’s, and a bare novice at all things alcohol. The craft brewery scene hadn’t really launched yet, to say nothing of the homebrewing scene. Oh, I had been ‘introduced’ to beer–I did mention that I was a Sailor, right?–but when I had tried it, it was mass-produced swill, and the low-quality version, at that. (I was young, and the “premium” stuff was too expensive…)

What I was interested in, though, was cooking. I missed home-cooked meals, and the chow hall on base simply wasn’t cutting it. The house I was sharing had a lovely kitchen, but my cooking skills were mostly limited to grilled cheese and soup.  So, seeing an opportunity, I set about learning, by raiding the local bookstores for cookbooks. (I did mention that this was a while ago, right? the Internet was barely in its infancy…)

One fine day, while perusing the shelves in a Borders Bookstore which undoubtedly no longer exists, a book quite literally leapt out at me.  Seriously, it fell off the shelf. That book was The New Complete Joy of Homebrewing, by Charlie Papazian. Intrigued by the promise of learning “to make beer just the way you like it,” the book came home with me, and I devoured its contents in the space of a couple of nights.

It was about the same time that Sam Adams began distributing to the islands, and I had my first taste of the Boston Lager. To put it mildly, I was blown away, and hooked.

It wasn’t for another six months, though, in early 1995, that I put my first batch together. It took a series of things coming together. First, I had found a store that sold homebrew supplies. Second, I moved to a new rental house, with a different roommate. And third, we decided to throw a housewarming party. I scraped together a little extra cash and bought the basics:

  • A 10-quart pot, to serve as my “boil kettle”;
  • A 6-gallon plastic fermenting bucket, with a lid and airlock;
  • A bunch of siphoning gear (tubing, cane, wand); and
  • Two cans of malt extract, two ounces of hops, and a sachet of dry yeast.

I started the batch before we had even finished unpacking. I had my first boilover; we cooled the pot in the sink, and the freshly-pitched batch fermented happily away in the hall closet. I’m not sure exactly what the ingredients were–I was so new at it, that I didn’t even know what was important to record, at the time. I believe that it was Munton and Fisons malt extract (but can’t swear to it); I’m told it was a can each of dark and light extract. The hops were recorded as “one ounce of high-alpha hops, one ounce of low-alpha hops.” As to the yeast, your guess is as good as mine. (Thinking back on the batch, as best I can–this was over twenty years ago–and I’d probably use Nottingham, if I were to try it again.)

Subsequent purchases included bottles and caps, priming sugar, and a bottling wand. Two weeks after the batch was started, it was bottled; about three weeks after that, we had the party.

The beer was extremely well received, with favorable comparisons to Sam Adams. (By this time, I had discovered a local watering hole that carried hundreds of brands of beer, and my tastes had branched out considerably.) Most of it was gone by the next morning, but the feeling of satisfaction from knowing that I had made the beer, and that people liked it, remained.

Many batches followed that one; most of them were less successful. I was still largely flying blind, with just the one guidebook (and the one, very limited, source of ingredients). I had my first infected batch, and more than a couple of “drinkable, but less than tasty” batches. And then I moved back to the mainland; things paused for the duration of one military course, and two years in Japan.

But the urge to brew again never left. The instant I had another place stateside, I went looking for more information–and things had radically changed. There was a homebrewing community, and the Internet had happened (mostly), and craft breweries were popping up seemingly everywhere. And I’ve never really looked back.

Since that first batch, I estimate I’ve brewed nearly 500 batches. I’ve refined my technique, branched into meads and wines, upgraded equipment, shifted to all-grain, and things continue to move. When my wife and I got back into the Society for Creative Anachronism, that opened up the aspect of historical brewing. And things have continued to go, since then.

Let’s see where this all takes us.

Brewing Status Update, October 2017

I’ve got four types of hops growing, assuming the Sterling survive the winter.  They were looking a little weak, but then, so were the Magnums when they were initially planted, so I’m just sort of waiting.  The Magnums are doing pretty well–I actually got some hops from them.  Not much to write home about, but it’s a harvest.  The Willamette plant is absolutely going gangbusters–I need to dig up that crown and split it, this winter/early spring.  I’ll probably be able to divvy it up into six or eight healthy crowns, without trying very hard.  And the Cascades (all 3 bines) are doing quite well–I didn’t get as much of a harvest as I might have liked, but that’s on me, not on the plants.  Next year, hopefully, will be another story.

I’ve been trying my hand at beekeeping; so far, with much less success than I’d like.  I had two colonies last year; both absconded.  Started over with two this year; one has absconded, but the other appears set to at least go into the winter…  We’ll see how they fare.  These have all been Italian bees, and I think part of the reason for them absconding has been mite pressure, combined (this year) with some pollen-bound comb.  I’ve got an order in for two nucleus hives of Russian bees for next spring; they’re apparently mite-resistant.  If they work out, that’ll be outstanding; if not, I may take a break for a year & come back to the hobby again later.

In SCA terms, well…  The King felt it worthwhile to induct me into the Order of the Laurel two weeks back (!!!).  Reasons cited included my baking, woodworking, and a few assorted other crafts… but primarily my brewing.  Which is what brings us here today…

My goal, when starting the latest bit of research, was (and still is) finding a good semblance of a recipe for the original Einbecker Bier–the ancestor of today’s Bock.  I’ve seen references to it from numerous period sources, describing it variously as subtle, light, and “a paragon among all summer, light, hoppy beers.”  The beer was one of the main drivers for Einbeck joining the Hanseatic League; through the League, the beer was shipped as far as Novgorod, England, Italy, and even Jerusalem. (Reportedly, Hansa Hofs and Kontors even built special warehouses, to hold the casks of Einbecker Bier.)

A moment’s thought should bring a conclusion: the beer was likely big, in every sense.  Strong and hoppy.  The descriptions keep calling it “light;” that’s probably more a color thing than flavor–but experimentation may provide other insights; despite being at this issue for several years, now, I’m still pretty early in the hands-on part of the exercise… Maybe next year.

Brew Day, January 2016

The winter barley is getting its first snowfall of the year (!). Chickens are giving us the occasional egg, mostly holding out for slightly longer days. I probably could have harvested hops, if everything hadn’t gotten away from me; they’ll have to wait for this year. Likewise much of the garden. On the bright side, there were no real disasters, so I’ve got that.

I’m brewing regularly again. In fact, there’s an historical-ish English ale coming up to a boil as I type this. I’ve got a half-batch moscat pyment on deck, for my wife. And I’ve got to decide what to make next month… I’m leaning towards a brown ale, for drinking in the late spring or early summer.

Also on deck, I’ll be a beekeeper, come springtime (mid-May or so). I’m looking forward to it, and not just for the honey and wax. I’ve long been interested in bees, and now I’ll get to work with them up-close.

Here’s to a new year, and new excitement!

Harrison’s Wife’s Ale (this recipe is #148 in Misha’s Little Black Book)

8 lbs Maris Otter malt
2 lbs Dark wheat malt
1 lb Oat malt
2 oz East Kent Goldings pellet hops (4.6% AA, 1 hour)
1 Whirlfloc tablet (15 minutes)
1 pack Wyeast 1098 British Ale Yeast

Mash at ~158F for 1 hour. Pre-boil wort volume 7.5 gallons.
Boil 1 hour, hopping to schedule.
OG: 1.052
(Kegged 21 Feb 2016. Color was surprisingly light.)

Turning up cups!

Due to Winter(tm), and the associated weather, my outside brewing has been limited, lately.  Instead, I’ve got three batches of mead burbling away.  One is a traditional, made with Radish and Christmasberry honeys; the second is a Blackberry/Raspberry melomel, with these berries in some blackberry honey; the third is my wife’s popular Cranberry, with varietal honey and two pints of homemade cranberry sauce.  The ciders from the fall (2.5 gallons of perry, 5 gallons of apple) are seemingly quite happy, as well–settling out and clearing nicely.

So, given the abundance of “free time,” I’ve been playing with wood.  But not just any playing. Me being me, this is SCA playing.

I wish I could say that I’m using period tools, but I’m just not there yet.  (Yes, I did say ‘yet.’)  I’m working up to using period materials–I want to get some basic skillsets down before I go whole-hog and pay the pretty pennie$ necessary for the right wood varieties.  So, I’m practicing on and off with chest-making; I’ve got a pair of Mastermyr-style chests done.  I really like them–the sloped sides are aesthetically pleasing to me–but finding hardware is a pain.  I’m working up to being able to make my own–but blacksmithing is a whole ‘nother skillset…

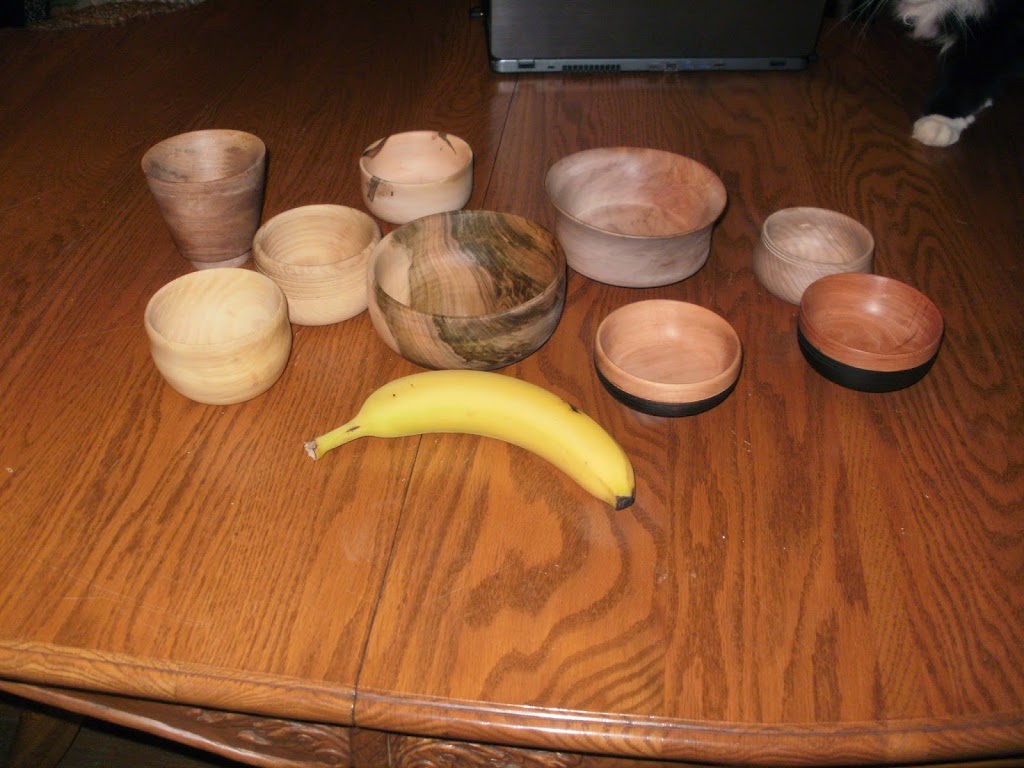
Most of the fun, though, has been woodturning: bowls, cups, and plates.

Assortment of my early attempts at turning bowls and cups. Banana for scale
Drinking vessels, in assorted birch, maple, ash, and cherry. Banana for scale.

It’s relatively early days, yet.  I’m almost to where I really want to be with the basics–I don’t have to do much post-processing (sanding), if I take my time and work methodically.  Still, I’m running 45 minutes to an hour per vessel; I might be able to bring it to more like 30 minutes, given enough practice.

I’m doing quite a bit of study, too, to find period-appropriate shapes and styles.  Oddly enough, wood types matter here, too, although it’s not quite as crucial.  Most of what I’ve been turning have been drinking bowls and cups–and they tended to be maple, ash, or birch, depending on what part of the world you were looking at.  (Maple seemed to be a universal; ash and birch–mostly ash–were popular in Russia, while alder and birch seemed to be favored in England.)

So, I’m doing up a class, for Gemutlichplatz (a semi-local event, focused on brewing and brewers), on turned wooden drinking vessels.  I hope to have enough examples to do a bit of drinking with them, too.

But a thought which struck me, recently: how much demand is there, in the SCA community, for period wooden drinking vessels?  Is there enough to support my getting a business license, and peddling them at the odd event or two?  Perhaps an Etsy shop?  I’ve been thinking about this more than a little bit, lately…  Perhaps three “tiers” of wares, to start:

  • Period material and design (researched design);
  • Period design, modern selection of material;
  • Plausibly- or non-period design (inlays, etc.), modern material.

At the least, it might support my hobbies somewhat–even if only to make the turning sustainable.  (Woodturning is an amazingly fun way to make a whole lot of wood shavings…)  I have designs, eventually, on making some pottery and pit-firing it, too–probably using the shavings from turning–which might find its way, eventually, into the second or third tier of the storefront.  Add in carved things (spoons, bowls–particularly the big dough/bread trays), and it starts looking really interesting.

I plan on gauging the reaction at Gemutlichplatz, and asking a few trusted individuals between now and then, and making my decision towards spring.  If I do go for it, it wouldn’t be before fall; I’d have to build up an inventory.  What say you, good Reader?  Is there interest?

(2018 edit: I decided there was enough interest, and have opened Holmgard Trading Company on Etsy. The focus is still mainly on turning bowls, cups, and plates, but I’ve also branched into carved bone items, and will likely expand past that in the future.)

Malting, The Next Adventure

So, after almost twenty years (!) of working on the brewing art, I’ve decided to step up my game, and go to the next level: malting.

As I’ve mentioned here before, I’m now in the process of growing my own grains. This is year two; my total harvest, from less than 120sqft of seed sown, is probably about twelve pounds.  Not much–but not bad, when you consider that I started from just over an ounce total from four varieties of “heirloom” seed (Hana, Bere, Maris Otter, and Halcyon), and added in about a quarter pound of modern commercial seed (Conlon) last year.

I’ve combined the Maris Otter and Halcyon seed, for what I’m calling “MoH”.  Halcyon is derived from Maris Otter, and it’s hard to tell the two apart–particularly when the dogs “helped” with the sowing, and thoroughly “tilled” the patches of sown seed, mixing the two.  No loss.  They’ll be spread across a 50’x50′ area this fall, assuming I can get the rototiller started in the next few days.

In the meantime, I’ve purchased a 25# bag of Conlon seed from the lovely folks at Johnny’s Selected Seeds, and built an Arduino-controlled malt kiln and a decidedly low-tech couching bed, as well as a number of food-grade plastic buckets (can you ever have too many?) and an aquarium air pump.  With this, let the malting begin!

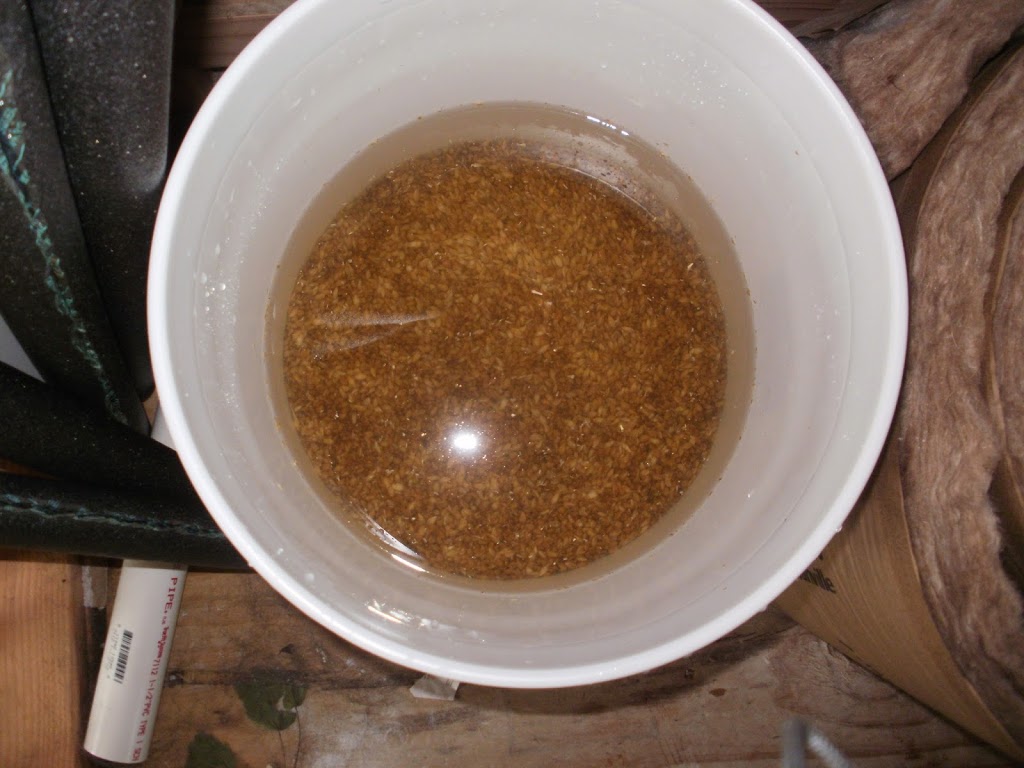
I’m doing this, at first, in six-pound batches.  Once I get things figured out, I might be able to go as high as fifteen; container size is a limiting factor.  The first step is to clean and steep the grains.  I put the grain into a bucket, covered them with a few inches of water, stirred, and poured off the chaff that floated to the top.  Repeat a few times, then just leave the water in, and let ’em go. The picture below is the grains beginning their journey…

Malting: Grains steeping
Grains cleaned and steeping.

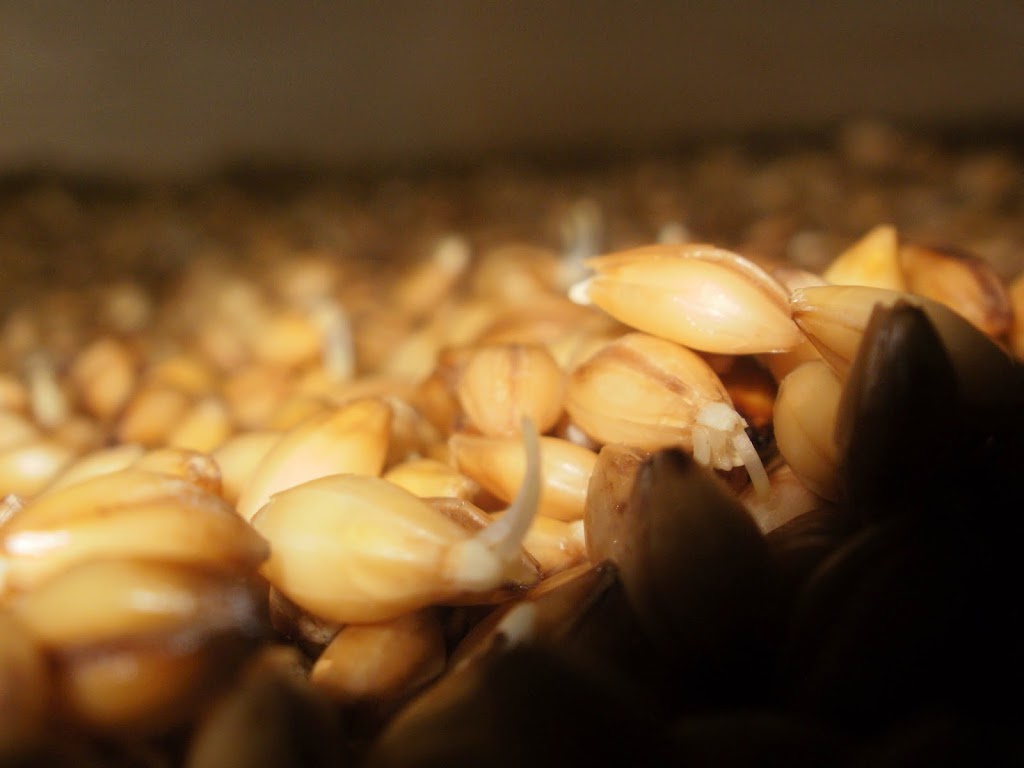
After a couple of hours, pour off the water, and let the grains “air” for six to eight hours.  Then cover them again with water for six to eight (or ten or twelve, depending on your source), and repeat.  After about two days, they should have begun “chitting”–you’ll see little white tips on the grains.  At this point, they’re ready to begin germination.  Drain the water thoroughly, then let the grains sit, stirring them (gently) every so often–three or four times a day is supposedly good enough. They need oxygen at this point, and will be giving off CO2 and heat; the stirring keeps them oxygenated, and lets the heat dissipate somewhat.

Let them “rest” a day or two more, and they’ll have developed rootlets:

Malting: Chitting and roots
Grains “chitting,” and root development
You’ll want to start checking for acrospire growth at this point–every now and then, grab a grain, and rip it apart lengthwise.  Look for the shoot, connected to the rootlets, and see how long it is, relative to the grain.  At 2/3 to 100%, you need to start drying and kilning; less, and they need to sit a little longer. If too many of them go longer, you’ve got some lovely animal feed–the chickens love it.


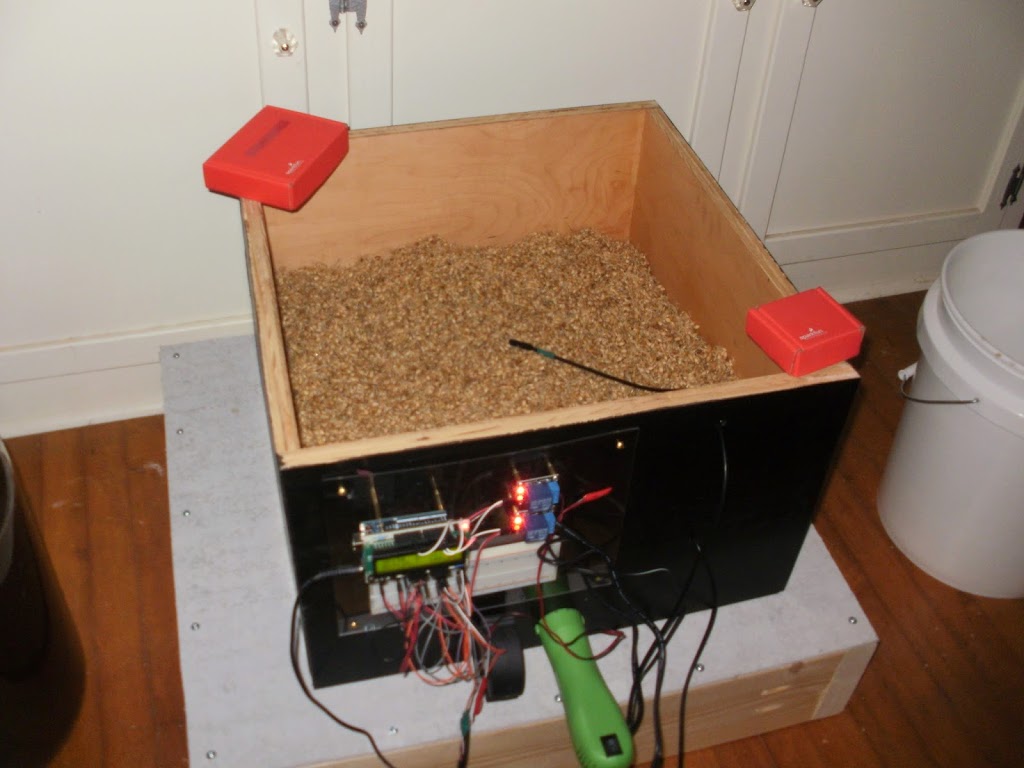
If you’re drying them, there are multiple ways to go.  Easiest for most is probably the oven–but be careful; if you go over about 50 degrees C (about 120F), you’ll kill the enzymes you need for mashing. This is where my kiln comes into play:

Malting: Arduino-powered kiln
Arduino ‘kiln’, sitting atop the couching bed

I can’t take credit for it–that goes to Richard Oliver, whom I haven’t been able to contact, and his kiln design.  I believe mine works exactly the same, even though I’ve built it slightly differently (larger, and different temperature sensors).  Basically, there’s a low-wattage hot-air gun (the green thing, bottom center) blowing hot air below the grain (suspended on a stainless mesh).  There’s a temp sensor below the grain, and another one resting on top. The gaggle of wires is for an Arduino, which monitors the temperatures–if the bottom sensor gets to a set temperature, it starts cycling the heat gun, trying to maintain temp.  (The Arduino is programmed to function like a PID, “learning” to hold the set temp.) Once the top sensor reads the same as the bottom, that means the grain has dried.  In theory, I’ll be able to get most types of base malts with the kiln–crystal and roasted malts will take the oven.

So, the first attempt used the leftover Conlon I had for the planting–it was fairly old, and I’m not certain I got good germination from it. I’ve started batch #2, and will tweak the process, and report back.  Too much fun!

Barley, Round 2

Halcyon barley, sprouting

Well, the Autumnal Equinox has come and gone, and with it the “four-to-six weeks before first frost” mark for my area.  What does that mean?  Time to sow the winter barley!

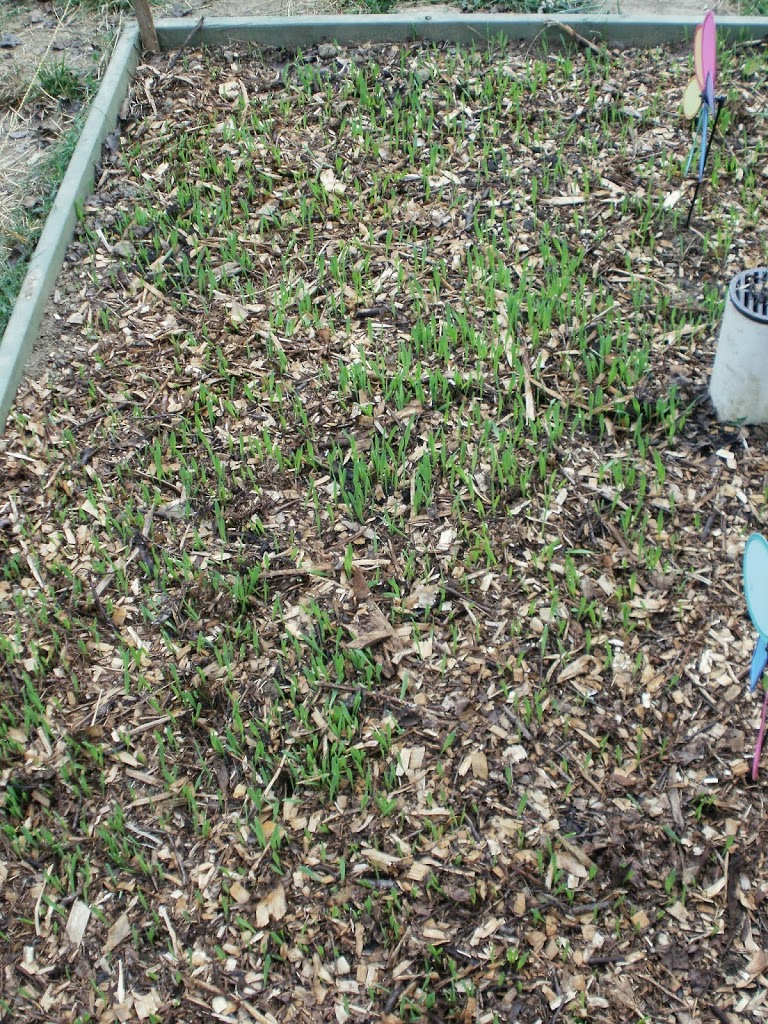
As I write this (the 28th of September), the barley has been in the ground for just over a week.  Again, two varieties of winter barley: Maris Otter, and Halcyon.  I put down roughly 200g of each seed, using one of the garden planter-boxes.  I added a thin mulch layer, and have watered every other day for a few minutes (enough to soak the soil); I’ll keep up with that watering regime (less days when it actually rains) until I start seeing reliable predictions for the actual first frost.  (About then, the grain will go ‘dormant’ for the winter.)

Since the seed was planted in the garden area (near the house), as opposed to out in the field (‘far’ from the house), I’ve been able to keep an eye on them.  That, and having an electric fence I can put up have made it less likely to suffer from deer predation (as happened last year).  Watching the seed chit, then sprout, then grow, has been fascinating!

Here’s what we’ve got, a week into things:

That’s the Halcyon on the left, and the Maris Otter below, on the right.  (Yes, there’s a bit past the PVC pipe where it’ll be hard to distinguish between them; since Halcyon is a descendant of Maris Otter, and since they’re ultimately going to be malted together, I’m not terribly worried about it–I may, in fact, simply mix the two together next year.)

That looks roughly like 100% germination, or quite near enough.  If I get as good a harvest next year as I did this, I should end up with about 17lbs of each.  (Call it 15lbs, to account for inefficiencies in harvesting, etc.)  Not only would that get me set up to be “malt-sustainable” after one more harvest, it gives me more time to acquire the equipment I’ll need for the larger-scale growing.

My hops didn’t fare as well, this year: my “retired” Cascades are fine, but the Willamette was the only variety of “new” stuff that did well enough to give me hope for next year…  The Magnum may have survived, but the “new” Cascade and the Sterling both thoroughly croaked.  I’ll replace them next spring. They’ll have better access to sunlight, as I’ve got a number of trees to take down; I’ll also be better able to “baby” them along.  (Not to mention getting them in the ground earlier than I could, this year.)

Harvest time

Well, some of it, anyway. The winter barleys–Maris Otter and Halcyon–are completely harvested. I got most of it last weekend, but left a few stalks to finish “curing”/drying; they were retrieved yesterday. I’ll probably harvest the Bere barley this weekend, while the Hana probably needs another week or two. Overall, from sowing the first seed, it’s been about nine months; by the time it’s done, it’ll probably be ten months overall, for all the varieties. My yield looks pretty good: starting from 5 grams of seed per variety, I’ve got at least several ounces of each: Maris Otter (the only one I’ve done any real processing on) came to a little over 10 ounces, prior to threshing/winnowing (maybe 9 ounces, when all is said and done). With that sort of yield, assuming similar results the next few years, I could get about 28 pounds per variety next year–enough to “play” with malting some, and replanting for sustainability.

Actually, at a that rate of increase, only 8 pounds and a bit (total!) is probably enough to plant and be sustainable, figuring roughly 20 pounds needed per batch (10 gallons), and no more than 20 batches per year (legal limit), that’s 400 pounds; add back in the 8 pounds to re-seed, and it’s pretty close. If I just re-plant everything, then from the 9 ounces this year, I’ll get 28 pounds in 2014, then 1400 pounds in 2015… And that’s per variety; I don’t have enough field to pull that off.  Barley has an “optimal” seeding rate of about 85 pounds/acre; sticking to a manageable amount, about 1/4 acre, and planting ~5 pounds of each variety is much more reasonable…

The hops are, of course, another issue entirely. Their harvest season doesn’t usually start until August, as the days start getting a little shorter. My “retired” Cascades have a number of burrs and some early cones; their root system was significantly larger, of course, than the new rhizomes. So far, there’s not much to report with them–the bines were savaged by groundhogs a couple of weeks back, but are rebounding. I’ve set up cages to protect them; I wasn’t anticipating a harvest from them this year, anyway–they need to get established. Next year, however, I’m hoping will be productive. We’ll call it a few ounces this year, and (optimistically) about a pound next year; time will tell.

In other news, I’ve got about 1/3 of the decking on the deck of my future BierGarten (“Dante,” the deck on the Undisclosed Location).  I expect to have it done before the end of July; general clean-up and debris removal will probably be going on at the same time. I’m debating right now whether to get a separate power line/meter run, or just to extend the electrical service from the house (it has a 100A panel and a 200A panel-don’t ask why, because I don’t know). I’m planning (hopefully) on taking down the chimney in August/September, and making roof repairs around the same time. I’ve also got to patch the holes in the walls; once all that’s done, I can start storing some of my equipment out there. Still quite a bit to go before it’s even 50% usable, though.

In the meantime, the main house is getting a new outside over the next week–exciting, but also an unholy mess of preparations and the like. And we’re taking the next step in “dismantling” the utility room this evening, the better to re-build it (better and stronger) over the summer…  What fun!