
So, after almost twenty years (!) of working on the brewing art, I’ve decided to step up my game, and go to the next level: malting.
As I’ve mentioned here before, I’m now in the process of growing my own grains. This is year two; my total harvest, from less than 120sqft of seed sown, is probably about twelve pounds. Not much–but not bad, when you consider that I started from just over an ounce total from four varieties of “heirloom” seed (Hana, Bere, Maris Otter, and Halcyon), and added in about a quarter pound of modern commercial seed (Conlon) last year.
I’ve combined the Maris Otter and Halcyon seed, for what I’m calling “MoH”. Halcyon is derived from Maris Otter, and it’s hard to tell the two apart–particularly when the dogs “helped” with the sowing, and thoroughly “tilled” the patches of sown seed, mixing the two. No loss. They’ll be spread across a 50’x50′ area this fall, assuming I can get the rototiller started in the next few days.
In the meantime, I’ve purchased a 25# bag of Conlon seed from the lovely folks at Johnny’s Selected Seeds, and built an Arduino-controlled malt kiln and a decidedly low-tech couching bed, as well as a number of food-grade plastic buckets (can you ever have too many?) and an aquarium air pump. With this, let the malting begin!
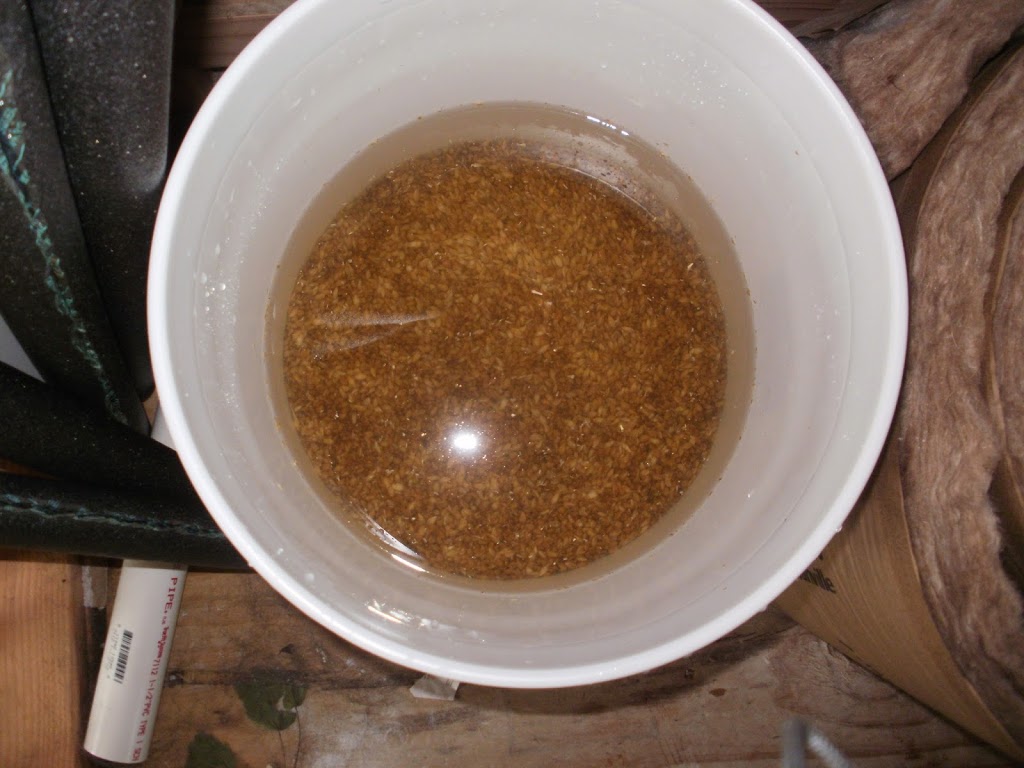
I’m doing this, at first, in six-pound batches. Once I get things figured out, I might be able to go as high as fifteen; container size is a limiting factor. The first step is to clean and steep the grains. I put the grain into a bucket, covered them with a few inches of water, stirred, and poured off the chaff that floated to the top. Repeat a few times, then just leave the water in, and let ’em go. The picture below is the grains beginning their journey…
 |
| Grains cleaned and steeping. |
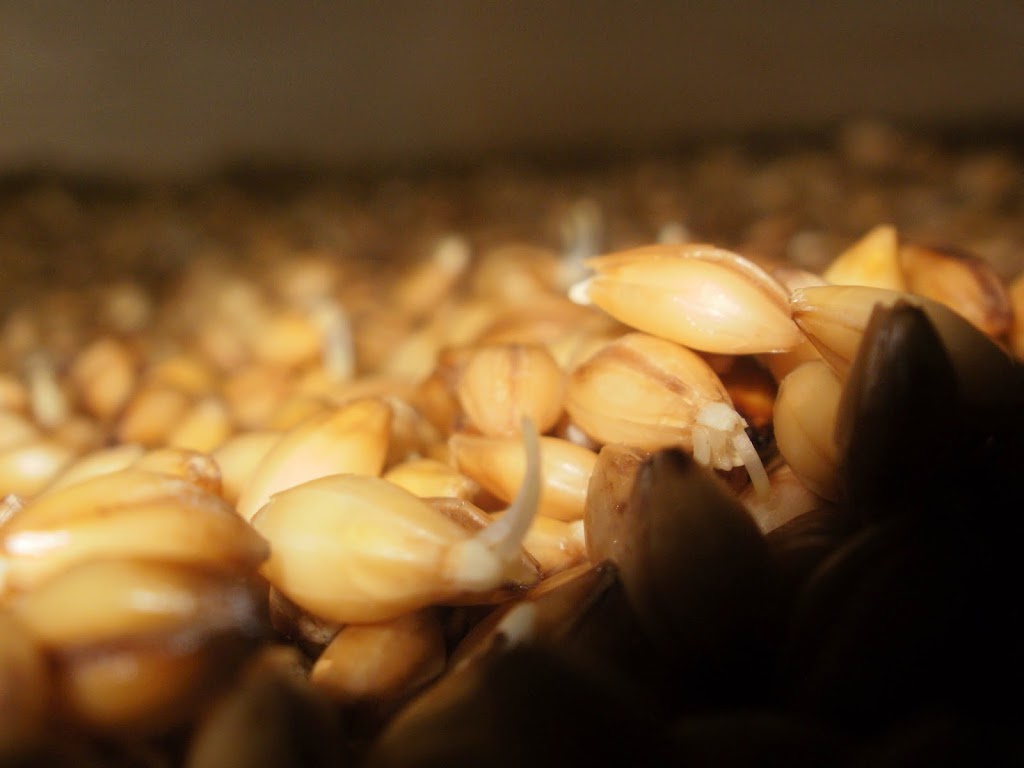
After a couple of hours, pour off the water, and let the grains “air” for six to eight hours. Then cover them again with water for six to eight (or ten or twelve, depending on your source), and repeat. After about two days, they should have begun “chitting”–you’ll see little white tips on the grains. At this point, they’re ready to begin germination. Drain the water thoroughly, then let the grains sit, stirring them (gently) every so often–three or four times a day is supposedly good enough. They need oxygen at this point, and will be giving off CO2 and heat; the stirring keeps them oxygenated, and lets the heat dissipate somewhat.
Let them “rest” a day or two more, and they’ll have developed rootlets:
|
|
If you’re drying them, there are multiple ways to go. Easiest for most is probably the oven–but be careful; if you go over about 50 degrees C (about 120F), you’ll kill the enzymes you need for mashing. This is where my kiln comes into play:
|
|
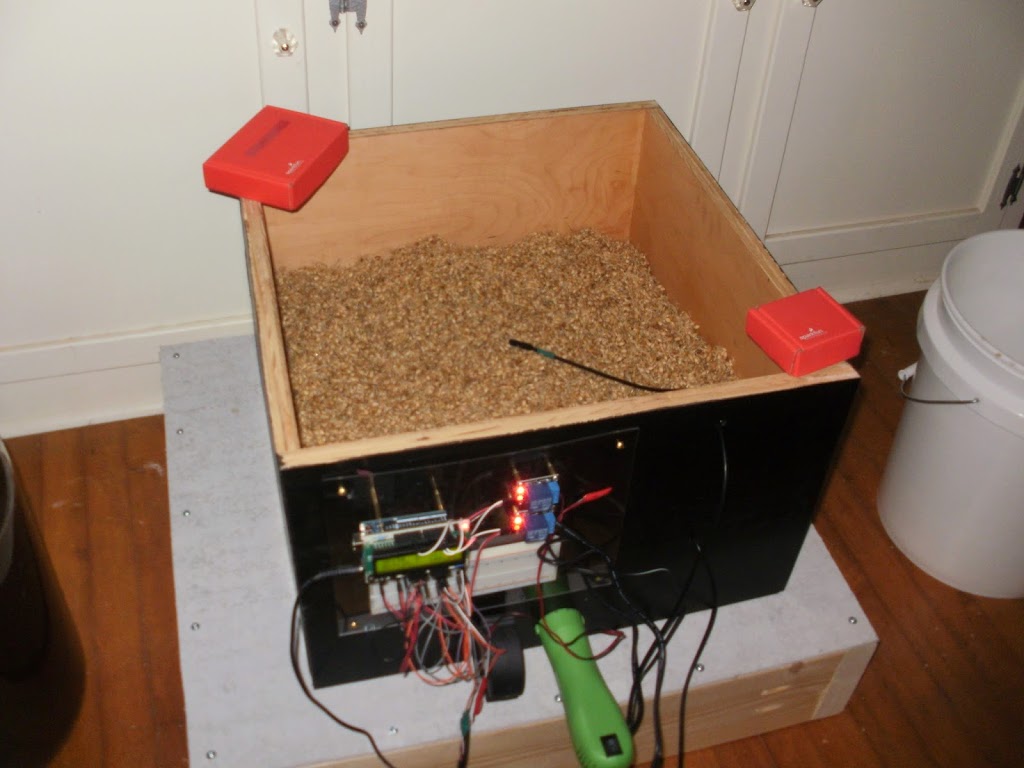
I can’t take credit for it–that goes to Richard Oliver, whom I haven’t been able to contact, and his kiln design. I believe mine works exactly the same, even though I’ve built it slightly differently (larger, and different temperature sensors). Basically, there’s a low-wattage hot-air gun (the green thing, bottom center) blowing hot air below the grain (suspended on a stainless mesh). There’s a temp sensor below the grain, and another one resting on top. The gaggle of wires is for an Arduino, which monitors the temperatures–if the bottom sensor gets to a set temperature, it starts cycling the heat gun, trying to maintain temp. (The Arduino is programmed to function like a PID, “learning” to hold the set temp.) Once the top sensor reads the same as the bottom, that means the grain has dried. In theory, I’ll be able to get most types of base malts with the kiln–crystal and roasted malts will take the oven.
So, the first attempt used the leftover Conlon I had for the planting–it was fairly old, and I’m not certain I got good germination from it. I’ve started batch #2, and will tweak the process, and report back. Too much fun!