
I recently spent a lovely evening discussing, among other things, the art of Kolrosing. It was at the (Unofficial) Northern Atlantian Arts and Sciences meeting, which apparently happens monthly, although I had somehow not heard of it before last week. It was a small crowd–names withheld 1) to protect the guilty, and 2) because I’m terrible with names, and can’t remember them all to save my life. But it was lively, and chatting was fun.
Kolrosing
While discussions wandered through various topics, Kolrosing was the theme of the evening. Kolrosing is an ancient art for decorating wood, involving incising a design, rubbing a colored powder into the incisions, then oiling the lot of it. The oil causes the wood to swell slightly, “grabbing” the powder, and creating as permanent a design as I’ve been able to find.
For a powder, I’ve seen cinnamon and coffee used most often. Historically, the inner bark of some trees were used–birch, for example. I could see walnut making a fine contrast against maple or birch. Powdered charcoal was also popular. Last night, I used some powdered roast barley, which worked fine. I have a notion to sand some honey locust down to a fine powder, and use it; while it wouldn’t contrast much against the background wood, locust fluoresces under blacklight, which could make for some interesting “magic rune” effects.
The oil used can be just about any light-colored oil that won’t go rancid–although I know of olive oil being used, in a pinch. My go-to is Boos Block Oil, but any other brand, or even a straight mineral oil, would certainly work.
After a light application of some fine sandpaper, it’s impossible to tell that the design wasn’t part of the wood to begin with; the only way to remove it would be to sand to the depth of the incision. I describe it as “tattooing” the wood.
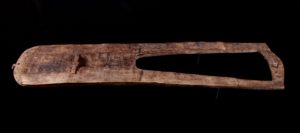 Where is kolrosing used? The oldest example I know of is the Trossingen Lyre, dating from the late 500’s AD. While the kolrosing is difficult to see on the original, it’s definitely there.
Kolrosing was also popular among the Saami of Finland, for decorating things such as bone needle cases and the like. And in modern times, spoons and kuksas, popular among the bushcrafting crowd, are often intricately decorated with kolrosing. And it’s the technique I’ve been using to inscribe stanzas from the Poetic Eddas around the rims of the cups I’ve been turning for my shop.
Silver
If you follow my Facebook feed, you’ve seen the other medium I’m playing with lately: silver wire inlay. I’ve got a couple of goals with the silver, ultimately. I’d like to have a line of cups and bowls in the shop with a wire inlay around the rim. Against walnut or cherry, the silver really “pops.” And in a candlelit room, that gleam off of the silver just seems to add a certain something.
My other goal is to do some inlay on flat pieces. I have a notion to do a Hnefatafl board (similar to a chessboard), with the decorations (knotwork designs) and squares outlined with silver inlay.
Oddly, the “inlay” technique for the cups and the “flat” pieces is different. The cups use round silver wire, which is glued down into a groove cut in the cup as it’s turned. After the glue (typically super-glue) sets, final sanding is done to remove any excess glue, and buff/burnish the silver. This technique puts a horizontal ring around the cup.
The other inlay technique, seen most frequently on gunstocks and knife handles, involves cutting a groove in the wood, then (relatively lightly) hammering a ribbon of wire into the groove edgewise. Glue is supposedly optional. I’m told that if done right, the glue isn’t necessary; if not done right, the glue won’t help. Then the standard sanding and finishing is done.
It looks simple enough in principle, but I’m sure there are subtleties to it that the various online tutorials don’t go into. I can say for certain that there are things not mentioned doing the cup inlay. First and foremost, make sure the wood is bone-dry prior to gluing in the wire. Otherwise, the shrinkage will change the cup’s diameter, and the (suddenly too-long) wire will pop out. I’ve been using “thin” CA glue; a switch to “medium,” or even “thick,” might help–experimentation is in order.
While I’ve been messing about some with the cup inlay, I’m really looking forward to trying out the flat inlay. The design options are much greater. I do have an ulterior motive for wanting to “level up” on it, a little–but I’ll have to save that for a future post, as I’d like to keep it something of a surprise. If things work out as I hope, in addition to turning, there will be a combination of round and flat inlays. (Also perhaps some wood ebonizing–a fascinating technique for another time, when I’m feeling a bit more alchemical.)