Happiness is a Planted Garden

One of the things I simultaneously anticipate and dread each year is the coming of late spring. That’s when the “warm months” really get rolling on the homestead, and everything moves outside into the garden and the fields.

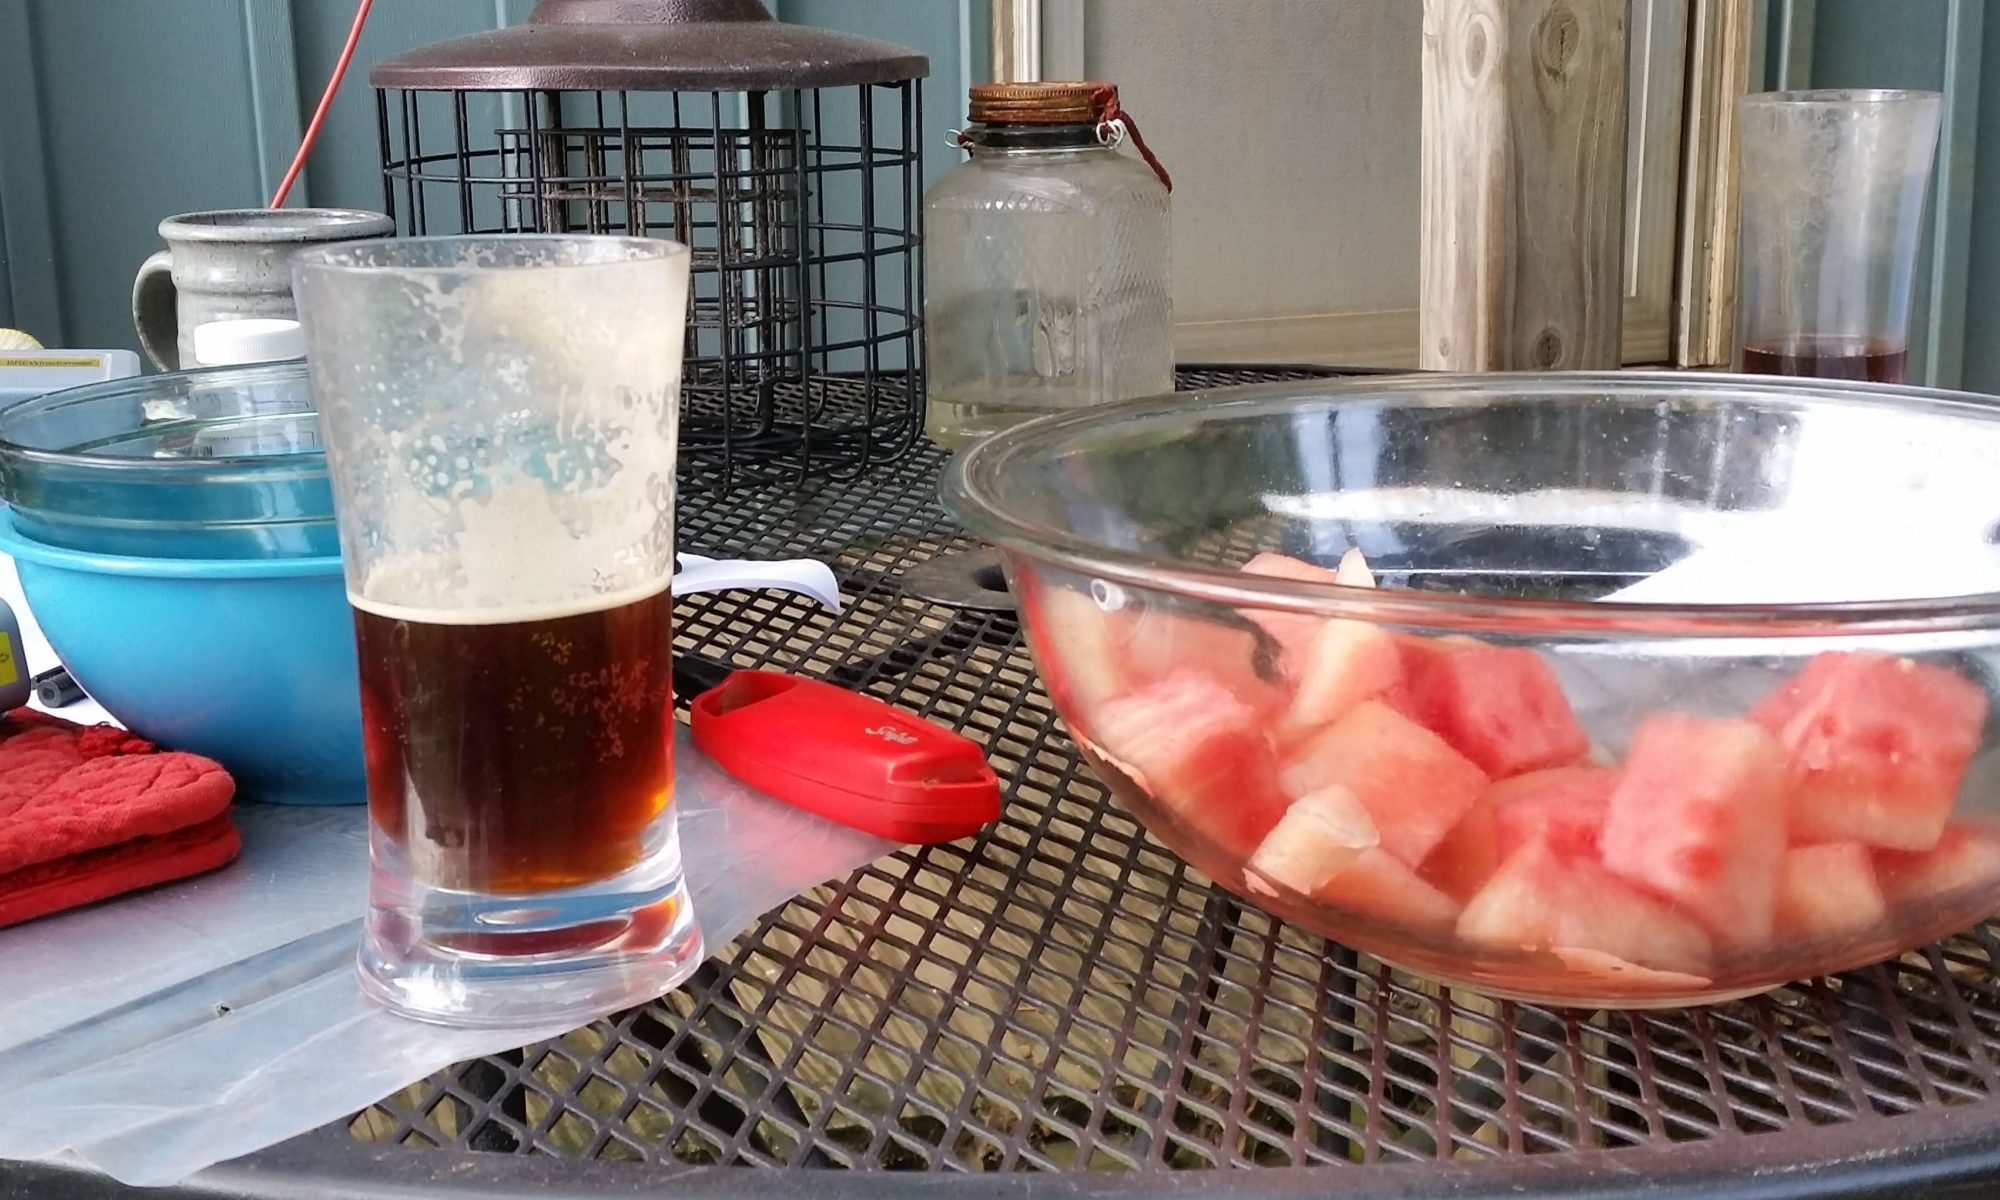
The upsides to the whole thing do outweigh the downsides, all things considered. The garden, so meticulously planned through the winter, finally gets planted. If you’re doing things right, you’ve been harvesting some of the earliest things–brassicas, cold-weather greens, and the like. I really enjoy when our produce starts switching from store-bought to self-grown, fresh from the garden. And it won’t be long before we can start enjoying fresh fruits–cherries, blackberries, and eventually apples and pears.

The plants all have leafed out, of course. Some of them, like the tulip poplars locally, are still blooming, which is great for the bees. The black locust and others have already passed, but the sumac is just beginning. If the colonies were established, I’d be looking at the first honey harvest of the year. (Read more about my bees here.)

The hard parts, though, include keeping the yard mowed, and weeding everything. The garden is small enough (and packed enough) to do by hand, as long as we keep on top of it. My grain patch, out in the field, is tilled, and waiting patiently. I haven’t decided if I’ll do spring grains, given the lateness of the season, or wait for fall and do winter grains. Either way, I can put some red clover seed down as a cover and green mulch–and the bees, again, will love it.

All of the yard tending means breaking out the various pieces of outdoor equipment, tuning things up, and starting them up for the first time. 2018 thus far has seen our trusty riding lawn mower die. We had been eyeing a replacement anyway, so that timeline got moved up. I’ve also historically had very bad luck with small 2-cycle engines, so the string trimmer has finally been replaced with a cordless electric one.

Other ups and downs involve the “livestock”–the chickens, particularly. With the longer days, they tend to lay more regularly. But with the heat of summer already on us, several have gone broody. We move them to the “quarantine” coop, to keep them out of the nesting boxes. This has the added benefit of cooling them off a little, and helps break the broodiness. But the quarantine coop has a flaw…

Oddly, the raccoon (I believe–it may have been a fox) got in before we had any in the quarantine coop. I believe either the coop door wasn’t latched well, or it managed to figure out the gate latch. Either way, it got two of the girls. We’ve addressed the latch issue with the addition of a carabiner “lock.” The longer-term solution for the girls in quarantine will be to move them to “general population” for the overnight. (I’ll stay up late with my “varmint repellant” for a few nights, just in case the raccoon comes back.)

In the meantime, my wife requested the purchase of more chickens, to “boost” the flock (we were down to 18). A search was run, and a gentleman not too far away was selling year-and-a-half old laying hens for $5 each–a steal! He was suffering from a rat problem, and wanted to divest of his flock for a while, in the hopes of clearing the rats out. We went with the intention of getting five or six, and came home with eleven for the price of six. So our flock is nearly back to its largest (we’re at 29; we’ve had as many as 30). After a little assimilation and acclimation, we’ll probably be getting over two dozen eggs a day.

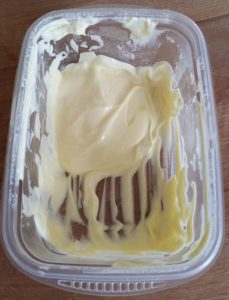
All of this, with an eye towards continued house renovations. We’ve got new appliances on order, to replace the older ones (in excess of 10 years old). Also a new refrigerator, with a different air recirculation mechanism. The current one keeps building up ice next to the fan, which leads to an extensive procedure to dismantle it and clean it out. Also finally getting a propane gas line run for the stove and water heater, plus a few minor “tweaks” to plumbing.

The last major thing for the summer is to re-insulate and seal the joists under the kitchen/dining room floor, with the hopes that they’ll stop buckling. There’s only so much we can do about the humidity and temperatures above it, but we can certainly keep the moisture and cool from coming up from below.

What do you like (and dread) about the switch-over from spring towards summer? I’d love to hear, in the comments below!

Five Minutes of Mead

I just realized that for all of my talk about brewing, I’ve neglected to talk about meads. While the majority of my mead recipes are for a full 5-gallon batch, I’ve recently discovered the joys of micro-batches. Here’s an article I wrote up for the newsletter of my local beekeeping association, discussing the process and providing a recipe for them:

Five Minutes of Mead with Misha

An issue many people have with making meads is finding vessels to use for the fermentation. As a homebrewer, I have a plethora of glass carboys of various sizes, from 7 gallons down to one-gallon. While convenient for me, they have a number of drawbacks: they tend to be large; they are heavy (especially when full of liquid); they are fragile, and tend to cut people when they break; and they can be expensive. A less-costly option would be fermenting buckets, made of food-grade plastic. These also come in a range of sizes. Plastic, however, scratches readily, meaning that they’re only really worthwhile for a small number of batches. Then there’s the issue of batch size: while you can brew a 1-gallon batch in a 5-gallon carboy or bucket, the extra airspace can be problematic for the brew. And brewing a 5-gallon batch requires a lot of honey: ten to fifteen pounds, or even more.

A simple solution is the use of pickle fermenting kits (readily found on Amazon; I think I saw a kit in Wegman’s, a while back, as well) and Mason jars. The kits consist of a Mason jar lid, which has been drilled and fitted with an o-ring to hold a standard homebrewing airlock. These are available in both wide- and narrow-mouth styles; I’m fond of the wide-mouth, for ease of adding things to the mead as I feel the urge. Quart jars are readily available, easily cleaned and sanitized (sterilized, even), and make the recipe math fairly easy.

Generally speaking, the amount of honey used will have the largest impact on the final sweetness of the mead. All other things being equal, using less than 2 ¾ pounds of honey per gallon will give you a dry mead; using more, up to about 3 ¼ pounds per gallon, yields an off-dry to semi-sweet mead. Going above that, up to about 4 ¼ pounds per gallon, gives increasingly sweeter meads, then above about 4 ½ pounds per gallon yields what is called “sack” mead.

Honey weighs about twelve pounds per gallon, give or take. Given that there are 16 cups to a gallon, a little kitchen math shows that four cups of honey would weigh three pounds. This means, conveniently, that one cup of honey in a quart is the equivalent of three pounds per gallon—a nice, semi-sweet mead. Want to drop it to two pounds per gallon? Only use 2/3 cup. Four pounds? 1-1/3. Little tweaks beyond that are a matter of tablespoons.

With all that said, here’s a fairly simple, “basic sweet mead” recipe, given in volumes for a quart; everything scales up directly to a gallon, or even five:

1 ¼ cups honey

Hot water to 1 quart

¼ packet of dry wine yeast (I recommend Lalvin K1V-1116, available here or here.)

  1. Put the honey in your fermenting container.
  2. Heat the water to a boil, then let it cool to just off the boil.
  3. Pour the hot water into the container, stirring to dissolve the honey.
  4. Let the liquid cool; when it reaches lukewarm (or below 100º F), add the yeast.
  5. Put the lid on the fermenter, and add water to the airlock.
  6. Give the vessel a shake twice a day for the first week.
  7. Leave the fermenter alone for about a month, then carefully decant the contents into a new fermenter, leaving behind as much sediment as possible.
  8. Once the mead is clear enough to see through, decant it once more.
  9. Let it sit another six months, then decant it a final time; now, you can put the “sealing” lid on the jar (ideally, not too tight-just enough to barely seal). The mead is ready to drink! It should keep a year or more in the refrigerator.

I’ve got another couple of articles that I can clean up a little bit and post, but this should be enough to get even the newest mead-maker started. Enjoy!

Brew Day, May 2018: Two brews, one experiment

Beer and a little watermelon while brewing

The brewday for this month went of well, with the weather finally deciding to cooperate after a solid week of rain. Downtown flooded, but as we’re on a hill, with a slope away from the house in all directions, we didn’t get any of that. There was a little water seepage in the cellar, but the full extent was a little bit of mud.

Two batches were brewed: a Pils for my friend Dominick, based on a Stella Artois clone, and an experiment for myself, which I’ll get to in a moment. The pils I believe is going to be nice, if not exactly “to style.” I don’t have a setup right now to truly lager, but I can ferment fairly cool in the cellar. It was a simple grain bill, with 9.5 pounds of Pilsner malt. The hops were Saaz, added at the beginning, and with 5 minutes to go in the boil (1.5 ounces and .5 ounces, respectively). Dominick picked out WLP830, German Lager yeast. Volumes came out decently, and the gravity ended at about 1.046; I think it’ll be about 4.5% ABV, and the color should be straw gold. The hope is to have it ready for Pennsic.

The other batch was, as I mentioned, a bit of an experiment. The recipe was a riff off of my “scaled” Braunschweig Stadtmumme recipe: Munich and Vienna malts, with a healthy dose of German hops. I went for the higher-Alpha Herkules, rather than Tettnang, partly because I wanted something with some bittering to balance the Munich, and partly because I wanted to try them out. Nottingham yeast, to keep things simple. (The full recipe will be below.)

The crux of the “experiment” part, though, was the mash. Rather than my typical infusion/batch-sparge style, I went with a direct-fired mash, starting everything (grains and water together) at room temperature. This, again, is based on my reading of the Mumme recipes. They didn’t infuse, nor did they decoct; rather, they heated the mash for an hour and a quarter. That timeframe confused me at first, because it almost sounded like they were “simply” mashing for 75 minutes. But the more I thought about it, the more I figured that a properly-shaped vessel, with a strong enough fire under it, would probably get the volumes given in the original recipe (2172 pounds of grain, with “enough” water) up to the right temperatures in about that amount of time.

I went with 16 pounds of grain overall, and water to bring the overall volume up to about 9.75 gallons (about 34 quarts, give or take). With a pretty low flame on my propane burner, it took me about an hour–near enough to the original time–to get to my target mash temperature of 152 degrees F.  I stirred constantly, to try to prevent any scorching, but still got a small amount (maybe 4 square inches of “scorch”).

My reasoning for starting from room temperature is that they didn’t specify any mash steps, and didn’t indicate adding the malt to hot water. The ramp up from ~70 degrees F progressively all the way to ~152 F took the mash through all of the intermediate steps–liquefaction, acid rest, protein rest, glucan, then saccharification. Rather than discrete steps, they “slid” up through the entire scale.

Once I had the mash at temp, I turned off the burner, and a friend and I transferred the mash to my “normal” mash tun (an Igloo cooler, with a false bottom). I let it sit another 20 minutes, partly to complete whatever conversion it was going to do, and partly to let the grain bed settle somewhat. Then I ran off the wort, using a large bowl to recirculate the first gallon or so.

My yield pre-boil was a little lower than I might have liked, netting about 6.5 gallons; while the kettle I fired the mash in could have held more, the cooler was about at its limit. (I either need to make the beer “smaller,” with less grain, or find a bigger mash tun.) Otherwise, everything went off without a hitch. The batch is currently happily fermenting in my cellar, and I’ll have to wait until next month to see how things have gone.

Fermented beer and lees
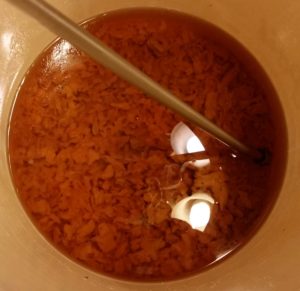
One other “achievement” for today was kegging last month’s batch. It turned out quite nicely, as a sort of “lawn-mower beer.” Pale golden, light in body, and astoundingly clear. In fact, here’s a picture of the last few inches of beer in the fermenter, with the sediment clearly visible through it. I think this will be a lovely Pennsic beer, nice and crisp and thirst-quenching.


This month’s recipe, with ingredient links to MoreBeer:

Closer to Stadtmumme

11 pounds of Munich Malt
5 pounds of Goldpils Vienna Malt
1.5 ounces of Herkules leaf hops (11.3% Alpha, first wort hops)
1 Whirlfloc tablet (15 minutes in the boil)
1.5 ounces of Herkules leaf hops (11.3% Alpha, 10 minutes in the boil)
1 packet Nottingham dry yeast

Direct-fire the mash from room temp up to ~152 degrees, over the course of an hour. Initial boil volume ~6.5 gallons. Boil 1 hour. Final volume, 5 gallons. Initial Gravity: 1.073.

Bees on the Homestead

Bees atop the hive frames

Last night, I picked up two baby hives (‘nucs’)of bees for the homestead. They’re both of the Russian bee species, which I’m hoping will help with mites, this year. This will be our third iteration with bees; the first year, one hive absconded, and the second “collapsed,” probably because of varroa mites. The second year, one collapsed due to disease load from mites, and the other was done in, or at least helped along, due to yellowjacket wasps.

Russian bees, however, are from the same area that the mites evolved from, and have developed a resistance. Mostly, it’s a form of “hygiene”–they clean the mites off of themselves, and chew off the legs, to keep the mites from re-attaching. (Yellowjackets can still be problematic, but if the bee population is decent, they’ll defend themselves.)

The nucleus hives come as a box–a little bigger than a shoebox–with five hive framesof honeycomb, a queen, about six thousand bees or so, and whatever they’ve managed to pack into the frames (mostly “brood”–baby bees). Normally, when installing the bees in their “permanent home,” you put them at least overnight where the hives will be, and open up the nuc entrance. Then you wait for a sunny point the next day, so the foragers will be out, and you swap the nuc box for a “normal” box in the same spot. The foragers won’t notice, when they get back–but they’ll have at least double the amount of room.

Last night, however, Mother Nature decided that it was time to move a little more firmly towards summer, and she lit into us with severe thunderstorms, as well as off-and-on rain all day. Most of the time, I’d leave the bees where they were, and wait for a sunnier day to move them. These boxes, however, were cardboard. Waxed cardboard, to be sure, but still, I didn’t want to risk the bees getting wet, and possibly deciding to abscond. (“Absconding” is similar to swarming–they all pack up with whatever honey they’ve got, and go looking for a new home.)

So, I waited until it was between sets of rain, and the sun tried to come out for a minute, then I got to deal with two very full boxes of bees. Both queens have been sighted, and they’ve both been laying a nice brood pattern, so there will be even more bees before too long. The “big” hives have even more honey (left from last year’s bees) and are almost completely drawn-out with comb, so they have lots of room to lay. I’ll give them a peek next weekend, and see how they’re doing. If it’s gangbusters, I’ll consider putting some honey supers on. We’re in this year’s flow, with black locust starting to bloom, and tulip poplars coming soon after.

Of course, they’re calling for thunderstorms and rain all week, which will limit the foraging. So, a little supplemental sugar syrup has been mixed up, and I’ve got plenty of sugar to make more, if needs be. With luck, it’ll be afternoon thunderstorms (typical for this time of year), and they’ll make it out to the trees in the mornings.

Given the rain, and the new accommodations, I didn’t get any pictures of them this weekend. The picture at the top of this post is from last year, at about this time. (Those are Italian bees, and as such are slightly larger and browner/yellower than the Russians.) But to tide us over until I can get some Bees bearding on the West hive
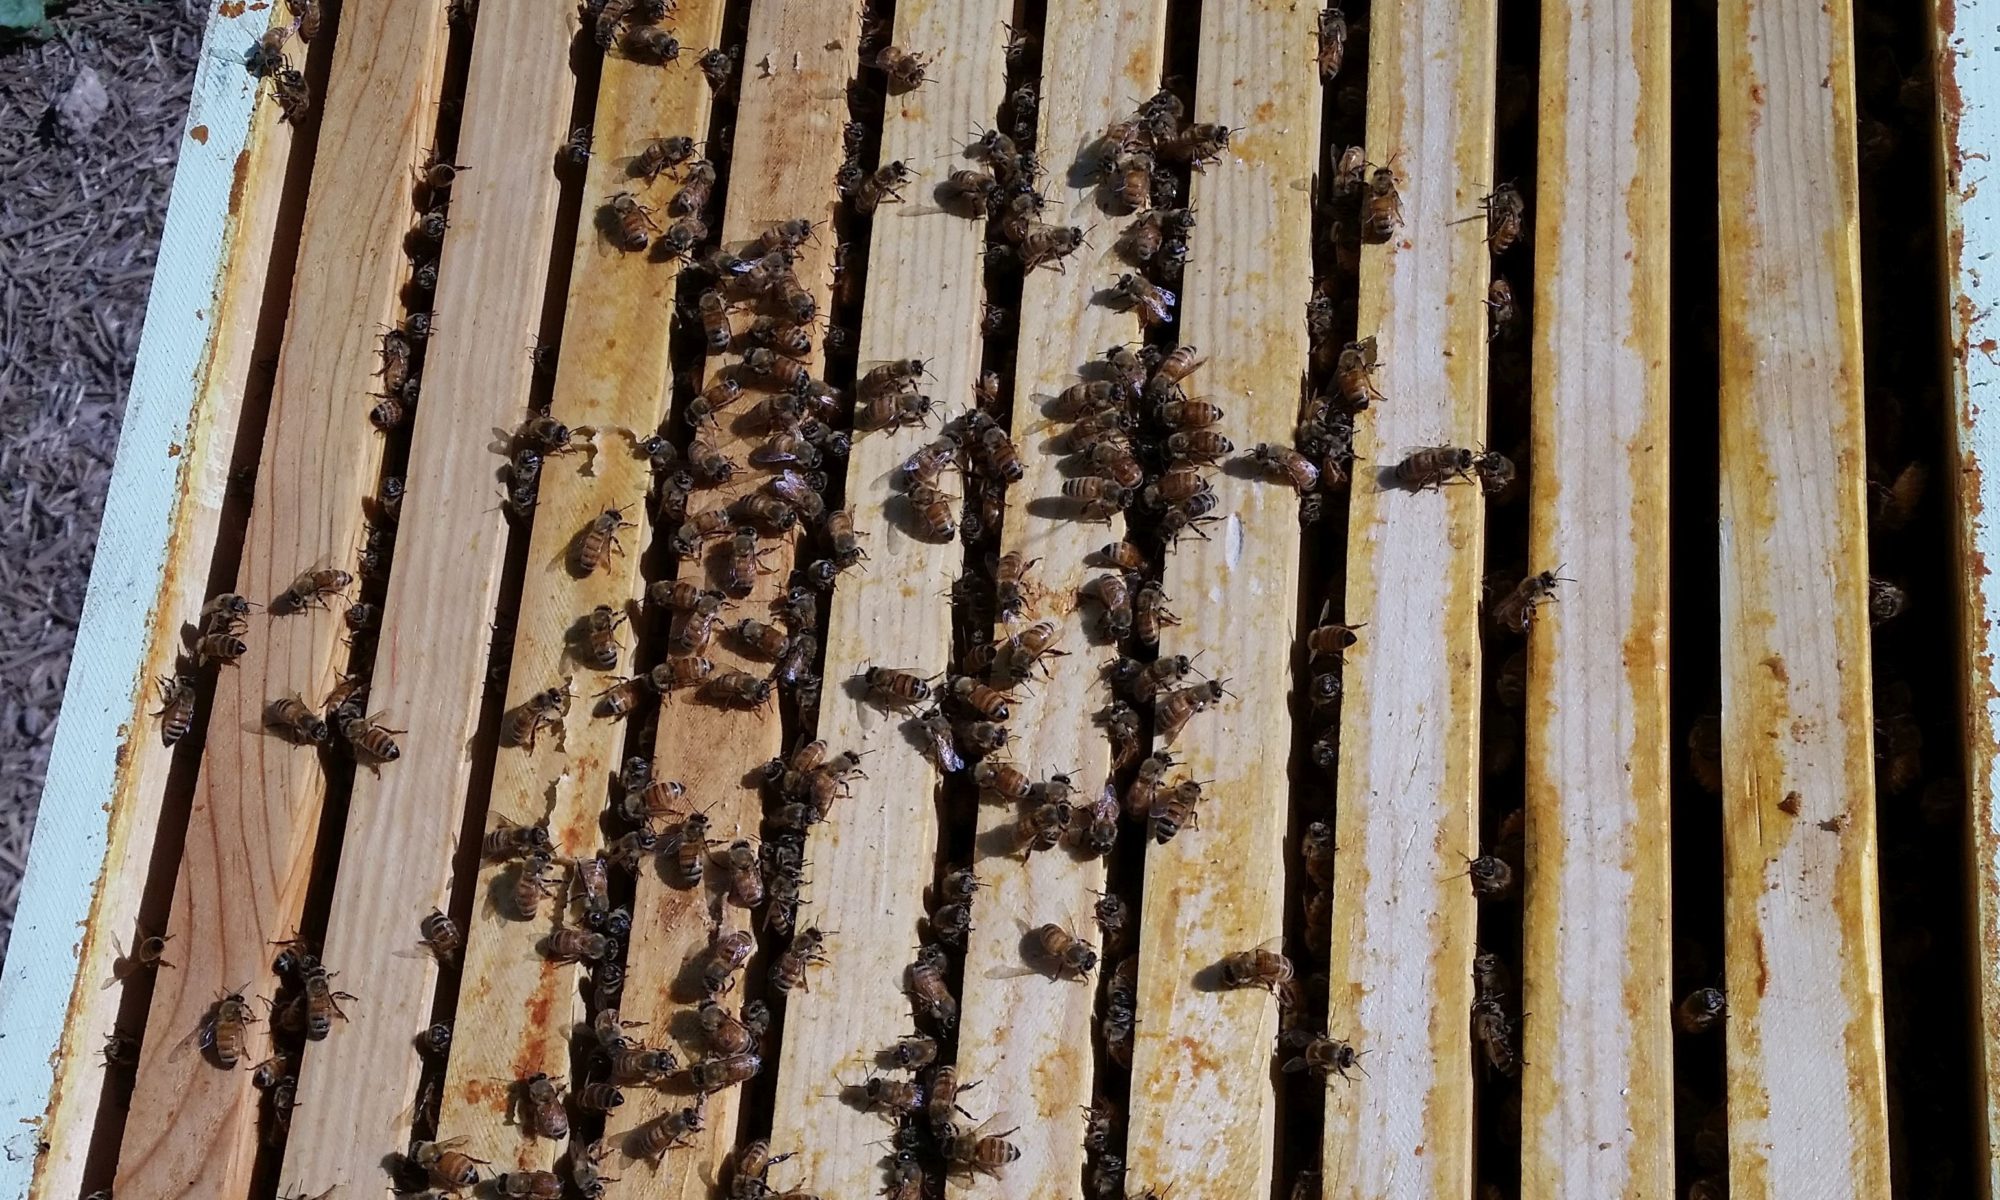
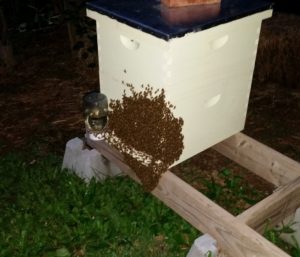
pics, here are more from last year, as they “bearded” the fronts of the hives.

Bees bearding on the East hive 
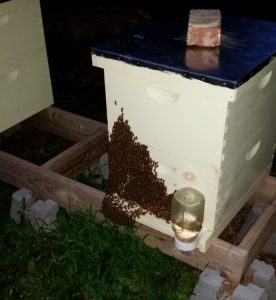
If any of you keep bees, I’d love to hear about them in the comments. What kind? How successful have you been with them? What tips do you have, that you could share with us?

Seven tips to help you become a better brewer

When I started seriously getting into brewing, I began scouring every resource I could find for tips on how to improve my brews. The tips I found seemed pretty simple–use fresh ingredients; pay attention to fermentation temperatures; “relax, don’t worry;” that sort of thing–but I quickly noticed that they all seemed pretty uniform. No matter where I went, everybody had the same advice. While the “normal” tips out there will certainly help improve your brewing, I’ve compiled a list of a few more “off-the-wall” tips I have collected on my own. Without further ado:

  1. Learn how to taste beer. Not how to drink beer, but how to taste it, the way that serious wine people do “wine tastings,” but without the pretension. Train your palate. If you can’t recognize that a given beer is bad (or a bad example of style), compared to a different one that is good, then anything you do to “improve” your beer will come up short.  More importantly, if you can’t tell why something is bad, you won’t be as well-positioned to critically taste your own brews, or improve them.  Going through formal Cicerone training is a formal way of doing this, but it’s a bit costly.  A simpler, more informal way of doing it is to organize beer tastings with small groups. Take time to try the beers at their “intended” temperatures, and sip them as they warm up. Discuss what you’re tasting; talk about what you’d like to taste in the beers, and talk through how you might get there.
  2. Try commercial examples of lots of styles. Try lots of commercial examples. Try multiple versions of styles. Try them from as close to the source as possible–and try them “aged,” or even slightly stale. Learn what styles you like, and what you don’t like. Learn why, and how to explain why. This will help you focus your brewing–there’s no reason to brew Bourbon Imperial Double-Stouts, if you don’t like them. Likewise, it will help you be able to recommend brews to others. (If you don’t know it’s out there, or don’t know what it’s like, you can’t recommend it.)
  3. Join a club, group, or find a brewing mentor. Good places to go for this include your local homebrew store. I’ve heard stories of unfriendly ones, but I’ve never actually been to one; usually, all of the employees are happy to help, however they can. Find your local homebrew club: if there’s not a small one locally, there’s bound to be a larger one that covers your region. A great place to find your local store or club is the American Homebrewers Association (there’s a link in the sidebar to join); I also recommend getting a membership, both for the online resources, and for the discounts on brewing books, as well as Zymurgy magazine. Go online: there are several forums, where you can get informal advice and mentorship from some very experienced people. (My favorite, at present, is HomeBrewTalk.) Having these sorts of connections will provide good discussions of styles, techniques, and equipment; it can provide exposure to more examples of styles; you can get access to more resources, and possible use of equipment. Most importantly, it’s a way to get feedback for your own brews.
  4. Brew a lot. Think of it as the beer equivalent to the “10,000-hour rule.” If you don’t brew frequently, it’ll be like a “new experience” every time you go to brew. You’ll never really build your confidence, or your knowledge of your equipment. Having lots of experience bumps up the chances of things going smoothly–and increases your “library of tricks” to fix when things go poorly. A corollary of this rule is “Be willing to dump a batch.” You can’t hit a home run at every at-bat. And sometimes things to irreparably wrong. You’ll probably not have to dump many–I can count mine on the fingers of one hand–but you’ll likely have to dump one at some point along the way.
  5. Keep copious notes. Notes on your brews. Yes, the recipes, but more importantly on how the brew went and what happened. What went well, what went poorly. Document the recipes, as well as (especially) on-the-fly changes, because the one time you don’t, you’ll brew up the best thing you’ve ever tasted, and you won’t be able to remember how, or to recreate it. When things go really wrong, you’ll have a written record to assist in fixing the issue later. When the brew is done, add tasting notes on it, to figure out whether to improve it next time, and how, or even to decide if you want this to be a “house brew.”  I’ve got my so-called “Little Black Book,” in which I record all of these things; I can look back on 14+ years of batches for inspiration, corrections, or just to reminisce.
  6. Learn your ingredients. Know what goes into your beers, and how you can change the brew by varying the use of those ingredients. Taste things, at every step of the way. Chew on some grains. Take deep whiffs of hops. Try a drop of different yeasts. Taste the wort–first runnings, last runnings, post-boil. Take samples of the beer during fermentation, and taste them. Try your batch before it’s carbed. This will give you some baselines for what a “good” batch/process looks like, so you can recognize when things go off the rails. I’m also fond of the so-called “SMaSH” beers, where you use a single base malt and a single hop variety. (“SMaSH” stands for just that: Single Malt and Single Hop.) You can use these to taste individual ingredients–and you can do them in series, changing one ingredient each time, to compare different ones. Do a series with different base malts (using the same recipe, up to a given gravity, with a fixed hop schedule). Then do a series with the same base malt, changing the hop variety each time. Do a series of the same recipe, using a different yeast. Only change one ingredient at a time, to get fair comparisons. And, importantly, take notes.
  7. Know your equipment. If you change things up every time, you’ll change your beer somewhat, even using the same recipe. When starting off, you’ll be building up to your “final system,” possibly for a long time. (While I’ve used the same setup for years, I’m still planning improvements.) But try to stick to a basic setup as much as possible. If you maintain it & learn it, you’ll be able to adjust recipes based on your equipment–your batch efficiency will be unique, and how you run the brew will change. (For instance, my setup does not lend itself well to decoctions–so I avoid recipes with decoction mashes, or adjust them to be “normal” infusion mashes.) Also, you can calibrate your equipment: set up volume markers; learn how much dead space various vessels have; learn your typical boil-off rates, and the like. If you’ve got one, and I suggest you acquire one, input this data into your favorite brewing software–this will help when formulating your own recipes.

Those are probably the biggest tips that I’ve got, beyond the basics. If you’ve got more tips, please let us know in the comments!

Homemade Mayonnaise

What to do when the world has handed you eggs, and you’re running out of space to store them?  Make homemade mayonnaise!

More specifically, my wife has decided that she needs to take firmer control of her meals for the week, which necessarily means that the kids and I will also be taken under her wing. While working up lunches, making large batches of egg and tuna salad, she noted that we were running low on mayo… And we’ve got something like ten dozen eggs in the fridge. Well, eggs being one of the main mayonnaise ingredients, we decided that it would be most cost-effective to make our own.

Now, we’ve made mayonnaise before. Back before we moved out to the homestead, in the heady days when Alton Brown had his show on regularly, we tried out his recipe with some success. But that was years ago, and I at first figured I’d try something different. Enter: the venerable Fanny Farmer Cookbook.

I’m not sure what happened. We followed the instructions precisely. Maybe we added the oil too quickly? Maybe there wasn’t enough mustard?  Regardless, it never set up. It remained a liquidy, mayonnaise-flavored soup. We tried the “repairs” that they suggested: adding another egg yolk. More oil. More mustard. Nope.

What eventually worked was starting smaller. We poured everything into a different container, and started over with a single egg yolk, a dollop of mustard, and a splash of vinegar. We got that spun up, then really slowly started adding the previous batch in. At first, literally drop. By. Drop. Then, slowly increasing the speed, but never as fast as the first attempt. I knew things were going well when I started seeing blobs of (recognizably) mayonnaise getting flung into and about the sides of the food processor. After a few short moments, it was done.

The taste was, at first, underwhelming… But after a short while in the fridge, it all came together nicely! Unfortunately, my wife was still making things…

One third of the batch of mayonnaise
I almost couldn’t get to it fast enough for a picture.

Here’s the recipe I used:

Blender Mayonnaise

1 whole egg (room temperature)
1/4 tsp salt
1/2 tsp dry mustard, or 1 tsp Dijon
1 cup oil (olive, peanut, vegetable, whatever)
1-1/2 Tbsp cider vinegar or lemon juice
1 Tbsp boiling water
additional salt to taste

Place the egg, salt, mustard, and 1/4 cup of the oil in the blender. Turn on the blender, and add the remaining oil slowly, in a thin stream (almost drop-by-drop). Add the vinegar or lemon juice and the water. Taste, add salt if desired, and refrigerate.