September 2018 Brew Day – Kits and Book Reviews

This Brew Day, I had some visitors. Two folks, one of whom wanted to learn a bit of brewing, and the other of whom hadn’t brewed regularly in I don’t know how long. And another friend came over to make a “show” mead–my well water is much tastier than his municipal supply.

I had hoped for a few more people, but the “main attraction” of the weekend was landfall of Hurricane Florence. Many folks were busy doing other things to prepare–or simply doing other things.

What to Brew

Having anticipated the new(-ish) brewers, I thought it would be worthwhile to do a few basic extract beers. I wanted something that would ferment out and be drinkable quickly, as we’re planning on a neighborhood get-together in early October. Also, something relatively sessionable, because that’s the direction my interests have been leaning of late.

After digging about the web a bit, I settled on a pair of kits from MoreBeer: the Best Bitter, and the English Pale Ale.

The two kits arrived quite quickly after ordering–MoreBeer is quite good about that–and I opened them up enough to pull the hops for each batch and put them in the freezer until brew day. Their kits don’t intrinsically come with yeast, so I had to stop by my local homebrew shop to pick some up, which I did a few days prior to brewing. They also don’t come with grain bags for steeping any specialty grains; those, fortunately, are cheap.

Best Bitter

The Best Bitter kit shoots for a light-colored (6-7 SRM), lightly bittered ale (about 27.4 IBUs). The alcohol content, with a starting gravity of 1.048, should come out right around 4%, maybe up to 4.5%. I chose White Labs’ Burton Ale (WLP023),  figuring that it was sourced to a similar style to what I was making (Burton Ale hails from Henley-on-Thames, and comes from Brakspear Bitter). One packet, for a low-gravity beer, was plenty.

The kit came with pre-measured hop additions (two 1-oz doses of Kent Goldings, and a 1.5-oz hit of Northern Brewer), a whirlfloc tab, a double-walled, sealed, mylar pouch with six pounds of liquid malt extract, a pound of dry malt extract, and 8 ounces of crushed specialty malt to steep.

The extract was quite fresh; MoreBeer does a pretty brisk business, so I figured it would be. In the back of my mind, I had anticipated seeing cans–it’s been about that long since I did an extract batch. I can’t say for certain that this helped keep the extract fresh, but it seemed that way. Regardless, the pouches make it easier to get the syrup into the kettle.

English Pale

Even though English Pale Ale isn’t a recognized BJCP style any longer, I recall it fondly from my early brewing days. The kit is superficially similar to the Bitter, with the pouch of extract, specialty grains, hops, and whirlfloc. It is designed to come out a bit darker (about 14 SRM), if anything more lightly bittered at 24 IBUs, and about the same alcohol (starting gravity 1.049, and shooting for about 4-4.5% ABV). For this batch, I chose White Labs’ London Ale (WLP013), which is supposedly sourced from Worthington White Shield, an English IPA.

If anything, on looking at the recipes, I’d have swapped them style-for-style; to my eye, the Pale Ale looks more like a Bitter, and vice-versa. But then, really, it’s sort of the “what’s in a name?” effect: the name is more cosmetic than anything, and if they want to call it a Pale Ale, that’s on them.

Either way, both brews went very smoothly, smelled delicious, and were fermenting happily away the next morning. I’ll try to remember to provide tasting notes, after they’re kegged and tapped.

A Little Light Reading – Book Reviews

To pass the time on my daily work commute, I listen to a number of podcasts. Lately, I’ve been bingeing on the Experimental Homebrewing podcast, with Denny Conn and Drew Beecham. It’s a fun show, with interviews, discussion, style breakdowns, tips, and tricks, and pretty much everything you could ask for.

Inspired by the show, I went and picked up two of their books: Experimental Homebrewing, and Homebrew All-Stars. I haven’t dug much into the former, but I did read All-Stars straight through.

The main conceit of Homebrew All-Stars is that broadly, homebrewers can be classified as one of several types: Old-School Masters, Scientists and Process Nerds, Wild Ones, or Recipe and Ingredient Innovators. Denny and Drew readily admit that these aren’t 100% perfect fits all the time, and everybody has a little of all of these in them (indeed, they talk subtypes and crosses between types). But generally, I think they are on to something.

They interview several prominent homebrewers within each type, and get advice, tips, and a few recipes for each one. While I can’t say that everything was surprising and new, there were more than a few things I hadn’t seen before, and could take away for my own brewing processes.

One thing I’m grateful for is the blessedly short version of the apparently mandatory, near-ubiquitous “how to brew beer” chapter. (I do wish that editors of brewing books wouldn’t insist on one of these in every single book. By the time most brewers are getting into either of these books, they’ve probably got at least a handful of batches under their belt, and don’t really need the primer.)

In all, I would rate “All-Stars” at a 4.5 stars out of five. It did kind of seem a little like they were simply re-hashing interviews from the podcast, but there was enough new stuff to overcome that. (And, having book-in-hand is easier for referencing than trying to find the right podcast episode, and listen/transcribe the relevant portion.) I’m hesitant to give a rating to “Experimental” yet, as I haven’t read much of it–but what I’ve gone through seems at least as solid, if not a bit more so. For you intermediate to advanced brewers out there, I highly recommend them! (For any beginners reading this, they’re not bad, but they’re talking some more advanced stuff, particularly in “All-Stars”.)

What say you, readers? Have you found any good kits, lately? Or read a good book?  Please let us know in the comments! Thanks!

One goal reached: Water Profile

In my last post, I mentioned a list of goals for upcoming brewing; I’m happy to report that I’ve accomplished one–I have my water profile!

The Profile

pH          6.4
Na          4ppm
Ca          14ppm
Mg         10ppm
SO4       <1ppm
CO3       <1ppm
HCO3    26ppm
Cl             36ppm

Total Hardness as CaCO3: 77
Total Alkalinity as CaCO3:  21

There are a couple of other bits listed–iron, phosphorus, and the like, but they generally don’t impact brewing (unless they’re way out of whack, which mine aren’t).

So what does all of that mean?  Well, according to everything I’ve read (here, and here), and various calculators (Beersmith, and Bru’n Water), my water is ideal for “very malty” beverages, with an SRM ranging from 6-10. That’s on the order of medium amber, down towards nearly brown. (A handy color chart can be found here.)

Again, so what? Well, the tendency my water has is to bring malts forward, and–if not suppress the hops, at least to do nothing for them. This is due mostly to my sulfate (SO4) levels being “below detection limit.” (For comparison, even Pilsen has 5ppm of sulfate. Most towns in the “Old World” are much higher–London runs about 75ppm or higher.)

So, for future batches, I’ll be doctoring the water a little bit–adding some gypsum to the mash, most often. A half teaspoon or so will bring up the sulfate, and add a little calcium as well. (Those relatively rare times I do extract brews, I may cut it down to a quarter teaspoon in the boil.)

Other Goals

Progress of sorts is being made on several of the other goals I listed, as well. First and foremost, I’ll be doing two batches on the next Brew Day: an English Pale Ale, and a Best Bitter. They’ll be extract batches, because this Brew Day I’ll be teaching some new folks, and don’t want to scare them away with all-grain just yet.

Both batches should tip the scales at about 4% abv; by the typical American definition of “session” (being under 5%), I’m right in. Once I see how these go, and after “progressing” them in future batches up to all grain, I’ll see about trying to dial them back to about 3.5%, which is my personal definition of “session”.

As to fermenter upgrades, I’ve decided where I want to go for the time being: BrewBuckets (also available here). I’ll eventually work up to full conicals, but probably not until I’ve got the “full brewery” completed (and which will be its own set of posts). The deciding factor was discovering another “toy”: the BrewJacket.

The BrewJacket (no links just yet–a Google search will bring it up) is a nifty device that allows you to maintain a set temperature in your fermenter, using the Peltier effect. (“Magic.”) They’re pricey, yes, but I’m a technophile at heart. (And I’m certain I can rig a system to run them off of a solar array…)

Using one of these would greatly expand my lagering capability: I would only need the chest freezer for the final cold crash, generally, even in summer. And in the depths of summer, when the cellar is getting warmer than even ale yeasts like it, I can still keep them comfortably cool. And either way, I’ve been looking for a more reliable fermentation temperature control system. It’s either these, or get a fridge for the cellar–and there’s not really room down there for another appliance.

There you have it: my water, and plotting the completion of a few other goals.  What do you think of the water profile? Or my plans for the upcoming brews? Have any of you used the BrewBucket, or the BrewJacket? I’d love to hear about them in the comments.

Summer Harvest

Having recovered (mostly) from Pennsic (the gallery is in the sidebar on the right), we found it was time to get stuck in on the garden and related outside-the-house things. In particular, it was time to do the summer harvest, before the weeds made it completely impossible. Also on the agenda: starting to reclaim the flower beds, and getting the garden beds ready for fall plantings.

Weedmageddon and a Harvest

It seems that we encounter some version of “weedmageddon” every year–a bout of summer rains, alternating with intense heat, often with crazy work schedules, and we can’t keep up with the weeds in the garden, much less get a decent harvest in. This year, the culprit was Pennsic, combined with frequent rains.

On our return, the garden had jumped from barely knee-high plants and a pretty controlled weed situation, to plants (mostly weeds) up to eye-level. An emergency “pull all the weeds!” session was held, combined with brutal prunings of the tomato plants which had threatened to crawl across the entire garden. We salvaged what tomatoes we could, but the chickens were gifted with more than a few of them.

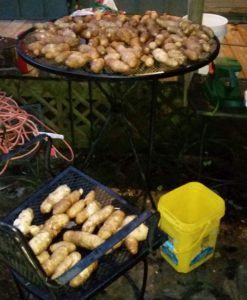
2018 Potato HarvestOnce things were more or less under control, we set about harvesting what we could. The onions did pretty well, particularly the yellow ones–the red onions never got much above golf-ball sized. The garlic ended up being pretty much a non-starter; we’ll get some more in for the fall, when they’ll be happier with the cool weather. But the big success was the potatoes. From a few small hills, we actually got about 50 pounds! (A photo of the harvest is to the right–please excuse the [ahem] potato-quality picture…)
The tomato harvest is still ongoing, of course, and the pole beans have only just really kicked into gear. Most of the squash have croaked, but a couple of pumpkin vines are still fighting on–the best one being the “volunteer” in the front flower bed. We’ll see how they do.

Getting Things Ready for Fall

The plan for the fall garden includes lots of brassicas–cabbage, bok choi, brussels sprouts, cauliflower, broccoli, and the like. Other beds will get root vegetables, such as beets, turnips, and radishes. Additionally, we’ve got a few unusual things to try out: salsify (two varieties), sugar beets, and swedes (related to rutabagas), to name a few.

A couple of the beds are going to lay fallow over the winter, and I hope to talk my wife into letting me put some winter grains in some of them. A few varieties, I’ve only got enough for about a two-foot square plot; with the winter wheat, I can probably do a full bed. The greens (after I clip the grains, in the spring) would be a good green manure, and having the plants in the garden would cut back on deer predation, which means I might get to harvest some of them, and grow up a better volume of grains.

Other fall preps include keeping a weather eye on the bees. They’ve been sucking down the sugar-water, almost as fast as I can put it out (about a quart each day and a half, give or take). They’ve been slow to draw out supers–I’m giving them another couple of weeks to work on them–but they’re doing fine as far as brood and pollen; their mite counts are as low as expected (zero–these are ‘hygienic’ Russian bees), and they look healthy. At this point I’m cautiously optimistic, but I’ve been here before. Another hive inspection in early- to mid-September will, I think, tell me how things are going to go.

Brewing, Of Course

The August brew day was one of cellar management. I racked some meads over to secondary, and cleaned a couple of things up in the cellar. Upcoming brew days will likely include some teaching moments (several folks have asked me to teach them about brewing), as well as some possible equipment upgrades, and playing around with some interesting techniques. In particular, I’m hoping to:

  1. Upgrade fermenters. I haven’t decided whether to go with conicals, BrewBuckets (almost-conicals), or 10-gallon corny kegs. Pricing, availability, and funds will end up deciding.
  2. Get an “official” water analysis done on the well water, with the goal of being able to dial things in a bit tighter.
  3. Do more in the way of session beers–I have my eyes set primarily on English milds and bitters, although as things cool off, I’m thinking about making a Kolsch or two, as well.
  4. Do a parti-gyle, in the style of Fuller’s (two sets of wort run off from the grains, then mixing the end results). It would require a little juggling of equipment, but I think the results would be fun.
  5. Get another 20-gallon Igloo cooler, with the intent of being able to do some really big mashes–possibly even enough for a 5-gallon batch of Braunschweiger Schiff-Mumme.

Please stick around, sign up for the mailing list (to be alerted to new posts), and feel free to comment below!

Brew Day, July 2018 – Cellar Management and Meads

Between the heat, things to do around the house, and the proximity to Pennsic, this month’s Brew Day was mostly cellar management. I got the beers from May kegged, and pulled a few 2.5-gallon carboys to make a couple of meads.

Cellar Management – Kegging Brews

The first of the May brews was my experiment in direct-firing the mash. Overall, it was a success for what it was–but I’d have to revamp the recipe if I were to do it again. It came out a most peculiar orange color, and the malt “backbone” was off. I’m not certain just how to describe it, really. I think if I switch the amounts of the two base malts, it would come out better. (I had 11 pounds of Munich, and 5 pounds of Vienna; so swap them to 5 of Munich and 11 of Vienna.) The hops need tweaking, as well. I think move the First Wort addition to a straight 60-minute addition; move the 10-minute addition back to 20-30 minutes, and add a whirlpool dose.

The second one to keg was for my friend Dominic; we brewed up a Pilsner-ish for him. (He’s very much of the “lighter is better” opinion.) When racking it into the keg, my only comment was “this is the most Dominic beer we’ve ever done.” It’ll be a step beyond “pale straw” color, I think. Corona is probably darker. The malt and hops are well-balanced, but very light. Tasty, and it’ll be great chilled at Pennsic.

Both beers were cloudy–my experiment much more so than the Pilsner.  And mine in particular was rather phenolic, a sign that things fermented warmer than the yeasts would have liked. But then, the cellar is running a very warm 80 degrees right now, supposedly–I think it’s probably more like high 70’s most of the time. So something needs to be done about that, in the long run.

Thoughts on future plans

I’m thinking more and more about switching my summer brewing over to a kveik yeast. They’re supposedly good up towards 110 degrees, even, fermenting cleanly the whole way.  I’ll have to wait until after Pennsic to try one, obviously, but I’m eager to see.

I do have a couple of questions about them: how would they do for a mead? How well do they flocculate (drop out of suspension)?  Things like that. Fodder for future experiments.

In the meantime, if I continue with “regular” yeasts in summertime brews, I’ll have to see about setting up a water bath for the fermenters, even down in the cellar. (Or turn off the dehumidifier for the duration of the ferment, but everything else in the cellar would be the worse for wear.) In the long run, of course, I hope to convert the “Garage” (currently my wood shop) into the “Brewery,” and set up some sort of dedicated cool space for fermenting and serving.

New Brews

This evening I’ll be mixing up a pair of meads to go in the fermenters I mentioned above. Both will be 2.5-gallon batches; one will be a blackberry melomel, and the other a Pinot Noir pyment.

The main thing about these two batches is that I’ll be moving out of my comfort zone, and using yeasts that I’m not as familiar with: 71B for the melomel, and RC-212 for the pyment. My “normal” go-to for meads is D-47. It plays well with most fruits, leaves a moderate sweetness, and actually improves over time when left on the lees.

I’m going with the “new” yeasts for a couple of reasons. Firstly, I’d like to expand my “library” some. I think I’ve learned and progressed a bit from my early days, when I used whatever wine yeast was available, as long as it was EC-1118. I’d like to see what these other yeasts can bring to the table. I mean, I keep seeing 71B mentioned as people’s preferred mead yeast, but I don’t have much experience with it, and a half-batch is a good way to learn. And finally, all of these yeasts evolved to do great things in their particular environments–RC-212 is great for red wines; 71B supposedly enhances berry flavors.

Each of these batches will get 5 pounds of clover honey, if only because that’s what I’ve got available. I’ll dose them up with staggered nutrients, too, then move them down to the cellar for the medium-term. I figure they’ll probably clear by early September, and I can get them bottled in September, then serve them up for Thanksgiving and Christmas.

(Note to self: set up calendar reminders to go check on them periodically, to make sure the airlocks don’t dry out…)

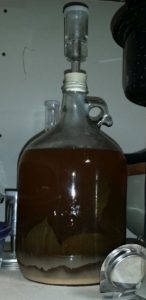
Hopleaf Mead Update, Cellar ManagementWhile I’m on the subject, the Hopleaf Mead continues to do its thing. It’s clearing up pretty nicely, and the hop leaves are surprising me a little by slowly sinking to the bottom. I’ll probably give it another week or two, simultaneously giving me time to find one of my other gallon jugs, then rack it onto some sorbate and hit it with some sort of finings before bottling it.

I’ll admit to being quite curious how this one turns out. My prediction is that the leaves will, at the absolute most, only mildly affect the flavor, and it’ll be a subtle “there’s something unusual here, but I’m not sure what.”

Bizarre Idea as a Closing Thought

This came to me in one of those half-asleep moments a while back: I should make a true “Frankenstein” batch. I’ve got techniques for malting and brewing from period. I’ve got grains from period (once I get enough of them grown up). In theory, I know how to get hops from period–or, failing that, at least their first-generation descendants. Yeast from period? Kveik (well, period enough). Add some honey (ideally from my hives), a la Trossingen. Ferment it up in a barrel, and serve it casked (either through a beer engine, or simply tapping the barrel).

Lots of planning and work would have to go into it–I’d need to grow enough Bere, and grow up the hops. I wouldn’t want to use a new barrel, so I’d have to run a few batches through one, to “mute” the oak a little…

But I think this would be a wonderful thing to do, in addition to my (already-planned) “Estate Beer.” What say you, readers?  Comments welcome below, or via email. (Speaking of which–I’m trying to get the blog’s email list function working; if you sign up, I won’t “spam” you, but only send at most a monthly newsletter, and notifications when I put up a new post. I hope you’ll give it a go!)

Following Rabbit-holes in Trossingen

One of the things I find most interesting about my brewing hobby is the various rabbit-holes it will take me down.  The research takes me down all sorts of odd side-streets and alleys.

Rabbit Holes

For example, finding myself with all sorts of “excess”–mostly spent grains–I started looking at other things to do with it. Dog biscuits and bread are the obvious answers. Or when a batch is done fermenting, I’ve got a surfeit of yeast: again with the bread.

Then there are the slightly odder things. What did they use to drink their beer, or ale, or wine, or mead? That question led me to a number of interesting places. There’s the bowls and cups I mentioned previously–those tended to be for beer, sometimes ale. There are lots of references to “wine cups,” and the Russians even had a “wine bowl” of much larger size.

Drinking horns?  Well, they were used, but I don’t think they were ubiquitous. (There seem to be many more trees than there are horned livestock.) Tankards? Possibly. Probably, even. I’ve seen reference to lots of glassware, too, and its use seems to have spanned class and caste to a much greater degree than people think.

Then there’s the question of mead. It seems to have been very much a special occasion drink in most areas. For that, you’d break out your “fine china,” in the form of your horns and the like. One particular type of vessel stands out for mead, though: the mazier. (It’s also spelled “maser,” but using that as a search term brings back all kinds of odd sci-fi stuff.) Maziers, though, are worth a post all their own.

Where things get really interesting to me, though, is when you can actually look at an extant item. That’ll usually be through photographs, to be sure, but it’s certainly better than nothing. (One interesting source of photos is Robin Wood’s book “The Wooden Bowl”. This book focuses on central and northern European bowls, and has lots of lovely pictures–but it’s not where I’m going today.)

Enter Trossingen

A set of turned things that really caught my attention when I first saw pictures  of them were the wooden goods from the Trossingen grave.  I don’t recall how exactly I ran across them–most likely, it was wandering through Pinterest–but detailed photos and descriptions can be in the book “Mit Leier und Schwert” by Barbara Theune-Großkopf. (The link to it is here, but be forewarned that it’s Amazon.de, the book is in German, and it’s usually out of stock.)

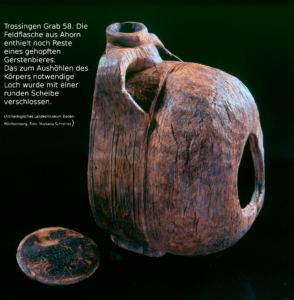
The grave is that of a 6th century Merovingian/Frankish high-status warrior. He was buried in a box-bed turned into a coffin, surrounded by grave goods, to include his sword, shield, spear/lance, a lyre, an antler comb, some pouches, a chair, a small table, candlestick, some candles, two bowls, and a canteen. Of these, the bed, candlestick, chair, table, bowls, and canteen, were at least partly turned.

Now, those are enough to pique my interest all on their own. But what really grabbed my attention was when I read through the bit on the canteen. In particular, the fact that the canteen was probably full when it was buried, and there was still residue on the inside–which they ran a pretty full analysis of.

Trossingen Canteen
The Trossingen Canteen

Alamannic “Starkbier” with Honey and Hops

Apparently, the Trossingen canteen once contained a fermented malt-based beverage, strengthened with honey. But where things get really odd is when they looked at the various pollen grains that were present. Among other things, these included hop pollen.

Being good scientists, and Germans to boot, the researchers decided to get together with the Weihenstephan brewery and try to recreate the beer. The report on this was published in a different academic journal, which I’d have to track down separately. If/when I find it, I’ll update the post and put a link to it here.

The recipe was obviously speculative–they were going off of long-since-evaporated 1300 year old dried beer residue. I’d like to see a little more about their process, and probably make a few adjustments to it. For instance, I believe the “recreation” used purely modern barley-malt. Hand-malted, to be sure, but more than likely the period malt would have included wheat and rye at least, possibly oats, and maybe some other weed seeds as well. Small percentages, probably, but it doesn’t necessarily take much.

Nevertheless, they came to the “definitive” conclusion that the canteen was full when buried, it contained a strong barley-based fermented drink. That drink was hopped, and at some point honey was added.

Let that sink in for a minute. They’re talking a hopped beer in 580AD. This is pushing 250 years before Abbot Adelhard of Corbie Abbey wrote, connecting the hop-harvest with brewing, and 600 years before the earliest written evidence of hopped beers in the modern sense, from St. Hildegard of Bingen. (Read about Adelhard and Hildegard over at Zythophile!)

My mind was, to say the least, blown. But still…

What Does It Mean?

How, you may ask, does this affect my brewing?  Well, to be fair, it doesn’t, really. I mean, if your persona in the SCA runs to early Frankish or Germanic, it means that hopped beers are “allowed” (not that that was stopping you). You’re not “stuck” with gruitbeer (which is a topic for another post). And speaking of other posts, we’ll take a look at the bowls, candlestick, and chair in time.

This has me wanting to do another experimental brew on a future Brew Day, to do my own recreation of the batch. What say you? I’m open to questions (and suggestions) in the comments!

Brew Day, June 2018 – Hopleaf Mead

This month saw the brewing of a hopleaf mead. This is rather a strange-seeming batch, and a bit of an experiment, just to see if some 15th-century Venetians knew what they were talking about. (I opted not to make anything overly complex because it’s been in the low 90’s and humid. Also, we’ve been getting pavilions ready for Pennsic outside, which is hot, sweaty, and tiring. Firing up a burner was definitely counter-indicated.)

The hopleaf mead experiment stems from a passage in a Russian book on brewing. In it, a professor writing the foreword cites Ambrosio Contarini, part of the Venetian Embassy to the Shah of Iran from 1472-1475. On the trip back from Iran, Contarini and company stopped for about six months in Moscow. Part of the story of his travels reads thus:

They have no wine of any kind, but drink a beverage made of honey and the leaves of the hop, which is certainly not a bad drink, especially when aged.

The “leaves of the hop” (hopleaf) really caught my attention. It reads that way in both Russian (“с листьями хмеля“) and, once I found it, the original Italian (“con le foglie del bruscandolo“).  My first thought was, certainly they don’t mean hop leaves? Contarini has to be confused about what part of hops gets used. I mean, the cones are green, and somewhat leaflike.

Intrigued, I dug a little further. “Bruscandolo” is Venetian dialect for hops (Google says that “normal” Italian would be “luppolo”; and a medieval Italian-English Herbal Dictionary even went with “lupuli“). Nowadays, it apparently means the hop shoots or tips, which can be treated like asparagus shoots or fern shoots, and cooked up in a variety of ways. (I’ll have to try Risotto di Bruscandolo, or Bruschetta Bruscandolo, next spring.) But I found another reference, again to a Venetian in period:

The principal imports of England are spices, sugars, and all sorts of fruit from Spain and France, wine, oil, and what they call hops (obloni), the flower of the hop plant, and the “bruscandoli,” needed for the brewing of beer…

This is from an English translation of some diplomatic letters from Giacomo Soranzo, the Venetian Ambassador to France. Now we’ve got several hop references and names; just to confuse matters, Soranzo describes “hops” and “bruscandolo.” Fortunately, he specifies “hops” as “the flower of the hop plant.”

Given all of these varying terms and such, until and unless I find anything different, I’m going with the notion that “hops” (or “obloni“, and maybe “lupuli” as well) are references to the hop flowers/cones, and “bruscandolo” is a reference to the plant as a whole. As such, it makes some sense to assume that Contarini meant the actual leaves. What one would get from them, I have no idea; all of the bittering oils are found in the cones. Hopleaf might (might) give you some tannins. There’s bound to be some natural yeast there, as well. But experimenting is in order.

I brewed this up as a 1-gallon batch of sweet mead, Cascade Hops, used in Hopleaf Meadand put three full-sized, mature hop leaves into primary, lacking any indication as to how much to use. I rinsed the leaves, just to ensure there weren’t any spiders, insects, aphids, or the like. The particular leaves I used were from one of my Cascade mounds, for the reason of ease of availability–I’d have had to go across the field to get Magnums or Willamettes, and did I mention it’s been hot?
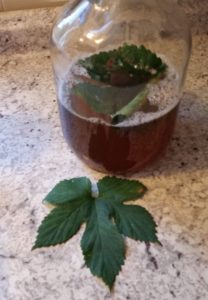
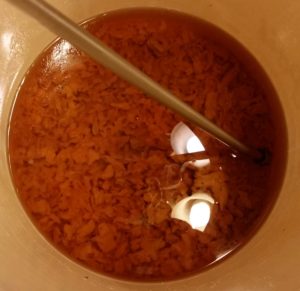
Having acquired the leaves, it was time to assemble the rest of the recipe. I’ve got about 20 pounds of Clover honey left over from a previous meadmaking spree. Three pounds or so into a gallon batch makes for a decently sweet mead. I’d thought about using K1V-1116, but didn’t have any on hand, so I opted to go with EC-1118 instead. They’ve got similar alcohol tolerances, and both ferment out cleanly. Also, after pondering things, K1V is a “killer” strain–it kills off other yeasts in solution with it. If the hopleaf is to add anything of a yeasty nature to the brew, going with EC-1118 will allow that to come out. The rest of the batch is pretty standard, with GoFerm and Fermaid O staggered nutrient additions.

Hopleaf Mead
Hopleaf Mead, prior to adding the final leaf. It also got diluted by almost half.

Hopleaf Mead (this is recipe #166 in my Little Black Book)

3.1 pounds of Clover Honey
1 packet Lalvin EC-1118 yeast
4.53 grams Fermaid-O (split into four additions, at 24, 48, and 72 hours, and on day 7)
2.5 grams GoFerm nutrient
3 mature Cascade hop leaves, rinsed

OG: 1.126

Five Minutes of Mead

I just realized that for all of my talk about brewing, I’ve neglected to talk about meads. While the majority of my mead recipes are for a full 5-gallon batch, I’ve recently discovered the joys of micro-batches. Here’s an article I wrote up for the newsletter of my local beekeeping association, discussing the process and providing a recipe for them:

Five Minutes of Mead with Misha

An issue many people have with making meads is finding vessels to use for the fermentation. As a homebrewer, I have a plethora of glass carboys of various sizes, from 7 gallons down to one-gallon. While convenient for me, they have a number of drawbacks: they tend to be large; they are heavy (especially when full of liquid); they are fragile, and tend to cut people when they break; and they can be expensive. A less-costly option would be fermenting buckets, made of food-grade plastic. These also come in a range of sizes. Plastic, however, scratches readily, meaning that they’re only really worthwhile for a small number of batches. Then there’s the issue of batch size: while you can brew a 1-gallon batch in a 5-gallon carboy or bucket, the extra airspace can be problematic for the brew. And brewing a 5-gallon batch requires a lot of honey: ten to fifteen pounds, or even more.

A simple solution is the use of pickle fermenting kits (readily found on Amazon; I think I saw a kit in Wegman’s, a while back, as well) and Mason jars. The kits consist of a Mason jar lid, which has been drilled and fitted with an o-ring to hold a standard homebrewing airlock. These are available in both wide- and narrow-mouth styles; I’m fond of the wide-mouth, for ease of adding things to the mead as I feel the urge. Quart jars are readily available, easily cleaned and sanitized (sterilized, even), and make the recipe math fairly easy.

Generally speaking, the amount of honey used will have the largest impact on the final sweetness of the mead. All other things being equal, using less than 2 ¾ pounds of honey per gallon will give you a dry mead; using more, up to about 3 ¼ pounds per gallon, yields an off-dry to semi-sweet mead. Going above that, up to about 4 ¼ pounds per gallon, gives increasingly sweeter meads, then above about 4 ½ pounds per gallon yields what is called “sack” mead.

Honey weighs about twelve pounds per gallon, give or take. Given that there are 16 cups to a gallon, a little kitchen math shows that four cups of honey would weigh three pounds. This means, conveniently, that one cup of honey in a quart is the equivalent of three pounds per gallon—a nice, semi-sweet mead. Want to drop it to two pounds per gallon? Only use 2/3 cup. Four pounds? 1-1/3. Little tweaks beyond that are a matter of tablespoons.

With all that said, here’s a fairly simple, “basic sweet mead” recipe, given in volumes for a quart; everything scales up directly to a gallon, or even five:

1 ¼ cups honey

Hot water to 1 quart

¼ packet of dry wine yeast (I recommend Lalvin K1V-1116, available here or here.)

  1. Put the honey in your fermenting container.
  2. Heat the water to a boil, then let it cool to just off the boil.
  3. Pour the hot water into the container, stirring to dissolve the honey.
  4. Let the liquid cool; when it reaches lukewarm (or below 100º F), add the yeast.
  5. Put the lid on the fermenter, and add water to the airlock.
  6. Give the vessel a shake twice a day for the first week.
  7. Leave the fermenter alone for about a month, then carefully decant the contents into a new fermenter, leaving behind as much sediment as possible.
  8. Once the mead is clear enough to see through, decant it once more.
  9. Let it sit another six months, then decant it a final time; now, you can put the “sealing” lid on the jar (ideally, not too tight-just enough to barely seal). The mead is ready to drink! It should keep a year or more in the refrigerator.

I’ve got another couple of articles that I can clean up a little bit and post, but this should be enough to get even the newest mead-maker started. Enjoy!

Brew Day, May 2018: Two brews, one experiment

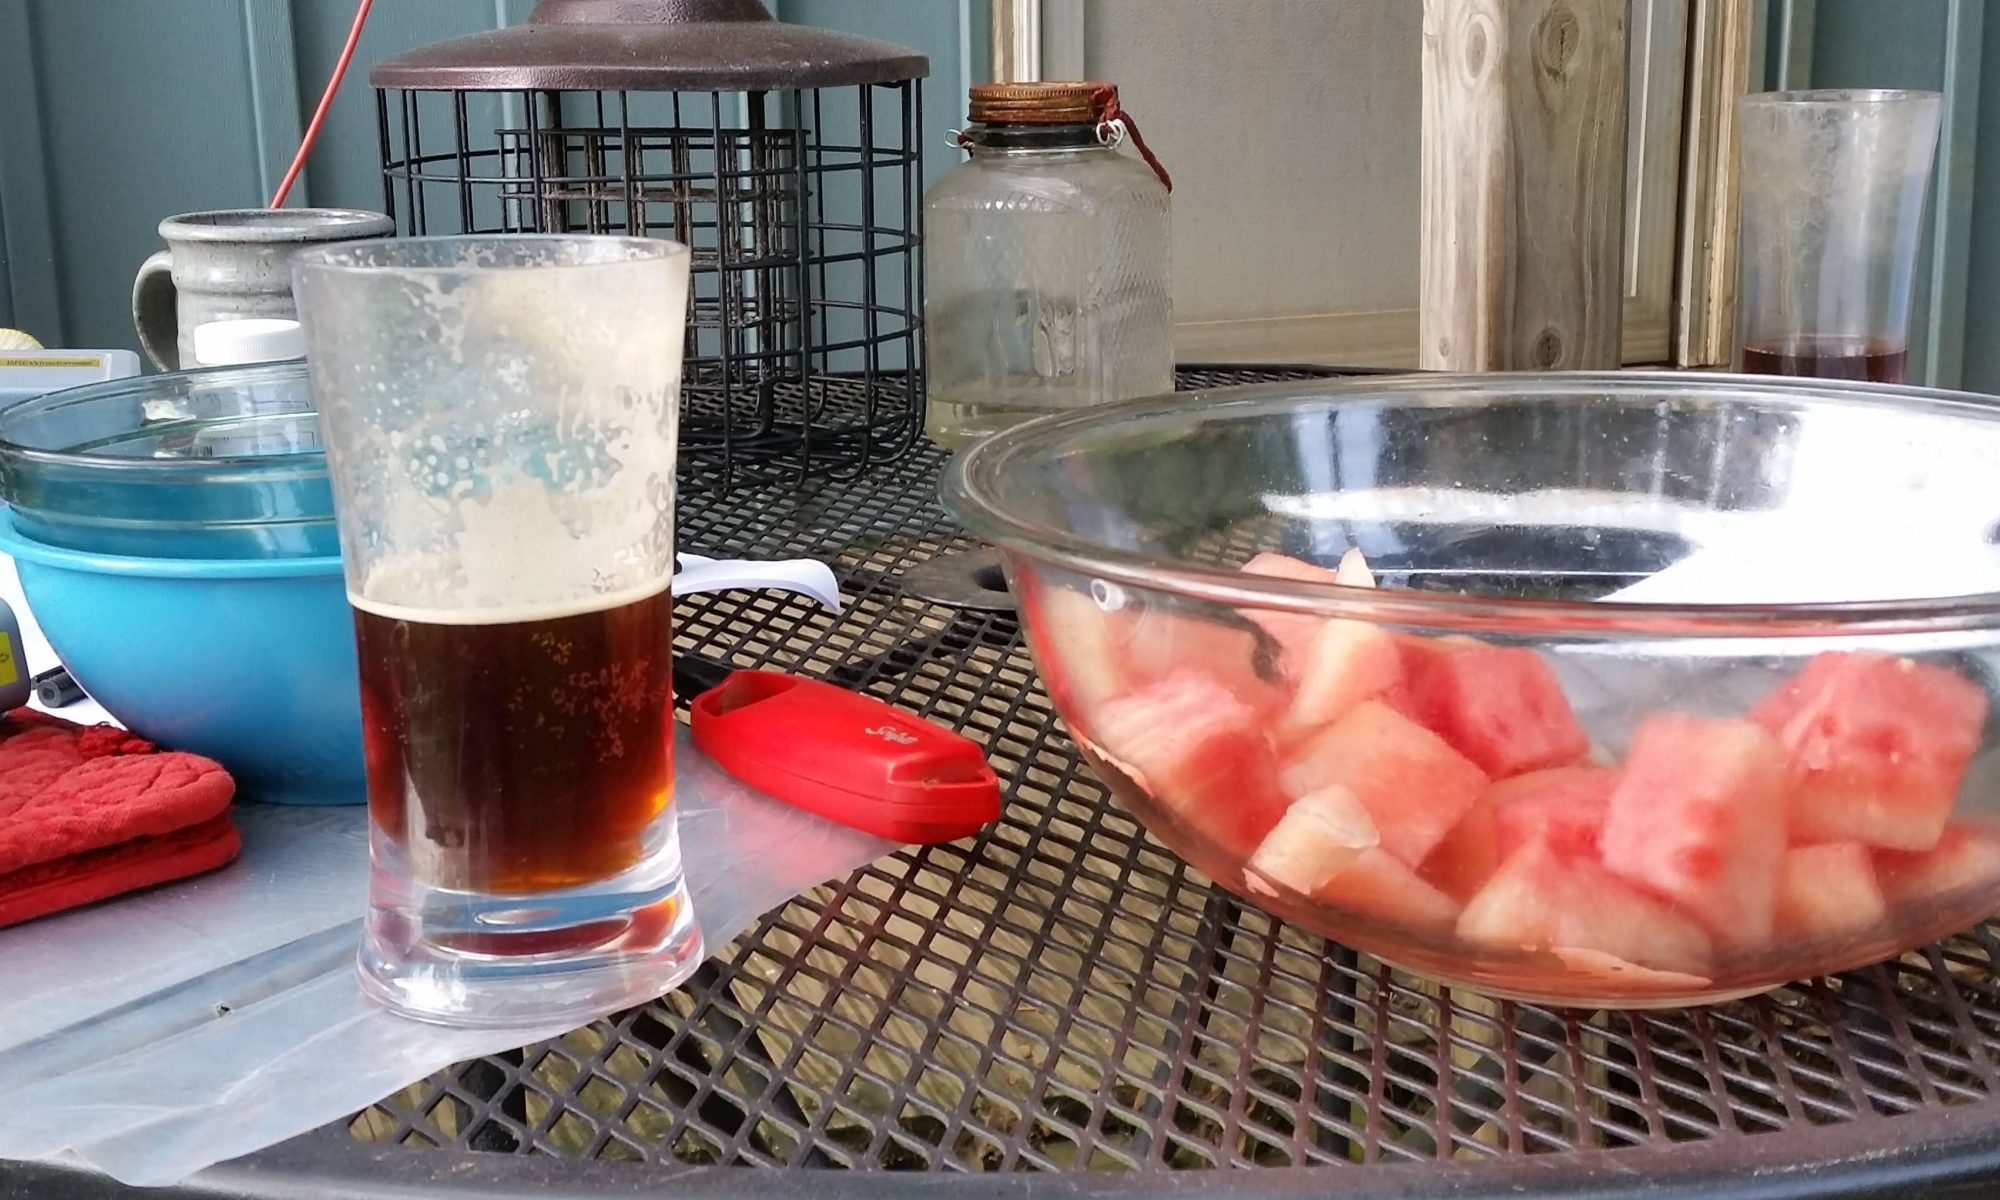
Beer and a little watermelon while brewing

The brewday for this month went of well, with the weather finally deciding to cooperate after a solid week of rain. Downtown flooded, but as we’re on a hill, with a slope away from the house in all directions, we didn’t get any of that. There was a little water seepage in the cellar, but the full extent was a little bit of mud.

Two batches were brewed: a Pils for my friend Dominick, based on a Stella Artois clone, and an experiment for myself, which I’ll get to in a moment. The pils I believe is going to be nice, if not exactly “to style.” I don’t have a setup right now to truly lager, but I can ferment fairly cool in the cellar. It was a simple grain bill, with 9.5 pounds of Pilsner malt. The hops were Saaz, added at the beginning, and with 5 minutes to go in the boil (1.5 ounces and .5 ounces, respectively). Dominick picked out WLP830, German Lager yeast. Volumes came out decently, and the gravity ended at about 1.046; I think it’ll be about 4.5% ABV, and the color should be straw gold. The hope is to have it ready for Pennsic.

The other batch was, as I mentioned, a bit of an experiment. The recipe was a riff off of my “scaled” Braunschweig Stadtmumme recipe: Munich and Vienna malts, with a healthy dose of German hops. I went for the higher-Alpha Herkules, rather than Tettnang, partly because I wanted something with some bittering to balance the Munich, and partly because I wanted to try them out. Nottingham yeast, to keep things simple. (The full recipe will be below.)

The crux of the “experiment” part, though, was the mash. Rather than my typical infusion/batch-sparge style, I went with a direct-fired mash, starting everything (grains and water together) at room temperature. This, again, is based on my reading of the Mumme recipes. They didn’t infuse, nor did they decoct; rather, they heated the mash for an hour and a quarter. That timeframe confused me at first, because it almost sounded like they were “simply” mashing for 75 minutes. But the more I thought about it, the more I figured that a properly-shaped vessel, with a strong enough fire under it, would probably get the volumes given in the original recipe (2172 pounds of grain, with “enough” water) up to the right temperatures in about that amount of time.

I went with 16 pounds of grain overall, and water to bring the overall volume up to about 9.75 gallons (about 34 quarts, give or take). With a pretty low flame on my propane burner, it took me about an hour–near enough to the original time–to get to my target mash temperature of 152 degrees F.  I stirred constantly, to try to prevent any scorching, but still got a small amount (maybe 4 square inches of “scorch”).

My reasoning for starting from room temperature is that they didn’t specify any mash steps, and didn’t indicate adding the malt to hot water. The ramp up from ~70 degrees F progressively all the way to ~152 F took the mash through all of the intermediate steps–liquefaction, acid rest, protein rest, glucan, then saccharification. Rather than discrete steps, they “slid” up through the entire scale.

Once I had the mash at temp, I turned off the burner, and a friend and I transferred the mash to my “normal” mash tun (an Igloo cooler, with a false bottom). I let it sit another 20 minutes, partly to complete whatever conversion it was going to do, and partly to let the grain bed settle somewhat. Then I ran off the wort, using a large bowl to recirculate the first gallon or so.

My yield pre-boil was a little lower than I might have liked, netting about 6.5 gallons; while the kettle I fired the mash in could have held more, the cooler was about at its limit. (I either need to make the beer “smaller,” with less grain, or find a bigger mash tun.) Otherwise, everything went off without a hitch. The batch is currently happily fermenting in my cellar, and I’ll have to wait until next month to see how things have gone.

Fermented beer and leesOne other “achievement” for today was kegging last month’s batch. It turned out quite nicely, as a sort of “lawn-mower beer.” Pale golden, light in body, and astoundingly clear. In fact, here’s a picture of the last few inches of beer in the fermenter, with the sediment clearly visible through it. I think this will be a lovely Pennsic beer, nice and crisp and thirst-quenching.


This month’s recipe, with ingredient links to MoreBeer:

Closer to Stadtmumme

11 pounds of Munich Malt
5 pounds of Goldpils Vienna Malt
1.5 ounces of Herkules leaf hops (11.3% Alpha, first wort hops)
1 Whirlfloc tablet (15 minutes in the boil)
1.5 ounces of Herkules leaf hops (11.3% Alpha, 10 minutes in the boil)
1 packet Nottingham dry yeast

Direct-fire the mash from room temp up to ~152 degrees, over the course of an hour. Initial boil volume ~6.5 gallons. Boil 1 hour. Final volume, 5 gallons. Initial Gravity: 1.073.

Seven tips to help you become a better brewer

When I started seriously getting into brewing, I began scouring every resource I could find for tips on how to improve my brews. The tips I found seemed pretty simple–use fresh ingredients; pay attention to fermentation temperatures; “relax, don’t worry;” that sort of thing–but I quickly noticed that they all seemed pretty uniform. No matter where I went, everybody had the same advice. While the “normal” tips out there will certainly help improve your brewing, I’ve compiled a list of a few more “off-the-wall” tips I have collected on my own. Without further ado:

  1. Learn how to taste beer. Not how to drink beer, but how to taste it, the way that serious wine people do “wine tastings,” but without the pretension. Train your palate. If you can’t recognize that a given beer is bad (or a bad example of style), compared to a different one that is good, then anything you do to “improve” your beer will come up short.  More importantly, if you can’t tell why something is bad, you won’t be as well-positioned to critically taste your own brews, or improve them.  Going through formal Cicerone training is a formal way of doing this, but it’s a bit costly.  A simpler, more informal way of doing it is to organize beer tastings with small groups. Take time to try the beers at their “intended” temperatures, and sip them as they warm up. Discuss what you’re tasting; talk about what you’d like to taste in the beers, and talk through how you might get there.
  2. Try commercial examples of lots of styles. Try lots of commercial examples. Try multiple versions of styles. Try them from as close to the source as possible–and try them “aged,” or even slightly stale. Learn what styles you like, and what you don’t like. Learn why, and how to explain why. This will help you focus your brewing–there’s no reason to brew Bourbon Imperial Double-Stouts, if you don’t like them. Likewise, it will help you be able to recommend brews to others. (If you don’t know it’s out there, or don’t know what it’s like, you can’t recommend it.)
  3. Join a club, group, or find a brewing mentor. Good places to go for this include your local homebrew store. I’ve heard stories of unfriendly ones, but I’ve never actually been to one; usually, all of the employees are happy to help, however they can. Find your local homebrew club: if there’s not a small one locally, there’s bound to be a larger one that covers your region. A great place to find your local store or club is the American Homebrewers Association (there’s a link in the sidebar to join); I also recommend getting a membership, both for the online resources, and for the discounts on brewing books, as well as Zymurgy magazine. Go online: there are several forums, where you can get informal advice and mentorship from some very experienced people. (My favorite, at present, is HomeBrewTalk.) Having these sorts of connections will provide good discussions of styles, techniques, and equipment; it can provide exposure to more examples of styles; you can get access to more resources, and possible use of equipment. Most importantly, it’s a way to get feedback for your own brews.
  4. Brew a lot. Think of it as the beer equivalent to the “10,000-hour rule.” If you don’t brew frequently, it’ll be like a “new experience” every time you go to brew. You’ll never really build your confidence, or your knowledge of your equipment. Having lots of experience bumps up the chances of things going smoothly–and increases your “library of tricks” to fix when things go poorly. A corollary of this rule is “Be willing to dump a batch.” You can’t hit a home run at every at-bat. And sometimes things to irreparably wrong. You’ll probably not have to dump many–I can count mine on the fingers of one hand–but you’ll likely have to dump one at some point along the way.
  5. Keep copious notes. Notes on your brews. Yes, the recipes, but more importantly on how the brew went and what happened. What went well, what went poorly. Document the recipes, as well as (especially) on-the-fly changes, because the one time you don’t, you’ll brew up the best thing you’ve ever tasted, and you won’t be able to remember how, or to recreate it. When things go really wrong, you’ll have a written record to assist in fixing the issue later. When the brew is done, add tasting notes on it, to figure out whether to improve it next time, and how, or even to decide if you want this to be a “house brew.”  I’ve got my so-called “Little Black Book,” in which I record all of these things; I can look back on 14+ years of batches for inspiration, corrections, or just to reminisce.
  6. Learn your ingredients. Know what goes into your beers, and how you can change the brew by varying the use of those ingredients. Taste things, at every step of the way. Chew on some grains. Take deep whiffs of hops. Try a drop of different yeasts. Taste the wort–first runnings, last runnings, post-boil. Take samples of the beer during fermentation, and taste them. Try your batch before it’s carbed. This will give you some baselines for what a “good” batch/process looks like, so you can recognize when things go off the rails. I’m also fond of the so-called “SMaSH” beers, where you use a single base malt and a single hop variety. (“SMaSH” stands for just that: Single Malt and Single Hop.) You can use these to taste individual ingredients–and you can do them in series, changing one ingredient each time, to compare different ones. Do a series with different base malts (using the same recipe, up to a given gravity, with a fixed hop schedule). Then do a series with the same base malt, changing the hop variety each time. Do a series of the same recipe, using a different yeast. Only change one ingredient at a time, to get fair comparisons. And, importantly, take notes.
  7. Know your equipment. If you change things up every time, you’ll change your beer somewhat, even using the same recipe. When starting off, you’ll be building up to your “final system,” possibly for a long time. (While I’ve used the same setup for years, I’m still planning improvements.) But try to stick to a basic setup as much as possible. If you maintain it & learn it, you’ll be able to adjust recipes based on your equipment–your batch efficiency will be unique, and how you run the brew will change. (For instance, my setup does not lend itself well to decoctions–so I avoid recipes with decoction mashes, or adjust them to be “normal” infusion mashes.) Also, you can calibrate your equipment: set up volume markers; learn how much dead space various vessels have; learn your typical boil-off rates, and the like. If you’ve got one, and I suggest you acquire one, input this data into your favorite brewing software–this will help when formulating your own recipes.

Those are probably the biggest tips that I’ve got, beyond the basics. If you’ve got more tips, please let us know in the comments!

Silly idea about wood…

A thought struck me as I was drifting off to sleep last night.

While the current material of choice for wooden casks is white oak, this certainly wasn’t always the case. (I know that ‘traditional’ balsamic vinegar, for instance, is aged in as many as three different woods.) I would imagine that liquid-tight casks could be made from nearly any good, close-grained hardwood (fruitwoods, mostly). What sort of wood character would have been imparted to the brew by these?

Nowadays, we homebrewers have done a bit of playing with oaked beers, adding oak chips to our fermenters & letting them soak in the brew for a while…

And this is when the light bulb went off: I’ve got a bag of apple-wood chips (nominally for smoking things) that I could use instead of oak chips. I almost certainly wouldn’t get the depth of character that I’d get with oak; I imagine it would be significantly more subtle, and I’d have to be careful what brew exactly I used it with, to not overpower the wood. But it would be interesting. And I can easily get similar bags of chips of different woods–cherry, maple, etc.

I’ve simply gotta try this. Something for me to play with over the winter brewing season, I should think. I imagine a nice Vienna lager, with maybe either apple and/or maple. If preliminary tests go well, perhaps a brown ale (or even a porter?) with some cherry.

Have any of you done this? Did you get good results? Bad? “Meh”? I’d really love to know–please let us know in the comments. (Or, if you have ideas for good wood/beer combinations, post that, too!)