Five Minutes of Mead

I just realized that for all of my talk about brewing, I’ve neglected to talk about meads. While the majority of my mead recipes are for a full 5-gallon batch, I’ve recently discovered the joys of micro-batches. Here’s an article I wrote up for the newsletter of my local beekeeping association, discussing the process and providing a recipe for them:

Five Minutes of Mead with Misha

An issue many people have with making meads is finding vessels to use for the fermentation. As a homebrewer, I have a plethora of glass carboys of various sizes, from 7 gallons down to one-gallon. While convenient for me, they have a number of drawbacks: they tend to be large; they are heavy (especially when full of liquid); they are fragile, and tend to cut people when they break; and they can be expensive. A less-costly option would be fermenting buckets, made of food-grade plastic. These also come in a range of sizes. Plastic, however, scratches readily, meaning that they’re only really worthwhile for a small number of batches. Then there’s the issue of batch size: while you can brew a 1-gallon batch in a 5-gallon carboy or bucket, the extra airspace can be problematic for the brew. And brewing a 5-gallon batch requires a lot of honey: ten to fifteen pounds, or even more.

A simple solution is the use of pickle fermenting kits (readily found on Amazon; I think I saw a kit in Wegman’s, a while back, as well) and Mason jars. The kits consist of a Mason jar lid, which has been drilled and fitted with an o-ring to hold a standard homebrewing airlock. These are available in both wide- and narrow-mouth styles; I’m fond of the wide-mouth, for ease of adding things to the mead as I feel the urge. Quart jars are readily available, easily cleaned and sanitized (sterilized, even), and make the recipe math fairly easy.

Generally speaking, the amount of honey used will have the largest impact on the final sweetness of the mead. All other things being equal, using less than 2 ¾ pounds of honey per gallon will give you a dry mead; using more, up to about 3 ¼ pounds per gallon, yields an off-dry to semi-sweet mead. Going above that, up to about 4 ¼ pounds per gallon, gives increasingly sweeter meads, then above about 4 ½ pounds per gallon yields what is called “sack” mead.

Honey weighs about twelve pounds per gallon, give or take. Given that there are 16 cups to a gallon, a little kitchen math shows that four cups of honey would weigh three pounds. This means, conveniently, that one cup of honey in a quart is the equivalent of three pounds per gallon—a nice, semi-sweet mead. Want to drop it to two pounds per gallon? Only use 2/3 cup. Four pounds? 1-1/3. Little tweaks beyond that are a matter of tablespoons.

With all that said, here’s a fairly simple, “basic sweet mead” recipe, given in volumes for a quart; everything scales up directly to a gallon, or even five:

1 ¼ cups honey

Hot water to 1 quart

¼ packet of dry wine yeast (I recommend Lalvin K1V-1116, available here or here.)

  1. Put the honey in your fermenting container.
  2. Heat the water to a boil, then let it cool to just off the boil.
  3. Pour the hot water into the container, stirring to dissolve the honey.
  4. Let the liquid cool; when it reaches lukewarm (or below 100º F), add the yeast.
  5. Put the lid on the fermenter, and add water to the airlock.
  6. Give the vessel a shake twice a day for the first week.
  7. Leave the fermenter alone for about a month, then carefully decant the contents into a new fermenter, leaving behind as much sediment as possible.
  8. Once the mead is clear enough to see through, decant it once more.
  9. Let it sit another six months, then decant it a final time; now, you can put the “sealing” lid on the jar (ideally, not too tight-just enough to barely seal). The mead is ready to drink! It should keep a year or more in the refrigerator.

I’ve got another couple of articles that I can clean up a little bit and post, but this should be enough to get even the newest mead-maker started. Enjoy!

Brew Day, May 2018: Two brews, one experiment

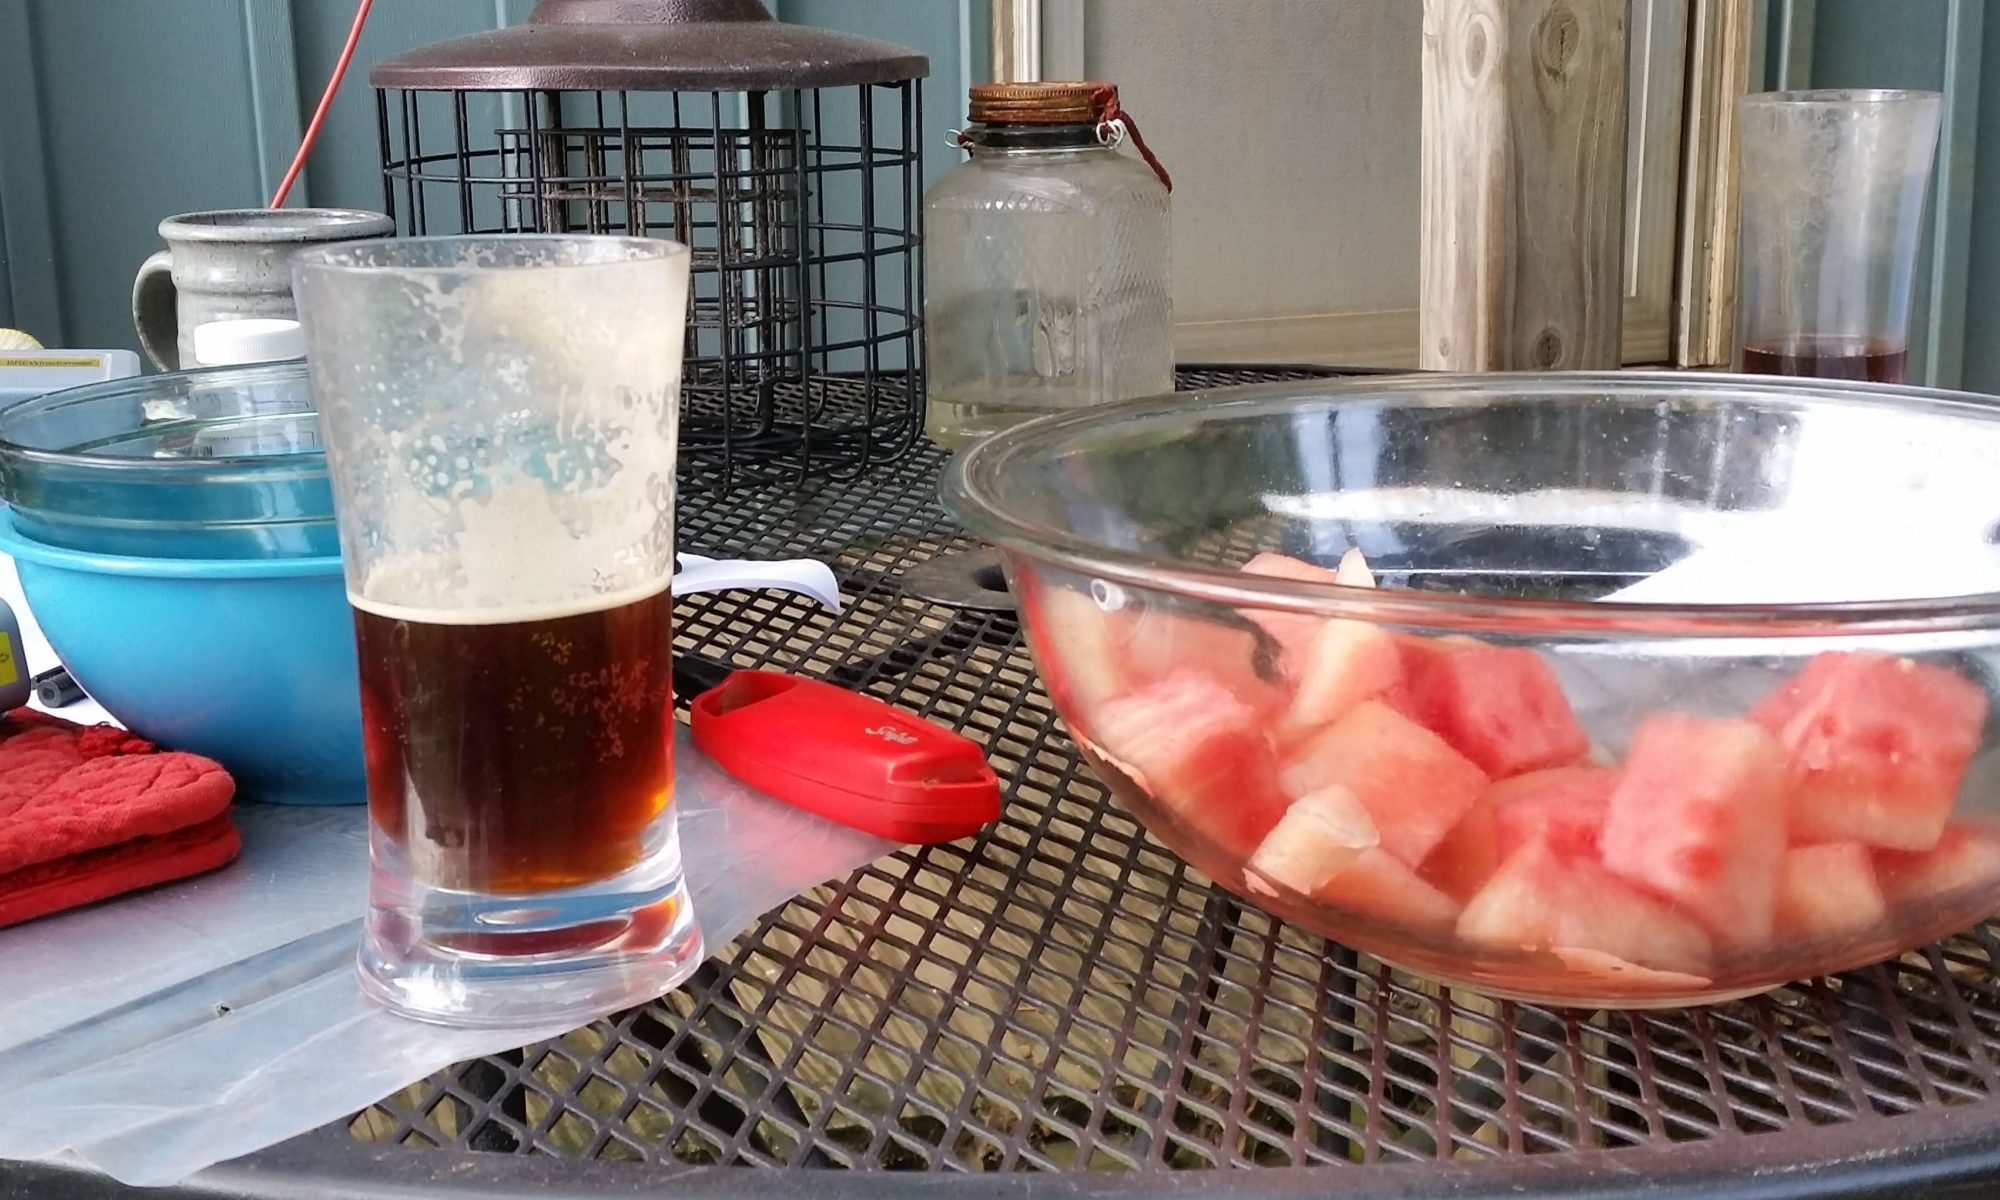
Beer and a little watermelon while brewing

The brewday for this month went of well, with the weather finally deciding to cooperate after a solid week of rain. Downtown flooded, but as we’re on a hill, with a slope away from the house in all directions, we didn’t get any of that. There was a little water seepage in the cellar, but the full extent was a little bit of mud.

Two batches were brewed: a Pils for my friend Dominick, based on a Stella Artois clone, and an experiment for myself, which I’ll get to in a moment. The pils I believe is going to be nice, if not exactly “to style.” I don’t have a setup right now to truly lager, but I can ferment fairly cool in the cellar. It was a simple grain bill, with 9.5 pounds of Pilsner malt. The hops were Saaz, added at the beginning, and with 5 minutes to go in the boil (1.5 ounces and .5 ounces, respectively). Dominick picked out WLP830, German Lager yeast. Volumes came out decently, and the gravity ended at about 1.046; I think it’ll be about 4.5% ABV, and the color should be straw gold. The hope is to have it ready for Pennsic.

The other batch was, as I mentioned, a bit of an experiment. The recipe was a riff off of my “scaled” Braunschweig Stadtmumme recipe: Munich and Vienna malts, with a healthy dose of German hops. I went for the higher-Alpha Herkules, rather than Tettnang, partly because I wanted something with some bittering to balance the Munich, and partly because I wanted to try them out. Nottingham yeast, to keep things simple. (The full recipe will be below.)

The crux of the “experiment” part, though, was the mash. Rather than my typical infusion/batch-sparge style, I went with a direct-fired mash, starting everything (grains and water together) at room temperature. This, again, is based on my reading of the Mumme recipes. They didn’t infuse, nor did they decoct; rather, they heated the mash for an hour and a quarter. That timeframe confused me at first, because it almost sounded like they were “simply” mashing for 75 minutes. But the more I thought about it, the more I figured that a properly-shaped vessel, with a strong enough fire under it, would probably get the volumes given in the original recipe (2172 pounds of grain, with “enough” water) up to the right temperatures in about that amount of time.

I went with 16 pounds of grain overall, and water to bring the overall volume up to about 9.75 gallons (about 34 quarts, give or take). With a pretty low flame on my propane burner, it took me about an hour–near enough to the original time–to get to my target mash temperature of 152 degrees F.  I stirred constantly, to try to prevent any scorching, but still got a small amount (maybe 4 square inches of “scorch”).

My reasoning for starting from room temperature is that they didn’t specify any mash steps, and didn’t indicate adding the malt to hot water. The ramp up from ~70 degrees F progressively all the way to ~152 F took the mash through all of the intermediate steps–liquefaction, acid rest, protein rest, glucan, then saccharification. Rather than discrete steps, they “slid” up through the entire scale.

Once I had the mash at temp, I turned off the burner, and a friend and I transferred the mash to my “normal” mash tun (an Igloo cooler, with a false bottom). I let it sit another 20 minutes, partly to complete whatever conversion it was going to do, and partly to let the grain bed settle somewhat. Then I ran off the wort, using a large bowl to recirculate the first gallon or so.

My yield pre-boil was a little lower than I might have liked, netting about 6.5 gallons; while the kettle I fired the mash in could have held more, the cooler was about at its limit. (I either need to make the beer “smaller,” with less grain, or find a bigger mash tun.) Otherwise, everything went off without a hitch. The batch is currently happily fermenting in my cellar, and I’ll have to wait until next month to see how things have gone.

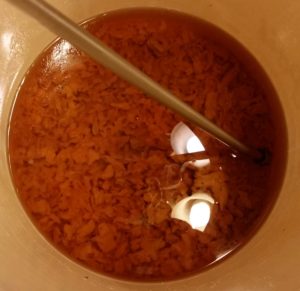
Fermented beer and leesOne other “achievement” for today was kegging last month’s batch. It turned out quite nicely, as a sort of “lawn-mower beer.” Pale golden, light in body, and astoundingly clear. In fact, here’s a picture of the last few inches of beer in the fermenter, with the sediment clearly visible through it. I think this will be a lovely Pennsic beer, nice and crisp and thirst-quenching.


This month’s recipe, with ingredient links to MoreBeer:

Closer to Stadtmumme

11 pounds of Munich Malt
5 pounds of Goldpils Vienna Malt
1.5 ounces of Herkules leaf hops (11.3% Alpha, first wort hops)
1 Whirlfloc tablet (15 minutes in the boil)
1.5 ounces of Herkules leaf hops (11.3% Alpha, 10 minutes in the boil)
1 packet Nottingham dry yeast

Direct-fire the mash from room temp up to ~152 degrees, over the course of an hour. Initial boil volume ~6.5 gallons. Boil 1 hour. Final volume, 5 gallons. Initial Gravity: 1.073.

Bees on the Homestead

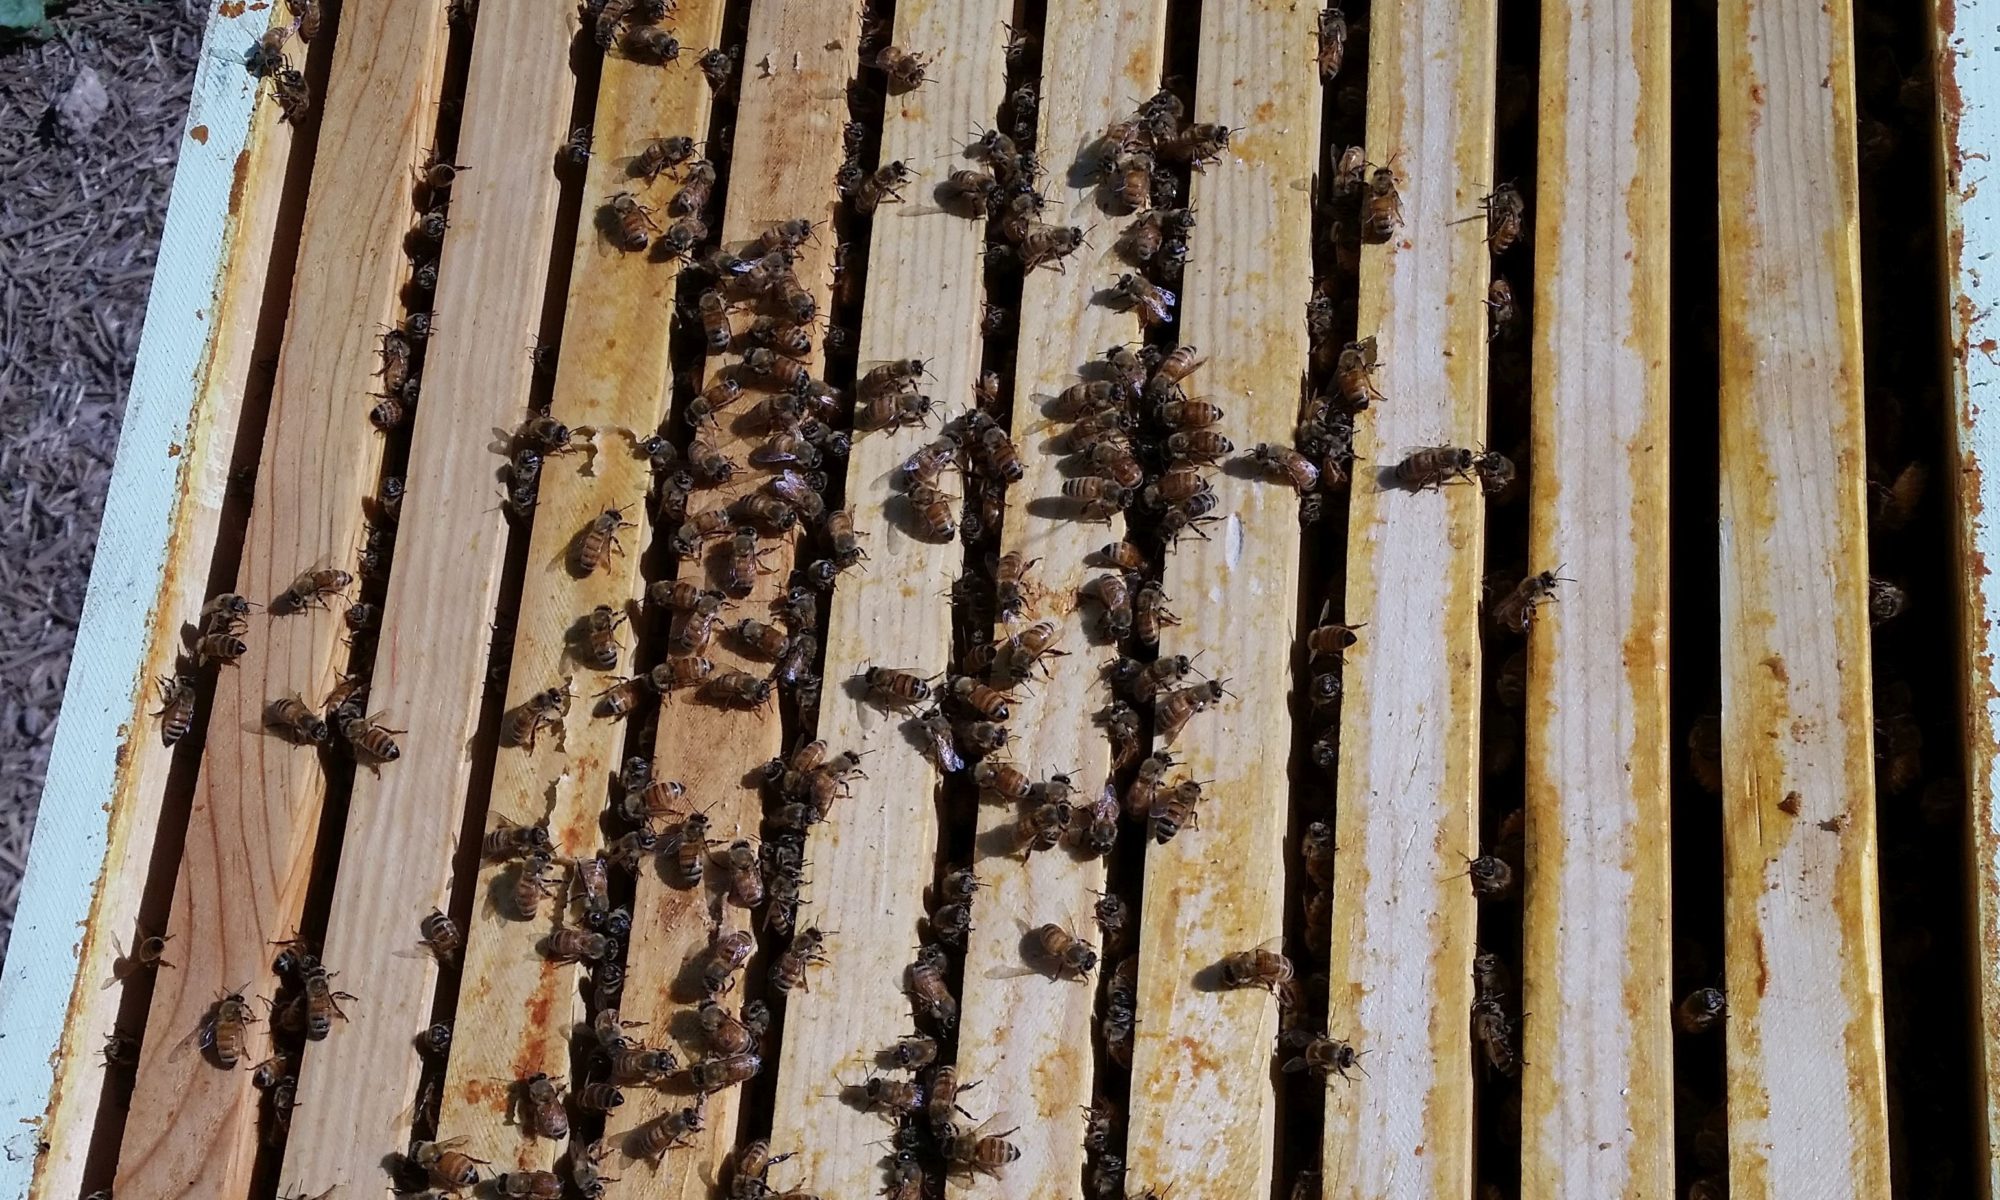
Bees atop the hive frames

Last night, I picked up two baby hives (‘nucs’)of bees for the homestead. They’re both of the Russian bee species, which I’m hoping will help with mites, this year. This will be our third iteration with bees; the first year, one hive absconded, and the second “collapsed,” probably because of varroa mites. The second year, one collapsed due to disease load from mites, and the other was done in, or at least helped along, due to yellowjacket wasps.

Russian bees, however, are from the same area that the mites evolved from, and have developed a resistance. Mostly, it’s a form of “hygiene”–they clean the mites off of themselves, and chew off the legs, to keep the mites from re-attaching. (Yellowjackets can still be problematic, but if the bee population is decent, they’ll defend themselves.)

The nucleus hives come as a box–a little bigger than a shoebox–with five hive framesof honeycomb, a queen, about six thousand bees or so, and whatever they’ve managed to pack into the frames (mostly “brood”–baby bees). Normally, when installing the bees in their “permanent home,” you put them at least overnight where the hives will be, and open up the nuc entrance. Then you wait for a sunny point the next day, so the foragers will be out, and you swap the nuc box for a “normal” box in the same spot. The foragers won’t notice, when they get back–but they’ll have at least double the amount of room.

Last night, however, Mother Nature decided that it was time to move a little more firmly towards summer, and she lit into us with severe thunderstorms, as well as off-and-on rain all day. Most of the time, I’d leave the bees where they were, and wait for a sunnier day to move them. These boxes, however, were cardboard. Waxed cardboard, to be sure, but still, I didn’t want to risk the bees getting wet, and possibly deciding to abscond. (“Absconding” is similar to swarming–they all pack up with whatever honey they’ve got, and go looking for a new home.)

So, I waited until it was between sets of rain, and the sun tried to come out for a minute, then I got to deal with two very full boxes of bees. Both queens have been sighted, and they’ve both been laying a nice brood pattern, so there will be even more bees before too long. The “big” hives have even more honey (left from last year’s bees) and are almost completely drawn-out with comb, so they have lots of room to lay. I’ll give them a peek next weekend, and see how they’re doing. If it’s gangbusters, I’ll consider putting some honey supers on. We’re in this year’s flow, with black locust starting to bloom, and tulip poplars coming soon after.

Of course, they’re calling for thunderstorms and rain all week, which will limit the foraging. So, a little supplemental sugar syrup has been mixed up, and I’ve got plenty of sugar to make more, if needs be. With luck, it’ll be afternoon thunderstorms (typical for this time of year), and they’ll make it out to the trees in the mornings.

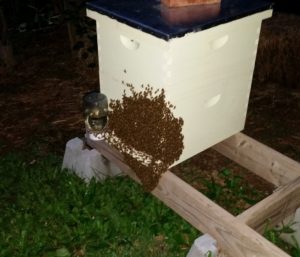
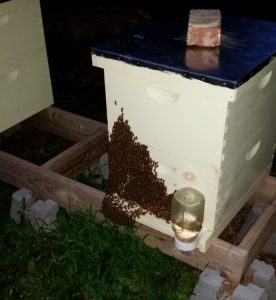
Given the rain, and the new accommodations, I didn’t get any pictures of them this weekend. The picture at the top of this post is from last year, at about this time. (Those are Italian bees, and as such are slightly larger and browner/yellower than the Russians.) But to tide us over until I can get some Bees bearding on the West hivepics, here are more from last year, as they “bearded” the fronts of the hives.

Bees bearding on the East hive If any of you keep bees, I’d love to hear about them in the comments. What kind? How successful have you been with them? What tips do you have, that you could share with us?

Seven tips to help you become a better brewer

When I started seriously getting into brewing, I began scouring every resource I could find for tips on how to improve my brews. The tips I found seemed pretty simple–use fresh ingredients; pay attention to fermentation temperatures; “relax, don’t worry;” that sort of thing–but I quickly noticed that they all seemed pretty uniform. No matter where I went, everybody had the same advice. While the “normal” tips out there will certainly help improve your brewing, I’ve compiled a list of a few more “off-the-wall” tips I have collected on my own. Without further ado:

  1. Learn how to taste beer. Not how to drink beer, but how to taste it, the way that serious wine people do “wine tastings,” but without the pretension. Train your palate. If you can’t recognize that a given beer is bad (or a bad example of style), compared to a different one that is good, then anything you do to “improve” your beer will come up short.  More importantly, if you can’t tell why something is bad, you won’t be as well-positioned to critically taste your own brews, or improve them.  Going through formal Cicerone training is a formal way of doing this, but it’s a bit costly.  A simpler, more informal way of doing it is to organize beer tastings with small groups. Take time to try the beers at their “intended” temperatures, and sip them as they warm up. Discuss what you’re tasting; talk about what you’d like to taste in the beers, and talk through how you might get there.
  2. Try commercial examples of lots of styles. Try lots of commercial examples. Try multiple versions of styles. Try them from as close to the source as possible–and try them “aged,” or even slightly stale. Learn what styles you like, and what you don’t like. Learn why, and how to explain why. This will help you focus your brewing–there’s no reason to brew Bourbon Imperial Double-Stouts, if you don’t like them. Likewise, it will help you be able to recommend brews to others. (If you don’t know it’s out there, or don’t know what it’s like, you can’t recommend it.)
  3. Join a club, group, or find a brewing mentor. Good places to go for this include your local homebrew store. I’ve heard stories of unfriendly ones, but I’ve never actually been to one; usually, all of the employees are happy to help, however they can. Find your local homebrew club: if there’s not a small one locally, there’s bound to be a larger one that covers your region. A great place to find your local store or club is the American Homebrewers Association (there’s a link in the sidebar to join); I also recommend getting a membership, both for the online resources, and for the discounts on brewing books, as well as Zymurgy magazine. Go online: there are several forums, where you can get informal advice and mentorship from some very experienced people. (My favorite, at present, is HomeBrewTalk.) Having these sorts of connections will provide good discussions of styles, techniques, and equipment; it can provide exposure to more examples of styles; you can get access to more resources, and possible use of equipment. Most importantly, it’s a way to get feedback for your own brews.
  4. Brew a lot. Think of it as the beer equivalent to the “10,000-hour rule.” If you don’t brew frequently, it’ll be like a “new experience” every time you go to brew. You’ll never really build your confidence, or your knowledge of your equipment. Having lots of experience bumps up the chances of things going smoothly–and increases your “library of tricks” to fix when things go poorly. A corollary of this rule is “Be willing to dump a batch.” You can’t hit a home run at every at-bat. And sometimes things to irreparably wrong. You’ll probably not have to dump many–I can count mine on the fingers of one hand–but you’ll likely have to dump one at some point along the way.
  5. Keep copious notes. Notes on your brews. Yes, the recipes, but more importantly on how the brew went and what happened. What went well, what went poorly. Document the recipes, as well as (especially) on-the-fly changes, because the one time you don’t, you’ll brew up the best thing you’ve ever tasted, and you won’t be able to remember how, or to recreate it. When things go really wrong, you’ll have a written record to assist in fixing the issue later. When the brew is done, add tasting notes on it, to figure out whether to improve it next time, and how, or even to decide if you want this to be a “house brew.”  I’ve got my so-called “Little Black Book,” in which I record all of these things; I can look back on 14+ years of batches for inspiration, corrections, or just to reminisce.
  6. Learn your ingredients. Know what goes into your beers, and how you can change the brew by varying the use of those ingredients. Taste things, at every step of the way. Chew on some grains. Take deep whiffs of hops. Try a drop of different yeasts. Taste the wort–first runnings, last runnings, post-boil. Take samples of the beer during fermentation, and taste them. Try your batch before it’s carbed. This will give you some baselines for what a “good” batch/process looks like, so you can recognize when things go off the rails. I’m also fond of the so-called “SMaSH” beers, where you use a single base malt and a single hop variety. (“SMaSH” stands for just that: Single Malt and Single Hop.) You can use these to taste individual ingredients–and you can do them in series, changing one ingredient each time, to compare different ones. Do a series with different base malts (using the same recipe, up to a given gravity, with a fixed hop schedule). Then do a series with the same base malt, changing the hop variety each time. Do a series of the same recipe, using a different yeast. Only change one ingredient at a time, to get fair comparisons. And, importantly, take notes.
  7. Know your equipment. If you change things up every time, you’ll change your beer somewhat, even using the same recipe. When starting off, you’ll be building up to your “final system,” possibly for a long time. (While I’ve used the same setup for years, I’m still planning improvements.) But try to stick to a basic setup as much as possible. If you maintain it & learn it, you’ll be able to adjust recipes based on your equipment–your batch efficiency will be unique, and how you run the brew will change. (For instance, my setup does not lend itself well to decoctions–so I avoid recipes with decoction mashes, or adjust them to be “normal” infusion mashes.) Also, you can calibrate your equipment: set up volume markers; learn how much dead space various vessels have; learn your typical boil-off rates, and the like. If you’ve got one, and I suggest you acquire one, input this data into your favorite brewing software–this will help when formulating your own recipes.

Those are probably the biggest tips that I’ve got, beyond the basics. If you’ve got more tips, please let us know in the comments!

Homemade Mayonnaise

What to do when the world has handed you eggs, and you’re running out of space to store them?  Make homemade mayonnaise!

More specifically, my wife has decided that she needs to take firmer control of her meals for the week, which necessarily means that the kids and I will also be taken under her wing. While working up lunches, making large batches of egg and tuna salad, she noted that we were running low on mayo… And we’ve got something like ten dozen eggs in the fridge. Well, eggs being one of the main mayonnaise ingredients, we decided that it would be most cost-effective to make our own.

Now, we’ve made mayonnaise before. Back before we moved out to the homestead, in the heady days when Alton Brown had his show on regularly, we tried out his recipe with some success. But that was years ago, and I at first figured I’d try something different. Enter: the venerable Fanny Farmer Cookbook.

I’m not sure what happened. We followed the instructions precisely. Maybe we added the oil too quickly? Maybe there wasn’t enough mustard?  Regardless, it never set up. It remained a liquidy, mayonnaise-flavored soup. We tried the “repairs” that they suggested: adding another egg yolk. More oil. More mustard. Nope.

What eventually worked was starting smaller. We poured everything into a different container, and started over with a single egg yolk, a dollop of mustard, and a splash of vinegar. We got that spun up, then really slowly started adding the previous batch in. At first, literally drop. By. Drop. Then, slowly increasing the speed, but never as fast as the first attempt. I knew things were going well when I started seeing blobs of (recognizably) mayonnaise getting flung into and about the sides of the food processor. After a few short moments, it was done.

The taste was, at first, underwhelming… But after a short while in the fridge, it all came together nicely! Unfortunately, my wife was still making things…

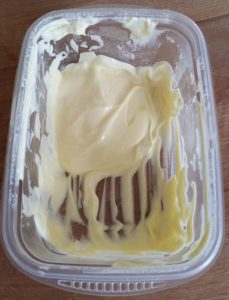
One third of the batch of mayonnaise
I almost couldn’t get to it fast enough for a picture.

Here’s the recipe I used:

Blender Mayonnaise

1 whole egg (room temperature)
1/4 tsp salt
1/2 tsp dry mustard, or 1 tsp Dijon
1 cup oil (olive, peanut, vegetable, whatever)
1-1/2 Tbsp cider vinegar or lemon juice
1 Tbsp boiling water
additional salt to taste

Place the egg, salt, mustard, and 1/4 cup of the oil in the blender. Turn on the blender, and add the remaining oil slowly, in a thin stream (almost drop-by-drop). Add the vinegar or lemon juice and the water. Taste, add salt if desired, and refrigerate.

Silly idea about wood…

A thought struck me as I was drifting off to sleep last night.

While the current material of choice for wooden casks is white oak, this certainly wasn’t always the case. (I know that ‘traditional’ balsamic vinegar, for instance, is aged in as many as three different woods.) I would imagine that liquid-tight casks could be made from nearly any good, close-grained hardwood (fruitwoods, mostly). What sort of wood character would have been imparted to the brew by these?

Nowadays, we homebrewers have done a bit of playing with oaked beers, adding oak chips to our fermenters & letting them soak in the brew for a while…

And this is when the light bulb went off: I’ve got a bag of apple-wood chips (nominally for smoking things) that I could use instead of oak chips. I almost certainly wouldn’t get the depth of character that I’d get with oak; I imagine it would be significantly more subtle, and I’d have to be careful what brew exactly I used it with, to not overpower the wood. But it would be interesting. And I can easily get similar bags of chips of different woods–cherry, maple, etc.

I’ve simply gotta try this. Something for me to play with over the winter brewing season, I should think. I imagine a nice Vienna lager, with maybe either apple and/or maple. If preliminary tests go well, perhaps a brown ale (or even a porter?) with some cherry.

Have any of you done this? Did you get good results? Bad? “Meh”? I’d really love to know–please let us know in the comments. (Or, if you have ideas for good wood/beer combinations, post that, too!)

Three Beers from Brunswick

In trying to track down my “Holy Grail” of a pre-1600 Einbecker Bier, I stumbled across a mention of another of my favorite period beers: the Braunschweiger (Brunswick) Mumme. This reference was in “Hochtnutzbar und Bewährte Edle Bierbrau-Kunst”, by David Kellner, printed in Leipzig in 1690. While this is a bit post-period for my purposes, I’m confident enough to say that it’s “close enough” for horse-trading. Unlike Einbeck, Brunswick maintained a continuous brewing tradition, which inclines me to think that it was less likely to change significantly. (The brewing of Einbecker Bier moved to Munich after the 30 Years’ War, and there it evolved into today’s Bock.)

Kellner praises Mumme for its “exquisite strength, lovely taste, and thick, brown, beautiful color.” He also describes how it is carried far and wide over land and sea, for which the Braunschweiger brewers have created “Schiff-Mumme,” or Ship-Mumme. For their own usage within the town, they have a version called “Stadt-Mumme,” or City-Mumme; lastly, they make “Erndtbier,” or Harvest Beer, to sell to the peasants at harvest-time.

The description of what goes in to the various Brunswick Mummes is as follows:

Take two Braunschweiger wispels of quite well-washed and dried barley-malt, together with sufficient water for , and cook it for five quarters of an hour, scoop it into a vat and let it stand a little, then again it goes into the pan (but only the broth, without the malt), and once again for three hours with 15 himpen of good Country-Hops therein cook well. After this they cool in a vat, and allow them to be fermented adequately before they place it in barrels and bring it into the cellar, which afterwards, when it has sufficiently fermented and separated from the yeast, it will be tapped in the cellar and sent away. From this they receive commonly four half-barrels of Mumme.

The common City-Mumme, to be drunk quickly, take the same amount barley-malt, only 4 himpen of hops, and proceed as with the previous one. But if it is supposed to lie long, take 10 maß of hops to it, and put the brew in seven barrels.

For their Harvest-Beer they take two wispels of barley malt, 12 maß of hops, cook them with enough water for nine barrels of beer, in the same way as before, and clear it up, then they seal up the barrels, and sell it to the peasants at harvest-time.

First, let’s do an analysis of the brewing technique. It’s obviously different than the Berliner Beer process I’ve documented, particularly in that it assumes pre-malted grain. Judging from the above, I would guess that the “five quarters of an hour” portion is the mash, and it takes that long to bring everything up to temp, running it up from room temperature. It would obviously go through each stage of the various rests–liquiefaction, acid, protein, et cetera. I would have to run experiments (or dig up information on specific mass and heat absorption) to see if they’d get up to a good mashing temp in that amount of time.

Once they’ve got their “cooked mash,” they let it sit for a while, probably finishing whatever conversion is going to happen, before returning the liquid to the kettle. They then perform a three hour boil. I shudder to imagine how much fuel that must have taken. After the boil, they cool the wort, then perform what appears to be an open fermentation, before casking the beer.

One point of interest to me is that they’re using the same grain bill for these beers, “adjusting” them by varying the hopping rate and the output volume. It’s not especially significant, other than to note that modern homebrewers go the opposite route: we aim for a consistent output volume (typically 5 gallons), and adjust the grain bill and hops to meet that.

Another point to make here is that this helps dispel the notion of “brewing being mostly done in the home, for personal use.” They would need two vessels large enough to hold over a ton of sodden grain, plus the additional mash liquid. I’ve heard of ways cities got around this (which I will put in a different post), but this is obviously not “homebrewing” in any real sense of the word.

That being said, the next thing to do is to get the measurements into something usable to us. For definitions of the different measures, and for lack of something better at the moment, I’m using the Vollstaendiges Handbuch der Muenzen, Maße und Gewichte aller Länder der Erde, by Johann F. Krüger, which dates from 1803 (Google Books edition). Here’s what we’ve got:

  • 1 Braunschweiger Wispel is 329.1 gallons
  • 1 Himpen is 1/40 of a Wispel, or 8.23 gallons
  • 1 Fass, or barrel, of Mumme is 95.95 gallons (for the curious, 1 Fass of Bier is 103.62 gallons; I’m not sure why the difference)

Those are, where available, the Brunswick measurements (as for the Wispel). Failing that, I’m using the Saxony versions, unless I can reason my way into something different. The Duchy of Brunswick/Braunschweig was part of the Kingdom of Saxony, when it wasn’t independent–but that’s more history than I want to go into here. (Maybe I’ll go over it a bit in its own post, some day.)

From my own empirical observations, I get about 3.3 pounds of barley malt per gallon. The hops are problematic, as we don’t know for sure how they were packed. Are they using hop bales? “Trod” hop pockets/sacks (as used in Victorian England)? Loose hops? I’m going to assume some form of tightly packed (bales or pockets), and use that as an upper bound. Two sources (Stewart and Priest’s Handbook of Brewing, and Hornsey’s Brewing) give me bale and pocket volumes and weights of .83 to 1.25 pounds per gallon and 1.02 pounds per gallon, respectively. So, roughly 1 pound per gallon should work as a rough maximum.

Then there’s the water. “Enough” water can be difficult to estimate, but with a brewing calculator, we’ve got the information to figure it all out. I don’t have an analysis of medieval Brunswick water available to me, but it was likely well-water, and probably of moderate hardness. This would tend to promote somewhat darker beers than otherwise.

Anyway, if we plug in the numbers, the raw recipes look something like this:

Schiff-Mumme
2172.06 pounds of barley malt
123.45 pounds of hops
Final volume 191.9 gallons

Stadt-Mumme
2172.06 pounds of malt
32.92 pounds of hops, plus 2.64 pounds for dry-hopping
Final volume 671.65 gallons

Erndte-Bier
2172.06 pounds of malt
3 pounds of hops
Final volume 863.55 gallons

Those are some big beers!  My calculations tell me that the Schiff-Mumme would need something north of 285 gallons pre-boil, and significantly more than that for the mash (considering the grain will absorb some). It also gives me an OG of 1.288, assuming 70% efficiency–which is likely optimistic. IBUs would depend largely on the hops being used; assuming something with about 3% AA, you’re looking at about 79-80 IBUs.  If they were using stronger hops, it would quickly bump up towards the (theoretical) 100 IBU maximum, but given that OG, you’d need some hefty bittering to balance it! The color, even if you assume something on the order of a modern Pale Ale malt, comes out roughly 20 SRM, which looks like a nice brown, darker than a Newcastle, say, but not as dark as a Dunkel.

The Stadt-Mumme needs about a thousand gallons of wort pre-boil. I’m seeing an OG of 1.078, with 40-ish IBUs. The color is significantly lighter, coming in at about 5 SRM, using Pale Ale malt.  And the Erndte-Bier needs 1285 gallons of wort pre-boil, clocks in at about 1.050, 8-9 IBUs, and about 4 SRM, or the same color as the Pale Ale malt.

But, as I mentioned, no homebrewer these days has the equipment to mash a ton of grain at a time. (If you do–please contact me; I’d like to talk.)  So, to make it work, we have to scale things down. Here’s what I come up with, to make 5 gallon batches of each:

Schiff-Mumme
56.47 pounds of grain
3.2 pounds of hops
Mash with 36 quarts of water

Stadt-Mumme
16.07 pounds of grain
3.9 ounces of hops, plus .3 ounces for dry-hop
Mash with 37 quarts of water

Erndte-Bier
12.6 pounds of grain
.25 ounces of hops
Mash with 38 quarts of water

I’m not sure the average homebrewer would be able to brew up a Brunswick Schiff-Mumme on typical equipment. Not all-grain, certainly; although the adventurous could probably come up with a usable extract recipe. The Stadt-Mumme looks like a hoppy Oktoberfest, in just about everything except color. Playing with the grain bill, to move it away from just the base malt, would make for a really tasty beer. And the Erndte-Bier, well–it looks okay, if a bit strong, for quenching the thirst and providing some extra calories on a long workday outside.

In all of this, I’ve avoided mentioning what yeast is used. I haven’t seen any useful analyses that would point in one direction or another, and certainly no actual cultures from the time. I’d go with something German, or at least Continental, if possible; if it had a good alcohol tolerance, so much the better. The Schiff-Mumme, after all, is strong enough that even a Champagne yeast would have a hard time drying it out. An Alt yeast might work for the other two, but really, you should experiment and decide what you like best. I can imagine a California Ale/Chico/1056 batch of Stadt-Mumme being tasty, with the right hops.

I hope this has inspired you to brew a batch of Brunswick Beer! If you try any of these recipes, please let me know, either via email or in the comments!

Working Up To Bockbier

I will, one day, brew the full version of my proposed Einbecker Bier (the “original” Bockbier). That day, however, was not today.

Today’s Brew Day, on Saturday as opposed to the normal Sunday due to outside scheduling conflicts, was playing around a bit with the bones of the basic recipe (which can be found in another post–as soon as I get it written and published). I kept the 2/3 barley, 1/3 wheat grist, but scaled it back from a 1.078 SG to a planned mid-1.050’s–and then hit 1.068 anyway. This should bring the ABV down from about 7.5% to a more quaffable not quite 6%. I also stepped away from the Munich malt in favor of Vienna, which should give a breadier maltiness. (In my opinion, Munich can almost get overwhelming when used in large percentages–almost a chewy meatiness, if you will. It’s not bad, but generally needs to be either less than 100% of the malt bill, or hit with a large dose of hops). It also dialed the color back from garnet-amber to somewhere in the gold range, where the original Bockbier was (described in period as “golden”–and more detail will be in the afore-mentioned post).

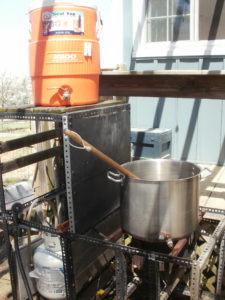
Low-tech Brew Rig, starting out on Almost Bockbier Brew Day
My trusty, somewhat rusty, Brew Rig, ready to start heating strike water.

I’ve also fooled around with the hop schedule: where the original was all bittering hops all the time, I’m doing FWH and some late hops. This should add a bit of hop complexity, even though it’s still a single-hop beer. It’s all Tettnang whole-leaf hops, because I’ve got a bunch of them waiting to be used. (As of this writing, they’re harder to get hold of as whole-leaf; here’s a link to some Tett pellets.)

Lastly, I went with White Labs San Francisco Lager yeast. This choice was made to cover a number of issues. First and second, the temps in my cellar have been fluctuating around the low 50’s; too warm for most lagers, but too cold for most ales-and I want this to be more lager-like, which pretty much means Kolsch yeast or San Fran. Third, given the weather has finally turned, everyone is brewing this weekend, and the yeast selection at my LHBS was pretty well decimated. None of my first, second, or third yeast choices were available, so here we are.

As things are wont to do, technical snags abounded. My first propane tank ran out while I was heating the sparge water; when I unscrewed the regulator, its O-ring broke. After quickly scrambling and scrounging out all of the other suitable propane hoses I’ve got, I determined that none of them had functional O-rings. A trip to the hardware store later, and my channel-lock pliers had wandered off–making connecting my second propane tank complex.

But, all things considered, it was a good day. The weather was nice, beer was brewed, and no one was killed in the making of today.

The recipe, for the curious. This is #164, in my Little Black Book.

Almost Bockbier
9 pounds Vienna Malt
3 pounds Wheat Malt
2 ounces Tettnang leaf hops (3.7% AA, FWH)
1 tablet Whirlfloc (15 min. in boil)
1 ounce Tettnang leaf hops (3.7% AA, 10 minutes in boil)
1 packet WLP-810 San Francisco Lager Yeast

Mash at 156 degrees F.  Sparge to 8 gallons pre-boil.  Boil for one hour. OG: 1.068, 5.5 gallons into the fermenter. Ferment at “cellar temps” (currently upper 50’s F).
(Brewed 14 April 2018)

Anatomy of a Project, Part I

Let’s follow a project of mine from (nearly) the beginning, through to as far as I take it.  Since the project is, as yet, barely started, this will be the first of a series.

I’m not really certain when I got interested in making jewelry. I mean, I’ve entertained the notion of taking up silversmithing classes for probably over a decade. I’ve toyed with the notion of casting (starting with pewter, and working my way up to precious metals) for nearly as long. But gems and stones, particularly cutting and polishing, that’s a fairly new one. Maybe two or three years? But I finally decided to act on that one a few months ago.

The root of the idea was wondering how exactly bezel settings worked–probably based on admiring some of the lovely Anglo-Saxon “gold-and-garnet” jewelry that’s been found. It struck me that the garnet pieces were certainly shaped and polished, and I began thinking about that. I know that precious stones are “lapped” (faceted) using fancy setups with spinning abrasive discs, using finely-tuned armatures to ensure the “proper” angles to the various faces. I reasoned that the first faceted stones probably were lapped and polished by hand, with a somewhat more “organic” form. So I set about to figure out how they did it.

YouTube, one of my normal “how would I…” starting points, was rather mum on the subject. There are several videos about lapping gems, all using modern tools. There are a couple of videos about making homemade modern lapping tools… Just when I thought all was lost, I found one video on polishing and faceting gemstones by hand, using no power tools. Not historical, but it was a start, and told me it could be done.

The next typical online stops for this sort of project include Cariadoc’s Miscellany and Stefan’s Florilegium, two great repositories of knowledge, sources, and information. The Miscellany is a series of essays, classes, documents, papers, and such by one of the more famous people in the SCA, Duke Cariadoc of the Bow. The Florilegium, meanwhile, is a curated compilation of email discussions from various SCA forums, dating from the early days of computer bulletin boards and such. Both pointed me at several books; the Miscellany was extra helpful and gave me some quotes.

One of these sources, which I was able to get my hands on fairly quickly, was Theophilus’ treatise On Divers Arts, which in addition to covering all sorts of metalworking has a chapter on polishing gemstones. Theophilus recommends using powdered emery stone and water on a copper plate as the abrasive; the runoff is collected in a basin and allowed to settle and dry. Afterwards, the powder is sprinkled on a flat limewood board and wet with saliva; this is used to polish the gem.

As it happens, I have access to emery powder (available as filler for making pincushions) and a copper plate that I acquired for a different project some time ago. “Limewood” is probably the same wood that we would call “basswood,” and is available in most craft stores.

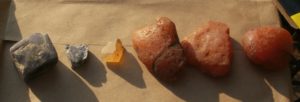
Iolite and Carnelian Agate for the Faceting Project
Two Iolite on the left, four Carnelian Agate on the right.

Rough gem material is available from many sources on EBay and Amazon; I have some Carnelian Agate, some Fire Quartz, and some Iolite readily at hand, and if I get decent results with these, I’ll get some others.

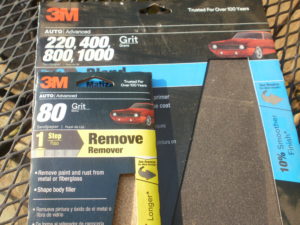
In the interest of following the guidelines from the YouTube video, I’ve got an assortment of wet/dry sandpaper, and I’ll use that to give it a go.

Sandpaper assortment
Assortment of Wet-Dry Sandpaper

My theory is that they’ll work more quickly than the emery; we’ll see how they go.

Additionally, knowing that some stones–the harder ones, such as any of the corundum (ruby and sapphire), and a few others–are likely to be very slow to polish up, I’ve got some modern sharpening stones, which use diamond powders of various grits. I’m hopeful that they’ll do a quicker job even than the sandpaper.

That pretty well covers the acquisition of inspiration, ideas, and materials for the project; next time around, we’ll give some of the methods a try.

Finding Inspiration for Historical Crafts

Finding the inspiration to pick up a new craft, especially within the SCA, can be challenging. Let’s face it, it’s one of the two most difficult parts of anything in this game we play–the other one being actually getting started!

A good place to start is to take a hard look at your persona, and think about the things they would have used and/or liked. Don’t limit yourself to the things he or she would have known or done; that’s a decent starting point, but is probably a stricter limit than necessary. And don’t worry about trying to contrive a “backstory” as to why you (as your persona) would know how to do such a thing. While our ancestors were content with relatively narrow, focused lanes to live, work, and play in, we’re not bound by those conventions.

I find that inspiration will tend to strike while I’m noodling about on Pinterest. (Back in the Dark Ages, before the Internet, the equivalent was “going to the library,” an option that is still available today…)  Or I’ll be pondering a question like “how did they do X, originally?” Very often, this will lead me down a rabbit-hole of articles, old email fora, YouTube videos, and the like. Sometimes, I don’t get a good answer, and have to set aside that particular thought for a while. Other times, I’ll find myself with a host of new ideas, and usually other avenues to explore later.

Another good place to go for inspiration, especially SCA-related inspiration, is to an event. It doesn’t even necessarily have to be an Arts-and-Sciences specific event, although there tends to be more to look at if it is. (Often times, my wife or I will see something–particularly clothing–and think, “I can make that better…”) If you’re really fortunate, they’ll even have an Artisan’s Row, where you can watch somebody who already knows how to do X, and possibly even who will show you the basics!

But if there’s one thing I’ve found to be definitely the case, it’s that the know-how is out there, somewhere. You may be re-blazing a trail that hasn’t been blazed in hundreds of years, but someone, somewhere, has written something down relative to your goal. Maybe it’s a complete description of the fabrication of the item. More often, it will be references to various steps and stages of it, and it will be on you to “suss out” what they’re talking about. Another good way to go is to find someone who’s already doing what you’re interested in, and ask them to show you some of the basics and/or become a mentor.

The next part to explore is what you need, in order to make the thing. I’ve found that the instructions you find out there tend to assume you’re a professional, and/or you have hundreds, if not thousands, of dollars to drop on a project. But let’s face it, we’re just starting off on this. That means that alternatives are in order. If you can determine how things were done in the “early days”, you’ll often find that the tools and equipment become much cheaper–often, to be sure, at the expense of simplicity. Don’t let that stop you, though! And remember the adage of being wary of any venture requiring new clothes; the same applies to tools. If you’ve got any sort of a toolbox (or craft chest, or what have you), you probably already have some workable analogs to the tools you’ll need.

Another thing to think about during the materials and equipment phase is how serious you’ll be taking this new craft. This is worth thinking long and hard about. You probably won’t know how much you enjoy it until after you’ve done it for a while; it’s entirely possible that you’ll find yourself completely unsuited to the job. (Contrariwise, you may find that you enjoy the challenge!) Once you’ve tried it, and gotten a taste of what is involved, do you want to keep it at the “hobby” level, or become a “master of the craft”? How much time do you intend to devote to it?

The biggest fear that people seem to have, and which very often holds them back, is that they’ll suck at it. Well, of course you will. You probably will for the first several tries at a thing, or maybe a little longer. The key is to look at each of the “failures” you produce, think hard about why they’re “bad,” how to go about fixing it next time, make those adjustments, then try it again! And don’t be afraid to show your “failures” to others. It may inspire them to give something new a try. And remember–they think that it’s “too hard” to do what you’ve done; the mere fact that you’ve done it puts your hard-won skills far ahead of theirs!