The Great Honeybee Project of 2017 ended in early October, with the final disappearance of the bees of the West Hive. (The East Hive was gone by mid-September.) 2016 was done by mid-October, although I didn’t find out about it until late October.
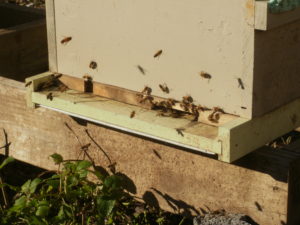 But apparently, the Great Honeybee Project of 2018 remains successful! The bees are still there, still numerous, and still doing their thing! I attribute their success this year to genetics from the Russian strain. I believe I can say I’m cautiously optimistic, but not out of the woods yet!
Feeding the Bees
The trick now will be to get them through the winter! Russian hives are supposed to go more slowly through their stores–but these ladies don’t have much in the way of stores put up. So it’ll be lots of feeding!
To do that, I’ve been making “sugar bricks” (also called candy boards, candy blocks, etc.). In essence, I put a bunch of sugar, a very little water, and a few drops of lemongrass oil (the bees’ favorite!) into a mixer, spin it up a little, divide it around some trays or plastic containers, and let it dry overnight (or over two nights, depending). Five pounds of sugar, a half cup of water, and about four drops of the essential oil will give me four blocks.
How fast the hives eat them will be an “it depends” sort of thing, and I’ll have to keep an eye on it. We’re supposed to have a few days of warm weather, so they’ll probably go through them more quickly. Once things cool off, they’ll slow down; I don’t know what the average will be, though.
How to Feed a Bee
So, the sugar blocks aren’t just shoved into the front of the hive; the feeding is a bit more complicated than that.
When things get cold, the bees form a cluster–they ball up around the queen and a bunch of brood, and shiver. This ideally keeps the center of the cluster at about 95 degrees, if I’m remembering my numbers correctly. But doing all of that shivering takes energy, which takes food–honey! Or, when they run out, sugar.
And where do the bees store honey, when they have it? At the top of the hive. So, over the course of the winter, the cluster moves its way up towards the top of the hive. And when they’re out of honey, they’re at the very top–so putting sugar down at the bottom doesn’t help them.
The remedy is to build a “feeder shim” to go on the top of the hive. Basically, it’s a short (about 2 or 3 inches) almost-hive-box–really, just a “rim” of wood–that has some half-inch mesh attached to the inside. This shim becomes the “top box” of the hive; you put your sugar blocks on the mesh, directly above the bee cluster. The bees generate moisture (rather like fogging the inside of a car window), which rises (due to the warmth) and softens the sugar, which they can then distribute amongst themselves.
The part that makes me nervous is that I’ll have to go into the hives during the cold. I mean, obviously, it’s been done–I’m not making the system up out of whole cloth–but the notion of exposing them to the cold unsettles me. (I’m told that if the wind is still, and you’re quick, it’s not too bad.) So we’ll see.
Bresaola – More Charcuterie
Also as promised, I started another cure over the weekend. This time, Bresaola: dry-cured beef. Specifically, eye-of-round, which is plied with cure for two weeks in the fridge, then trussed, hung, and left to air-dry for a time.
The recipe for this one is a little more complex than for bacon. In part, this is due to the air-drying portion of the event; instead of cure #1 (nitrite), it requires cure #2 (nitrate), for reasons I’ll get into below. And rather than set amounts, it goes by percentages.
I got my eye-of-round, which had already conveniently been cut into two more-or-less equal pieces, and I trimmed all of the visible fat, gristle, and silverskin off of it. Then a little tidying, to ensure no rogue flaps of meat, and I weighed the pieces: mine came to about 1400 grams and about 1250 grams. They went into individual ziplock bags.
Then I measured out the cure: 2% kosher salt, 2.5% sugar, 0.3% cure #2, 0.4% black pepper, 0.4% rosemary, 0.4% thyme, and (lacking the traditional juniper) a pinch of powdered ginger, and some cumin.
What this means is that for the 1400-gram piece, I used 28 grams (2% of 1400 grams) of salt, 35 grams (2.5% of 1400) of sugar, and so on. Yes, it’s difficult to measure the smaller amounts; I have a gram scale for just such occasions, and you should, too.
Why cure #2, instead of #1? It’s all to do with the length of time required for the cure. Either one of the cures will stop botulinum in its tracks, which is a good thing… But #1, sodium nitrite, only works for a short while–fine for bacon, which only takes a week. Cure #2, or sodium nitrate (note the “a,” there), actually has some nitrite in it, to start things off. The sodium nitrate, though, degrades over an extended time (weeks to months) into sodium nitrite, as well, giving you months of protection. Again, this is a good thing.
Having measured out the cure for each piece of meat, I then divided them in half: one half went into the ziplock bags with the bresaola, and the other half into another ziplock, to be reserved for later.
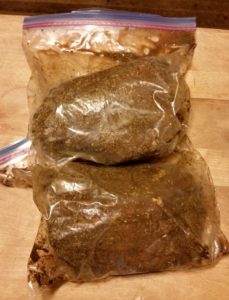 I massaged the cure into the meat, going as best I could for even coverage, and popped them into the fridge, where they are being re-massaged and turned daily. After a week, I’ll dump out the liquid that has accumulated, add the rest of the cure, then repeat the process for another week.
And once I get to there, it’ll be time to truss and hang the bresaola. It’ll also be time for another post!

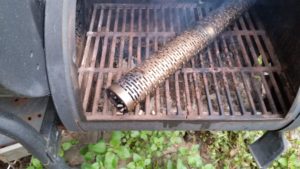 It uses pellets for the smoke, which is convenient: you can find dozens of types of pellets online for use in smoking, and they’re inexpensive, take up less room than chunks of wood, and work extremely well. I find that with the tube, I can easily get six to eight hours of consistent smoke.