Brew Day, July 2018 – Cellar Management and Meads

Between the heat, things to do around the house, and the proximity to Pennsic, this month’s Brew Day was mostly cellar management. I got the beers from May kegged, and pulled a few 2.5-gallon carboys to make a couple of meads.

Cellar Management – Kegging Brews

The first of the May brews was my experiment in direct-firing the mash. Overall, it was a success for what it was–but I’d have to revamp the recipe if I were to do it again. It came out a most peculiar orange color, and the malt “backbone” was off. I’m not certain just how to describe it, really. I think if I switch the amounts of the two base malts, it would come out better. (I had 11 pounds of Munich, and 5 pounds of Vienna; so swap them to 5 of Munich and 11 of Vienna.) The hops need tweaking, as well. I think move the First Wort addition to a straight 60-minute addition; move the 10-minute addition back to 20-30 minutes, and add a whirlpool dose.

The second one to keg was for my friend Dominic; we brewed up a Pilsner-ish for him. (He’s very much of the “lighter is better” opinion.) When racking it into the keg, my only comment was “this is the most Dominic beer we’ve ever done.” It’ll be a step beyond “pale straw” color, I think. Corona is probably darker. The malt and hops are well-balanced, but very light. Tasty, and it’ll be great chilled at Pennsic.

Both beers were cloudy–my experiment much more so than the Pilsner.  And mine in particular was rather phenolic, a sign that things fermented warmer than the yeasts would have liked. But then, the cellar is running a very warm 80 degrees right now, supposedly–I think it’s probably more like high 70’s most of the time. So something needs to be done about that, in the long run.

Thoughts on future plans

I’m thinking more and more about switching my summer brewing over to a kveik yeast. They’re supposedly good up towards 110 degrees, even, fermenting cleanly the whole way.  I’ll have to wait until after Pennsic to try one, obviously, but I’m eager to see.

I do have a couple of questions about them: how would they do for a mead? How well do they flocculate (drop out of suspension)?  Things like that. Fodder for future experiments.

In the meantime, if I continue with “regular” yeasts in summertime brews, I’ll have to see about setting up a water bath for the fermenters, even down in the cellar. (Or turn off the dehumidifier for the duration of the ferment, but everything else in the cellar would be the worse for wear.) In the long run, of course, I hope to convert the “Garage” (currently my wood shop) into the “Brewery,” and set up some sort of dedicated cool space for fermenting and serving.

New Brews

This evening I’ll be mixing up a pair of meads to go in the fermenters I mentioned above. Both will be 2.5-gallon batches; one will be a blackberry melomel, and the other a Pinot Noir pyment.

The main thing about these two batches is that I’ll be moving out of my comfort zone, and using yeasts that I’m not as familiar with: 71B for the melomel, and RC-212 for the pyment. My “normal” go-to for meads is D-47. It plays well with most fruits, leaves a moderate sweetness, and actually improves over time when left on the lees.

I’m going with the “new” yeasts for a couple of reasons. Firstly, I’d like to expand my “library” some. I think I’ve learned and progressed a bit from my early days, when I used whatever wine yeast was available, as long as it was EC-1118. I’d like to see what these other yeasts can bring to the table. I mean, I keep seeing 71B mentioned as people’s preferred mead yeast, but I don’t have much experience with it, and a half-batch is a good way to learn. And finally, all of these yeasts evolved to do great things in their particular environments–RC-212 is great for red wines; 71B supposedly enhances berry flavors.

Each of these batches will get 5 pounds of clover honey, if only because that’s what I’ve got available. I’ll dose them up with staggered nutrients, too, then move them down to the cellar for the medium-term. I figure they’ll probably clear by early September, and I can get them bottled in September, then serve them up for Thanksgiving and Christmas.

(Note to self: set up calendar reminders to go check on them periodically, to make sure the airlocks don’t dry out…)
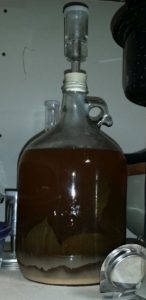
Hopleaf Mead Update, Cellar ManagementWhile I’m on the subject, the Hopleaf Mead continues to do its thing. It’s clearing up pretty nicely, and the hop leaves are surprising me a little by slowly sinking to the bottom. I’ll probably give it another week or two, simultaneously giving me time to find one of my other gallon jugs, then rack it onto some sorbate and hit it with some sort of finings before bottling it.

I’ll admit to being quite curious how this one turns out. My prediction is that the leaves will, at the absolute most, only mildly affect the flavor, and it’ll be a subtle “there’s something unusual here, but I’m not sure what.”

Bizarre Idea as a Closing Thought

This came to me in one of those half-asleep moments a while back: I should make a true “Frankenstein” batch. I’ve got techniques for malting and brewing from period. I’ve got grains from period (once I get enough of them grown up). In theory, I know how to get hops from period–or, failing that, at least their first-generation descendants. Yeast from period? Kveik (well, period enough). Add some honey (ideally from my hives), a la Trossingen. Ferment it up in a barrel, and serve it casked (either through a beer engine, or simply tapping the barrel).

Lots of planning and work would have to go into it–I’d need to grow enough Bere, and grow up the hops. I wouldn’t want to use a new barrel, so I’d have to run a few batches through one, to “mute” the oak a little…

But I think this would be a wonderful thing to do, in addition to my (already-planned) “Estate Beer.” What say you, readers?  Comments welcome below, or via email. (Speaking of which–I’m trying to get the blog’s email list function working; if you sign up, I won’t “spam” you, but only send at most a monthly newsletter, and notifications when I put up a new post. I hope you’ll give it a go!)
Following Rabbit-holes in Trossingen

One of the things I find most interesting about my brewing hobby is the various rabbit-holes it will take me down.  The research takes me down all sorts of odd side-streets and alleys.

Rabbit Holes

For example, finding myself with all sorts of “excess”–mostly spent grains–I started looking at other things to do with it. Dog biscuits and bread are the obvious answers. Or when a batch is done fermenting, I’ve got a surfeit of yeast: again with the bread.

Then there are the slightly odder things. What did they use to drink their beer, or ale, or wine, or mead? That question led me to a number of interesting places. There’s the bowls and cups I mentioned previously–those tended to be for beer, sometimes ale. There are lots of references to “wine cups,” and the Russians even had a “wine bowl” of much larger size.

Drinking horns?  Well, they were used, but I don’t think they were ubiquitous. (There seem to be many more trees than there are horned livestock.) Tankards? Possibly. Probably, even. I’ve seen reference to lots of glassware, too, and its use seems to have spanned class and caste to a much greater degree than people think.

Then there’s the question of mead. It seems to have been very much a special occasion drink in most areas. For that, you’d break out your “fine china,” in the form of your horns and the like. One particular type of vessel stands out for mead, though: the mazier. (It’s also spelled “maser,” but using that as a search term brings back all kinds of odd sci-fi stuff.) Maziers, though, are worth a post all their own.

Where things get really interesting to me, though, is when you can actually look at an extant item. That’ll usually be through photographs, to be sure, but it’s certainly better than nothing. (One interesting source of photos is Robin Wood’s book “The Wooden Bowl”. This book focuses on central and northern European bowls, and has lots of lovely pictures–but it’s not where I’m going today.)

Enter Trossingen

A set of turned things that really caught my attention when I first saw pictures  of them were the wooden goods from the Trossingen grave.  I don’t recall how exactly I ran across them–most likely, it was wandering through Pinterest–but detailed photos and descriptions can be in the book “Mit Leier und Schwert” by Barbara Theune-Großkopf. (The link to it is here, but be forewarned that it’s Amazon.de, the book is in German, and it’s usually out of stock.)

The grave is that of a 6th century Merovingian/Frankish high-status warrior. He was buried in a box-bed turned into a coffin, surrounded by grave goods, to include his sword, shield, spear/lance, a lyre, an antler comb, some pouches, a chair, a small table, candlestick, some candles, two bowls, and a canteen. Of these, the bed, candlestick, chair, table, bowls, and canteen, were at least partly turned.

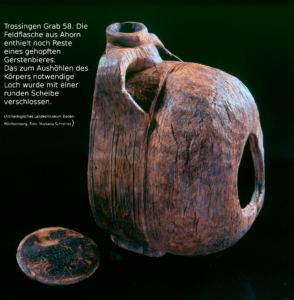
Now, those are enough to pique my interest all on their own. But what really grabbed my attention was when I read through the bit on the canteen. In particular, the fact that the canteen was probably full when it was buried, and there was still residue on the inside–which they ran a pretty full analysis of.

Trossingen Canteen
The Trossingen Canteen

Alamannic “Starkbier” with Honey and Hops

Apparently, the Trossingen canteen once contained a fermented malt-based beverage, strengthened with honey. But where things get really odd is when they looked at the various pollen grains that were present. Among other things, these included hop pollen.

Being good scientists, and Germans to boot, the researchers decided to get together with the Weihenstephan brewery and try to recreate the beer. The report on this was published in a different academic journal, which I’d have to track down separately. If/when I find it, I’ll update the post and put a link to it here.

The recipe was obviously speculative–they were going off of long-since-evaporated 1300 year old dried beer residue. I’d like to see a little more about their process, and probably make a few adjustments to it. For instance, I believe the “recreation” used purely modern barley-malt. Hand-malted, to be sure, but more than likely the period malt would have included wheat and rye at least, possibly oats, and maybe some other weed seeds as well. Small percentages, probably, but it doesn’t necessarily take much.

Nevertheless, they came to the “definitive” conclusion that the canteen was full when buried, it contained a strong barley-based fermented drink. That drink was hopped, and at some point honey was added.

Let that sink in for a minute. They’re talking a hopped beer in 580AD. This is pushing 250 years before Abbot Adelhard of Corbie Abbey wrote, connecting the hop-harvest with brewing, and 600 years before the earliest written evidence of hopped beers in the modern sense, from St. Hildegard of Bingen. (Read about Adelhard and Hildegard over at Zythophile!)

My mind was, to say the least, blown. But still…

What Does It Mean?

How, you may ask, does this affect my brewing?  Well, to be fair, it doesn’t, really. I mean, if your persona in the SCA runs to early Frankish or Germanic, it means that hopped beers are “allowed” (not that that was stopping you). You’re not “stuck” with gruitbeer (which is a topic for another post). And speaking of other posts, we’ll take a look at the bowls, candlestick, and chair in time.

This has me wanting to do another experimental brew on a future Brew Day, to do my own recreation of the batch. What say you? I’m open to questions (and suggestions) in the comments!

Brew Day, June 2018 – Hopleaf Mead

This month saw the brewing of a hopleaf mead. This is rather a strange-seeming batch, and a bit of an experiment, just to see if some 15th-century Venetians knew what they were talking about. (I opted not to make anything overly complex because it’s been in the low 90’s and humid. Also, we’ve been getting pavilions ready for Pennsic outside, which is hot, sweaty, and tiring. Firing up a burner was definitely counter-indicated.)

The hopleaf mead experiment stems from a passage in a Russian book on brewing. In it, a professor writing the foreword cites Ambrosio Contarini, part of the Venetian Embassy to the Shah of Iran from 1472-1475. On the trip back from Iran, Contarini and company stopped for about six months in Moscow. Part of the story of his travels reads thus:

They have no wine of any kind, but drink a beverage made of honey and the leaves of the hop, which is certainly not a bad drink, especially when aged.

The “leaves of the hop” (hopleaf) really caught my attention. It reads that way in both Russian (“с листьями хмеля“) and, once I found it, the original Italian (“con le foglie del bruscandolo“).  My first thought was, certainly they don’t mean hop leaves? Contarini has to be confused about what part of hops gets used. I mean, the cones are green, and somewhat leaflike.

Intrigued, I dug a little further. “Bruscandolo” is Venetian dialect for hops (Google says that “normal” Italian would be “luppolo”; and a medieval Italian-English Herbal Dictionary even went with “lupuli“). Nowadays, it apparently means the hop shoots or tips, which can be treated like asparagus shoots or fern shoots, and cooked up in a variety of ways. (I’ll have to try Risotto di Bruscandolo, or Bruschetta Bruscandolo, next spring.) But I found another reference, again to a Venetian in period:

The principal imports of England are spices, sugars, and all sorts of fruit from Spain and France, wine, oil, and what they call hops (obloni), the flower of the hop plant, and the “bruscandoli,” needed for the brewing of beer…

This is from an English translation of some diplomatic letters from Giacomo Soranzo, the Venetian Ambassador to France. Now we’ve got several hop references and names; just to confuse matters, Soranzo describes “hops” and “bruscandolo.” Fortunately, he specifies “hops” as “the flower of the hop plant.”

Given all of these varying terms and such, until and unless I find anything different, I’m going with the notion that “hops” (or “obloni“, and maybe “lupuli” as well) are references to the hop flowers/cones, and “bruscandolo” is a reference to the plant as a whole. As such, it makes some sense to assume that Contarini meant the actual leaves. What one would get from them, I have no idea; all of the bittering oils are found in the cones. Hopleaf might (might) give you some tannins. There’s bound to be some natural yeast there, as well. But experimenting is in order.

I brewed this up as a 1-gallon batch of sweet mead, Cascade Hops, used in Hopleaf Meadand put three full-sized, mature hop leaves into primary, lacking any indication as to how much to use. I rinsed the leaves, just to ensure there weren’t any spiders, insects, aphids, or the like. The particular leaves I used were from one of my Cascade mounds, for the reason of ease of availability–I’d have had to go across the field to get Magnums or Willamettes, and did I mention it’s been hot?
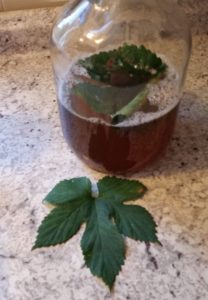
Having acquired the leaves, it was time to assemble the rest of the recipe. I’ve got about 20 pounds of Clover honey left over from a previous meadmaking spree. Three pounds or so into a gallon batch makes for a decently sweet mead. I’d thought about using K1V-1116, but didn’t have any on hand, so I opted to go with EC-1118 instead. They’ve got similar alcohol tolerances, and both ferment out cleanly. Also, after pondering things, K1V is a “killer” strain–it kills off other yeasts in solution with it. If the hopleaf is to add anything of a yeasty nature to the brew, going with EC-1118 will allow that to come out. The rest of the batch is pretty standard, with GoFerm and Fermaid O staggered nutrient additions.

Hopleaf Mead
Hopleaf Mead, prior to adding the final leaf. It also got diluted by almost half.

Hopleaf Mead (this is recipe #166 in my Little Black Book)

3.1 pounds of Clover Honey
1 packet Lalvin EC-1118 yeast
4.53 grams Fermaid-O (split into four additions, at 24, 48, and 72 hours, and on day 7)
2.5 grams GoFerm nutrient
3 mature Cascade hop leaves, rinsed

OG: 1.126

Brew Day, May 2018: Two brews, one experiment

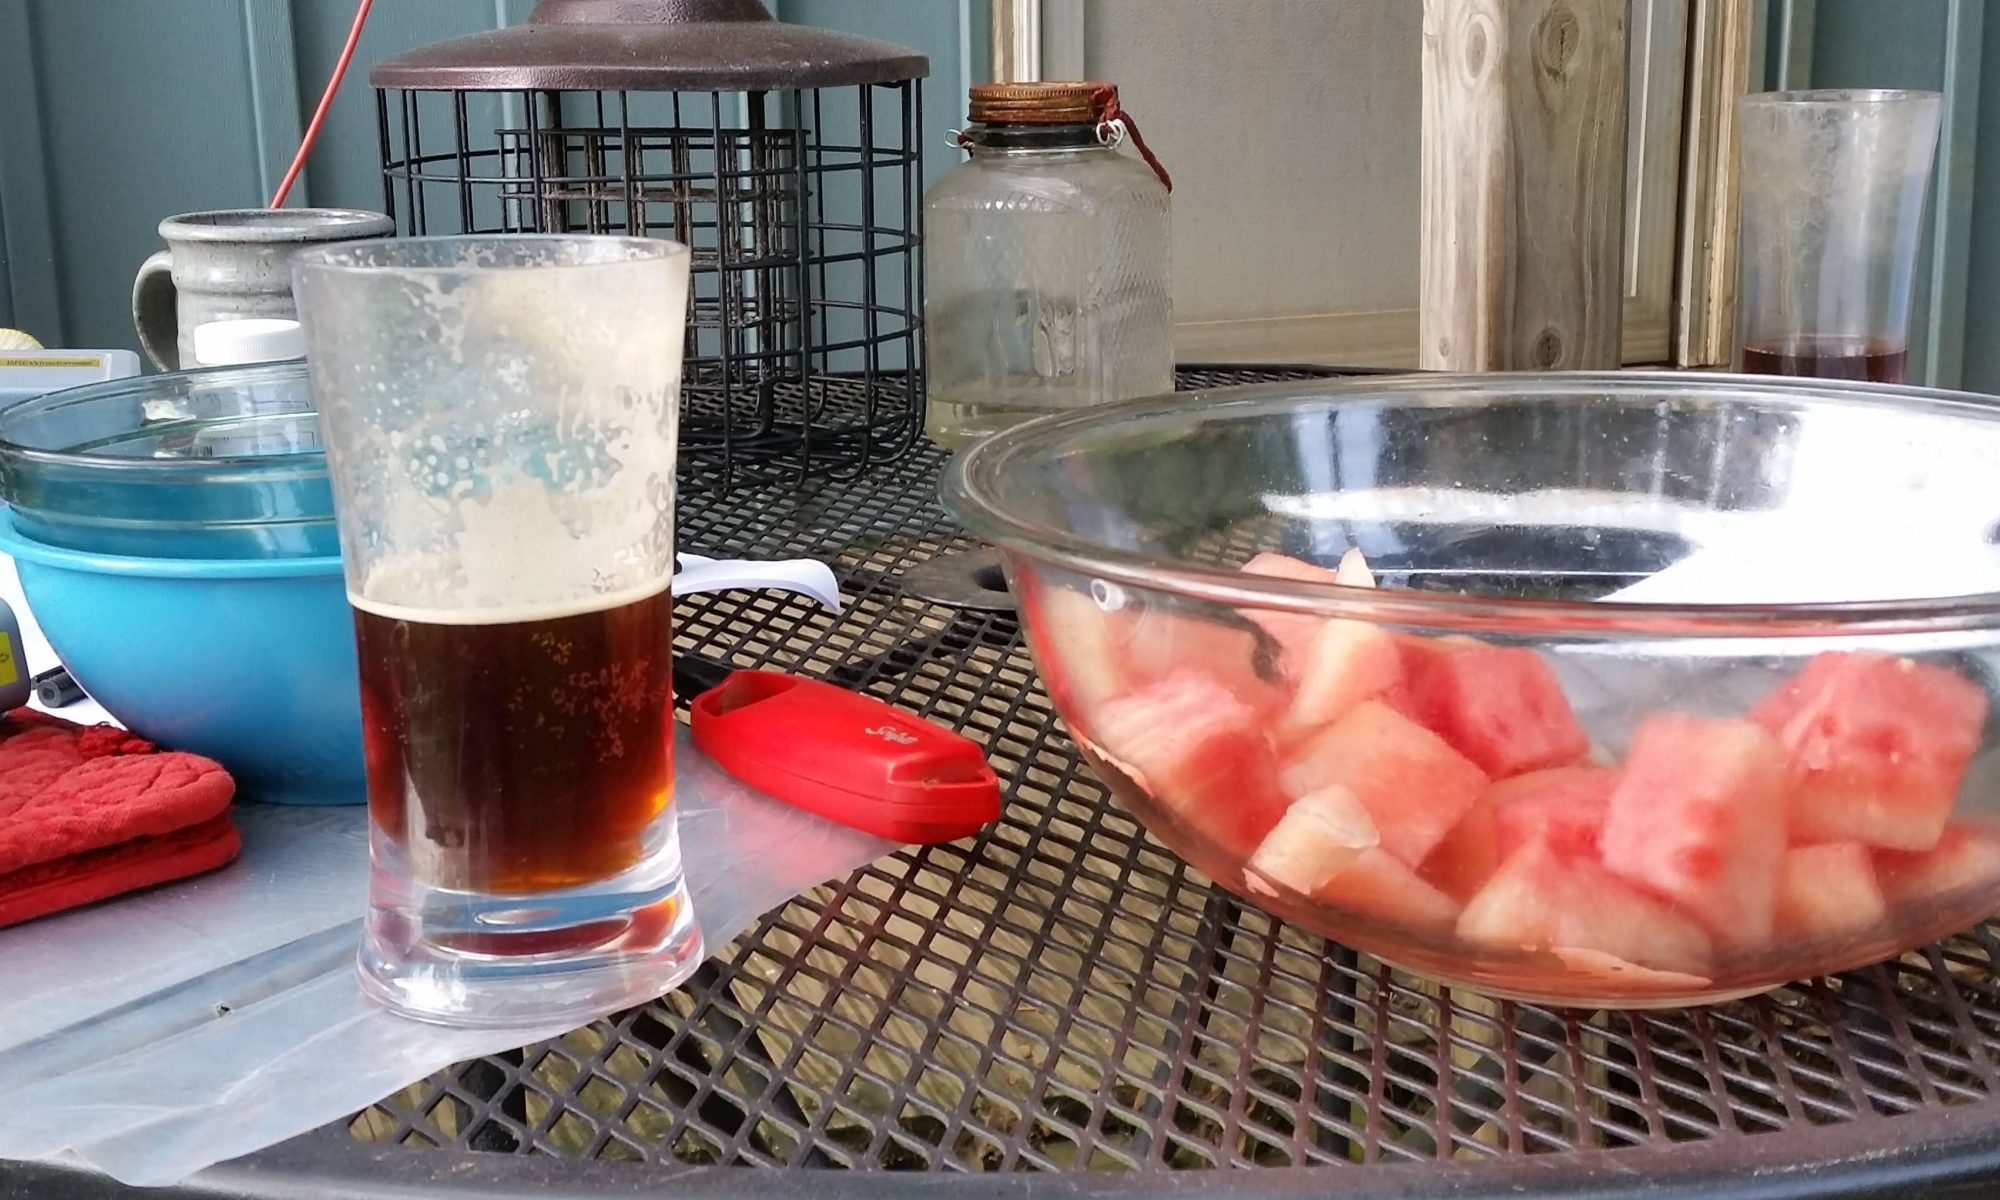
Beer and a little watermelon while brewing

The brewday for this month went of well, with the weather finally deciding to cooperate after a solid week of rain. Downtown flooded, but as we’re on a hill, with a slope away from the house in all directions, we didn’t get any of that. There was a little water seepage in the cellar, but the full extent was a little bit of mud.

Two batches were brewed: a Pils for my friend Dominick, based on a Stella Artois clone, and an experiment for myself, which I’ll get to in a moment. The pils I believe is going to be nice, if not exactly “to style.” I don’t have a setup right now to truly lager, but I can ferment fairly cool in the cellar. It was a simple grain bill, with 9.5 pounds of Pilsner malt. The hops were Saaz, added at the beginning, and with 5 minutes to go in the boil (1.5 ounces and .5 ounces, respectively). Dominick picked out WLP830, German Lager yeast. Volumes came out decently, and the gravity ended at about 1.046; I think it’ll be about 4.5% ABV, and the color should be straw gold. The hope is to have it ready for Pennsic.

The other batch was, as I mentioned, a bit of an experiment. The recipe was a riff off of my “scaled” Braunschweig Stadtmumme recipe: Munich and Vienna malts, with a healthy dose of German hops. I went for the higher-Alpha Herkules, rather than Tettnang, partly because I wanted something with some bittering to balance the Munich, and partly because I wanted to try them out. Nottingham yeast, to keep things simple. (The full recipe will be below.)

The crux of the “experiment” part, though, was the mash. Rather than my typical infusion/batch-sparge style, I went with a direct-fired mash, starting everything (grains and water together) at room temperature. This, again, is based on my reading of the Mumme recipes. They didn’t infuse, nor did they decoct; rather, they heated the mash for an hour and a quarter. That timeframe confused me at first, because it almost sounded like they were “simply” mashing for 75 minutes. But the more I thought about it, the more I figured that a properly-shaped vessel, with a strong enough fire under it, would probably get the volumes given in the original recipe (2172 pounds of grain, with “enough” water) up to the right temperatures in about that amount of time.

I went with 16 pounds of grain overall, and water to bring the overall volume up to about 9.75 gallons (about 34 quarts, give or take). With a pretty low flame on my propane burner, it took me about an hour–near enough to the original time–to get to my target mash temperature of 152 degrees F.  I stirred constantly, to try to prevent any scorching, but still got a small amount (maybe 4 square inches of “scorch”).

My reasoning for starting from room temperature is that they didn’t specify any mash steps, and didn’t indicate adding the malt to hot water. The ramp up from ~70 degrees F progressively all the way to ~152 F took the mash through all of the intermediate steps–liquefaction, acid rest, protein rest, glucan, then saccharification. Rather than discrete steps, they “slid” up through the entire scale.

Once I had the mash at temp, I turned off the burner, and a friend and I transferred the mash to my “normal” mash tun (an Igloo cooler, with a false bottom). I let it sit another 20 minutes, partly to complete whatever conversion it was going to do, and partly to let the grain bed settle somewhat. Then I ran off the wort, using a large bowl to recirculate the first gallon or so.

My yield pre-boil was a little lower than I might have liked, netting about 6.5 gallons; while the kettle I fired the mash in could have held more, the cooler was about at its limit. (I either need to make the beer “smaller,” with less grain, or find a bigger mash tun.) Otherwise, everything went off without a hitch. The batch is currently happily fermenting in my cellar, and I’ll have to wait until next month to see how things have gone.

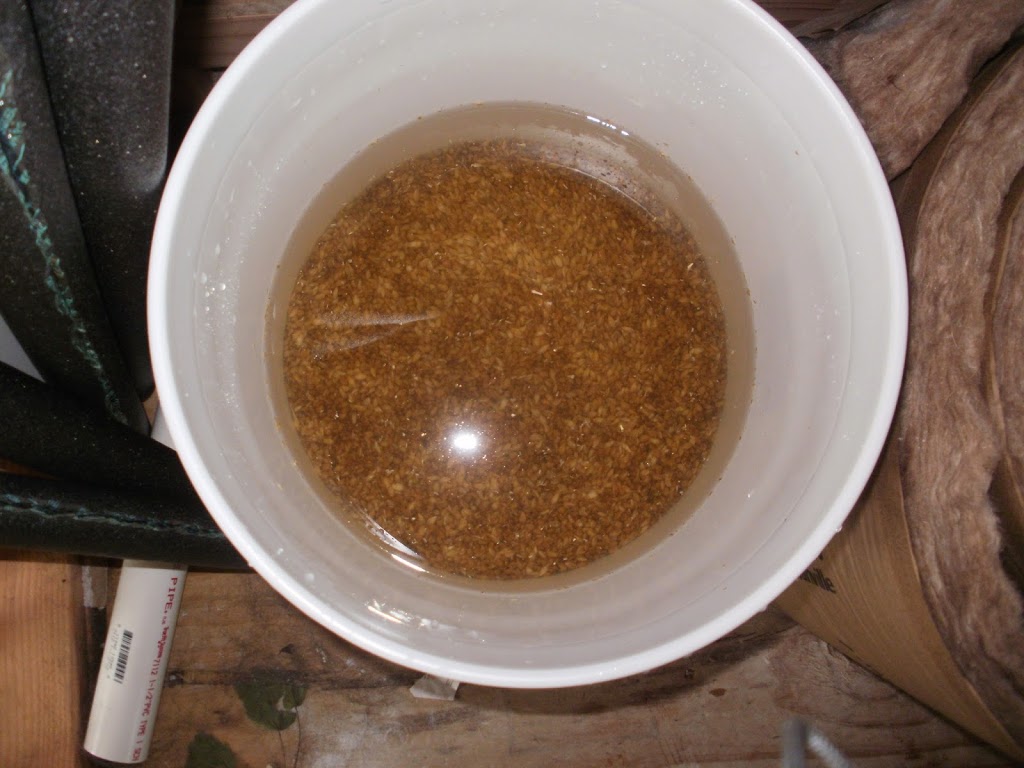
Fermented beer and leesOne other “achievement” for today was kegging last month’s batch. It turned out quite nicely, as a sort of “lawn-mower beer.” Pale golden, light in body, and astoundingly clear. In fact, here’s a picture of the last few inches of beer in the fermenter, with the sediment clearly visible through it. I think this will be a lovely Pennsic beer, nice and crisp and thirst-quenching.
This month’s recipe, with ingredient links to MoreBeer:

Closer to Stadtmumme

11 pounds of Munich Malt
5 pounds of Goldpils Vienna Malt
1.5 ounces of Herkules leaf hops (11.3% Alpha, first wort hops)
1 Whirlfloc tablet (15 minutes in the boil)
1.5 ounces of Herkules leaf hops (11.3% Alpha, 10 minutes in the boil)
1 packet Nottingham dry yeast

Direct-fire the mash from room temp up to ~152 degrees, over the course of an hour. Initial boil volume ~6.5 gallons. Boil 1 hour. Final volume, 5 gallons. Initial Gravity: 1.073.

Silly idea about wood…

A thought struck me as I was drifting off to sleep last night.

While the current material of choice for wooden casks is white oak, this certainly wasn’t always the case. (I know that ‘traditional’ balsamic vinegar, for instance, is aged in as many as three different woods.) I would imagine that liquid-tight casks could be made from nearly any good, close-grained hardwood (fruitwoods, mostly). What sort of wood character would have been imparted to the brew by these?

Nowadays, we homebrewers have done a bit of playing with oaked beers, adding oak chips to our fermenters & letting them soak in the brew for a while…

And this is when the light bulb went off: I’ve got a bag of apple-wood chips (nominally for smoking things) that I could use instead of oak chips. I almost certainly wouldn’t get the depth of character that I’d get with oak; I imagine it would be significantly more subtle, and I’d have to be careful what brew exactly I used it with, to not overpower the wood. But it would be interesting. And I can easily get similar bags of chips of different woods–cherry, maple, etc.

I’ve simply gotta try this. Something for me to play with over the winter brewing season, I should think. I imagine a nice Vienna lager, with maybe either apple and/or maple. If preliminary tests go well, perhaps a brown ale (or even a porter?) with some cherry.

Have any of you done this? Did you get good results? Bad? “Meh”? I’d really love to know–please let us know in the comments. (Or, if you have ideas for good wood/beer combinations, post that, too!)

Malting, The Next Adventure

So, after almost twenty years (!) of working on the brewing art, I’ve decided to step up my game, and go to the next level: malting.

As I’ve mentioned here before, I’m now in the process of growing my own grains. This is year two; my total harvest, from less than 120sqft of seed sown, is probably about twelve pounds.  Not much–but not bad, when you consider that I started from just over an ounce total from four varieties of “heirloom” seed (Hana, Bere, Maris Otter, and Halcyon), and added in about a quarter pound of modern commercial seed (Conlon) last year.

I’ve combined the Maris Otter and Halcyon seed, for what I’m calling “MoH”.  Halcyon is derived from Maris Otter, and it’s hard to tell the two apart–particularly when the dogs “helped” with the sowing, and thoroughly “tilled” the patches of sown seed, mixing the two.  No loss.  They’ll be spread across a 50’x50′ area this fall, assuming I can get the rototiller started in the next few days.

In the meantime, I’ve purchased a 25# bag of Conlon seed from the lovely folks at Johnny’s Selected Seeds, and built an Arduino-controlled malt kiln and a decidedly low-tech couching bed, as well as a number of food-grade plastic buckets (can you ever have too many?) and an aquarium air pump.  With this, let the malting begin!

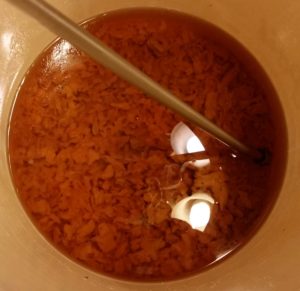
I’m doing this, at first, in six-pound batches.  Once I get things figured out, I might be able to go as high as fifteen; container size is a limiting factor.  The first step is to clean and steep the grains.  I put the grain into a bucket, covered them with a few inches of water, stirred, and poured off the chaff that floated to the top.  Repeat a few times, then just leave the water in, and let ’em go. The picture below is the grains beginning their journey…

Malting: Grains steeping
Grains cleaned and steeping.

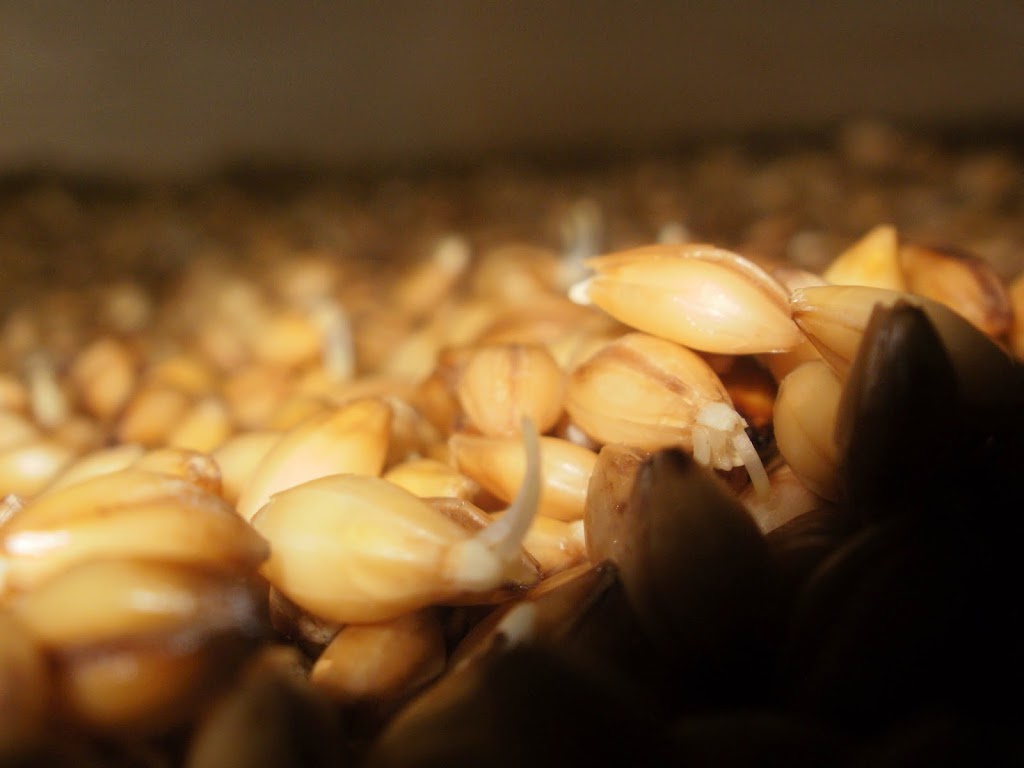
After a couple of hours, pour off the water, and let the grains “air” for six to eight hours.  Then cover them again with water for six to eight (or ten or twelve, depending on your source), and repeat.  After about two days, they should have begun “chitting”–you’ll see little white tips on the grains.  At this point, they’re ready to begin germination.  Drain the water thoroughly, then let the grains sit, stirring them (gently) every so often–three or four times a day is supposedly good enough. They need oxygen at this point, and will be giving off CO2 and heat; the stirring keeps them oxygenated, and lets the heat dissipate somewhat.

Let them “rest” a day or two more, and they’ll have developed rootlets:

Malting: Chitting and roots
Grains “chitting,” and root development
You’ll want to start checking for acrospire growth at this point–every now and then, grab a grain, and rip it apart lengthwise.  Look for the shoot, connected to the rootlets, and see how long it is, relative to the grain.  At 2/3 to 100%, you need to start drying and kilning; less, and they need to sit a little longer. If too many of them go longer, you’ve got some lovely animal feed–the chickens love it.


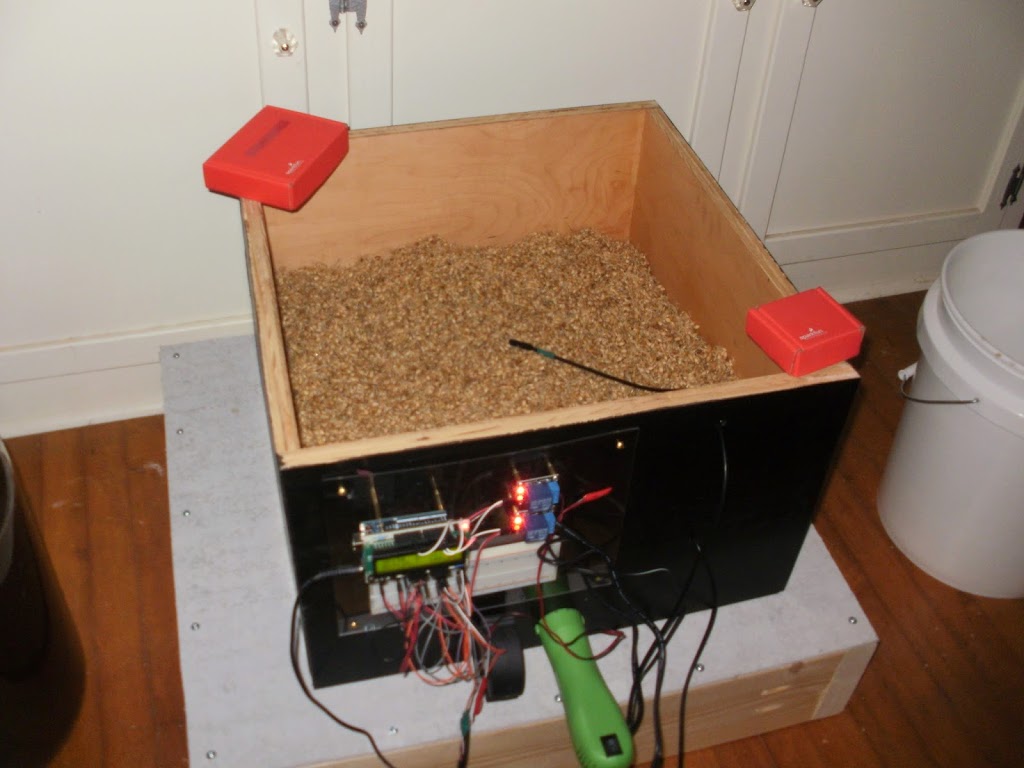
If you’re drying them, there are multiple ways to go.  Easiest for most is probably the oven–but be careful; if you go over about 50 degrees C (about 120F), you’ll kill the enzymes you need for mashing. This is where my kiln comes into play:

Malting: Arduino-powered kiln
Arduino ‘kiln’, sitting atop the couching bed

I can’t take credit for it–that goes to Richard Oliver, whom I haven’t been able to contact, and his kiln design.  I believe mine works exactly the same, even though I’ve built it slightly differently (larger, and different temperature sensors).  Basically, there’s a low-wattage hot-air gun (the green thing, bottom center) blowing hot air below the grain (suspended on a stainless mesh).  There’s a temp sensor below the grain, and another one resting on top. The gaggle of wires is for an Arduino, which monitors the temperatures–if the bottom sensor gets to a set temperature, it starts cycling the heat gun, trying to maintain temp.  (The Arduino is programmed to function like a PID, “learning” to hold the set temp.) Once the top sensor reads the same as the bottom, that means the grain has dried.  In theory, I’ll be able to get most types of base malts with the kiln–crystal and roasted malts will take the oven.

So, the first attempt used the leftover Conlon I had for the planting–it was fairly old, and I’m not certain I got good germination from it. I’ve started batch #2, and will tweak the process, and report back.  Too much fun!

Almost seems backward

Summer around the homestead is a busy place–there’s a yard, garden, and impending orchard to manage, as well as fields and fences to tend to.  Wood has to be cut & split for the winter.  Not to mention the repairs on the house–new siding and windows; plus a lot of interior work (the entire house re-plumbed!).

So what seems backward?  Well, the whole cycle of barley.  The winter barley gets planted in a bit over a month, give or take–late September to early October, or what would be “harvest time” for most normal crops.  Then it’s harvested in late Spring/early Summer (June or so), about the time lots of other things are just starting to grow…

I’ve been “threshing and winnowing” my harvest from last year, with an eye towards exactly what my usable yields are, and how much tilling I’ll have to do in a week or two.  I use the terms “threshing” and “winnowing” guardedly; while technically, they’re accurate for what I’m doing, they also somewhat overstate the enormity of the project, or lack thereof.  The threshing is being done by hand, literally–I’m just grabbing handfuls of grain ears, and “grinding” them between my fingers.  Most of the grains fall from the stems; the awns make a horrible mess, and a lot of the work is done.  (This is a process best performed outside.)  Once I’ve gone through it pretty thoroughly, I take a bit more time and pick off any stubborn grains from the stems (I’m sure there’s a technical term, but it escapes me at the moment).  Then I spend a bit more time hand-grinding the grains, just to break up the remaining awns & chaff.  Afterwards, I either wait for a breezy day, or plug in a fan, then it’s picking up the grains by handfuls, dropping them back into the container.  The breeze (or fan) blows away the light “chaff”, letting the heavier seeds drop back into the bucket.  It’s one of those things that I know makes perfect sense, intellectually, but it still amuses me to no end that it works as well as it does.

Next year, after I’ve had a bigger harvest (knock wood), I’ll have to step up my game a bit; I’ll probably actually get buckets for the grains (not the smallish plastic boxes I’ve got now), and the process will undoubtedly take more time.  Still, that’s a concern for next year.  For this year, I’ve got lots of other things to keep me busy.

First, there’s the hops.  I’ve got to find some time, probably this weekend, to harvest the Cascades from my “retired” bines (the only ones that produced–go figure).  The new bines weren’t expected to put any out, granted; I’m going to have to replace the Sterling, at least, as they seem to have died over the Summer.  (I’ll see, come Springtime, whether any of the others have made it–they’re okay, thus far, but Winter may do them in.)

I’m doing what woodworking I can, given that I don’t have any power tools to speak of, nor time to really use them. (Okay, I’ve got the tools, but I need to get to work on the Undisclosed Location before I have a place to put them–and it still needs electricity, etc…)  I’ve been doing some whittling, and I’ve found some images of a really nice carved chair that I’d like to take a stab at recreating/modifying.  I’ve also been toying with the idea of having a bit of fun with the carvings–maybe do a couple of pieces as inlays.  The fun lies in selecting the woods to use–some more-or-less ‘exotic’ woods will fluoresce under blacklight, which raises the possibility of some interesting “special effects.”

Another interest that I hope to delve into is metalworking–particularly coppersmithing (and probably silversmithing, eventually).  I’d like to try my hand at raising a bowl or two, and maybe some cups, as well as possibly doing some chasing and/or repousse, then there’s enameling…  The copper got me to thinking, though (always a bad sign)…  (To Be Continued)

Barley has begun!

Well, after significantly more toil and trouble than should really be necessary, I’ve got some barley in the ground. My evil plan has begun…

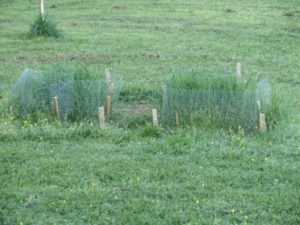
It’s not much, really–two very small plots (about 2’x3′ each).  barley has begunAnd I’ve absolutely no idea whether things will turn out.  But, as they say, nothing ventured, nothing gained.  The plots are my two winter barleys; specifically Maris Otter and Halcyon.  The planting was auspicious: the day after the Autumnal Equinox, and it was “witnessed” by both the Sun and the Moon.  So long as the winter isn’t absolutely insane, I’m at least moderately optimistic for them.

The rest of my barley (Bere, Hana, and Conlon) will wait for springtime, being spring barleys.  Which means I’ve got a little time yet to get the field prepped for them.  I’ve got to finish mowing (get everything down to 1/2″), then figure a way to disk or till a pretty large area of dirt.  I may end up renting a tiller from Home Depot, when all is said and done–although I may be able to talk a neighbor into disking the area with their tractor…

Work on the Brewery/Pub is still in the early planning stages–I may do a little interior clean-up this weekend, but I’m likely to have my hands full working on the house (ah, the joys of an old farmhouse–always something to fix…).  A full clean-up may have to wait for spring, as I’m liable to want a dumpster to haul stuff away–there’s junk both inside *and* outside that needs to go.  Then a new roof…  Eventually, there will be (as mentioned) a bar, as well as a dedicated brewing space; I hope to have a rainwater catchment system in place to provide about 2500 gallons or so of water; there will be a lagering/cold-storage area, and a bathroom.  Throw in a poker table, and you’ve got the start to an evening!  One wall is perfect to be the screen of a digital projection system (can you say twenty-two foot diagonal screen?); in decent weather, I may even be able to set up outside–depending on where exactly my hops end up.  All told, I think the space is going to work out nicely…

Speaking of my hops, I hope to move them to the new area by this weekend.  They didn’t produce, this year–they got too dry during the heat wave; I was amazed they came back as well as they did–so I’ll probably cut them back, and actually plant them in the spring.

And so, the latest round of adventures are under way!  Look for more updates as things progress.